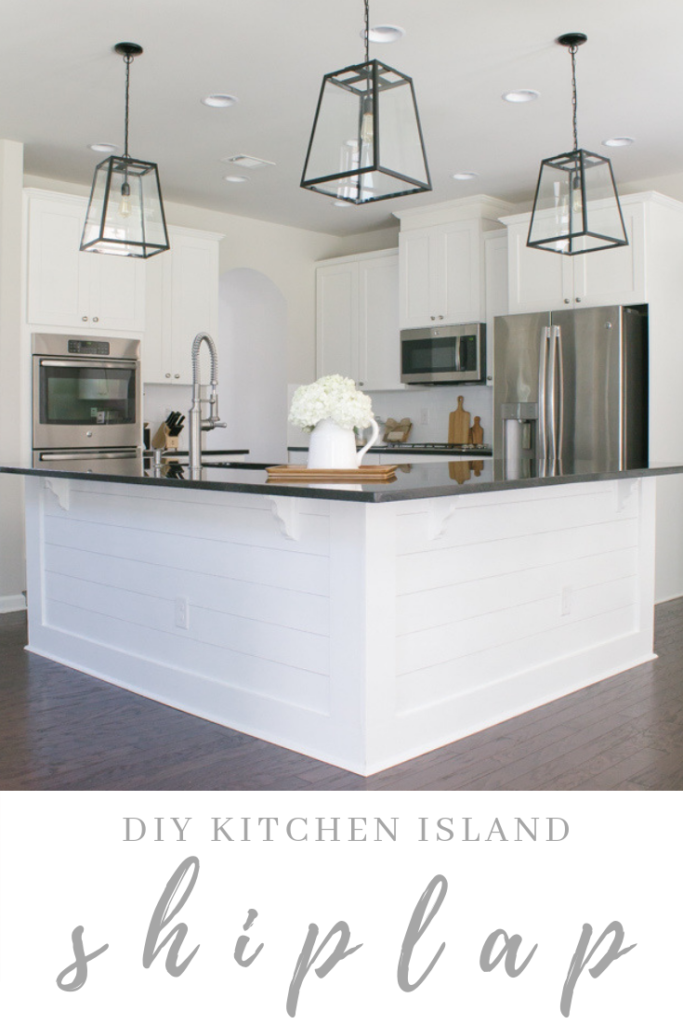
Easy + Affordable DIY Kitchen Island Shiplap
When we built our house we opted to leave many of the finishes in the house “builder-grade.” To us it wasn’t worth it to spend a ton of money towards expensive upgrades when we could add our own DIY upgrades to our home for a fraction of the cost.
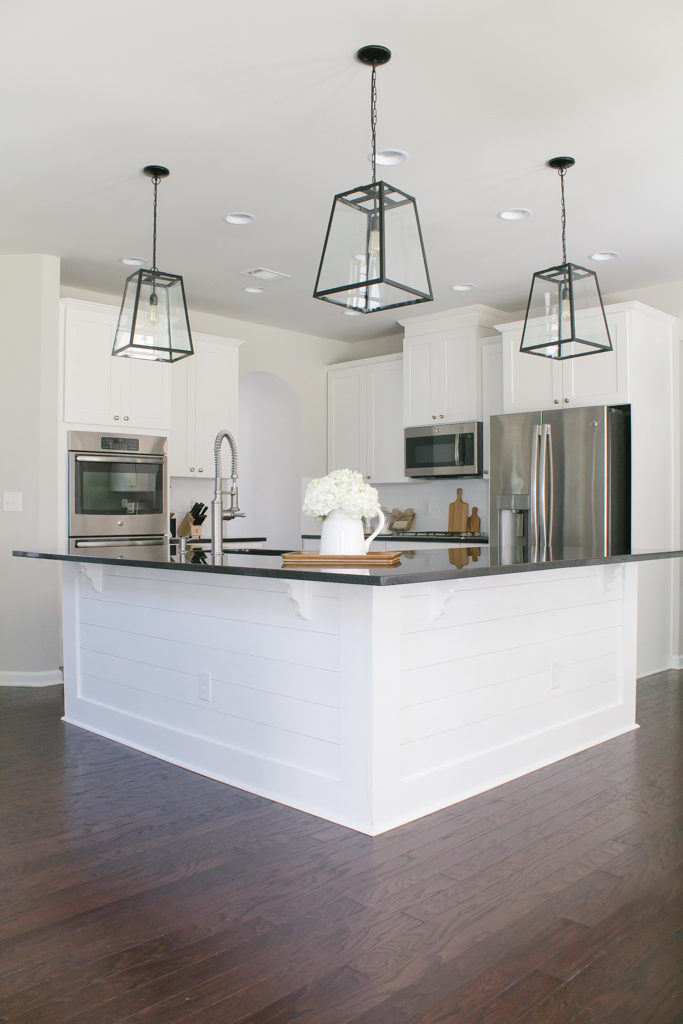
Case in point? Our builder grade kitchen island. From the moment we first saw the house I started planning in my mind how to transform our boring builder-grade kitchen island into a beautiful, bright, custom shiplap island!
The kitchen is the heart of our home and where we spend the most time as a family. On my birthday this past February Hubby told me we could do whatever we wanted for the day. Can you guess what I said? “Ok then I want to shiplap the kitchen island!” (Don’t you love how shiplap can be used as a verb now? 🙂 ) Pretty sure he regretted his sweet gesture almost immediately.
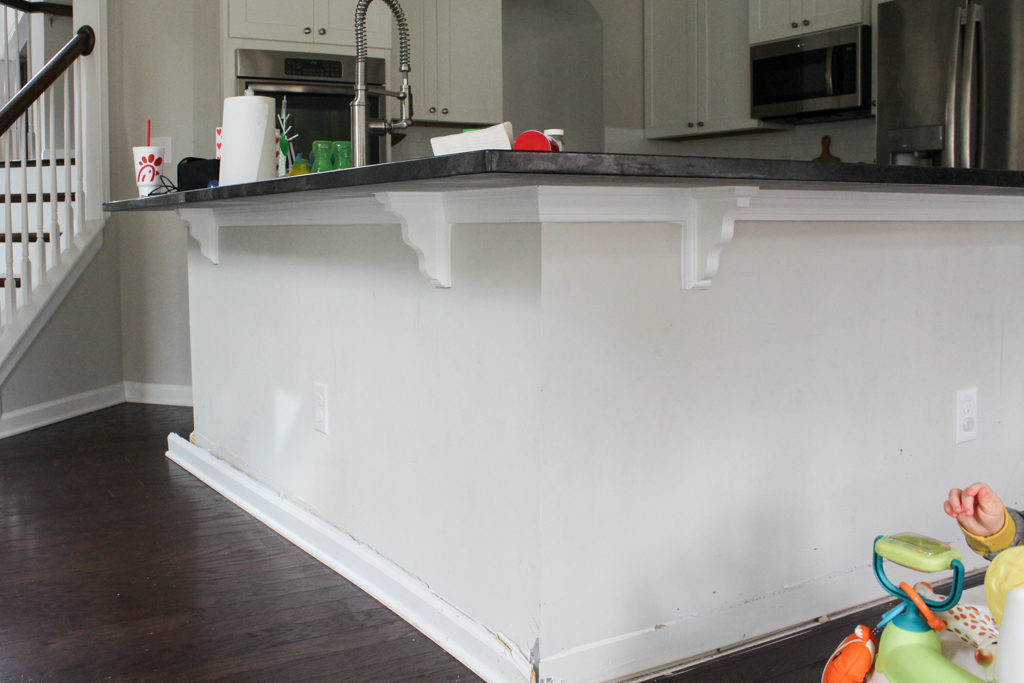
The Before: Basic Builder Grade Kitchen Island
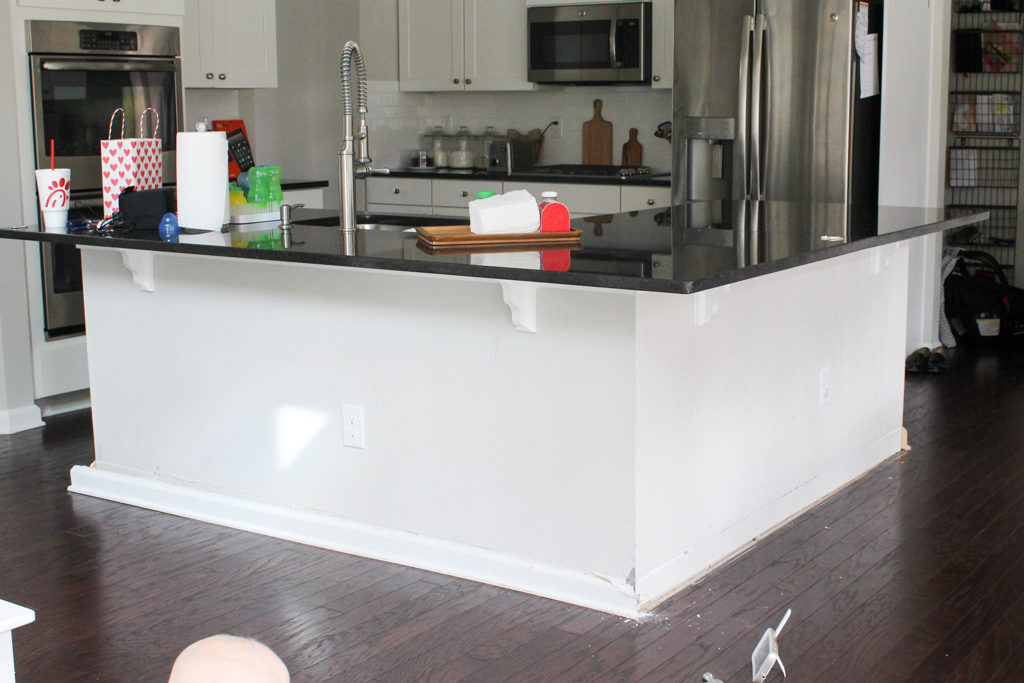
Well, here she is in all her glory. When we first bought our house I fell in love with the large kitchen island that provided tons of counter space. I did not, however, fall in love with the boring, builder-grade sheetrock that encased it.
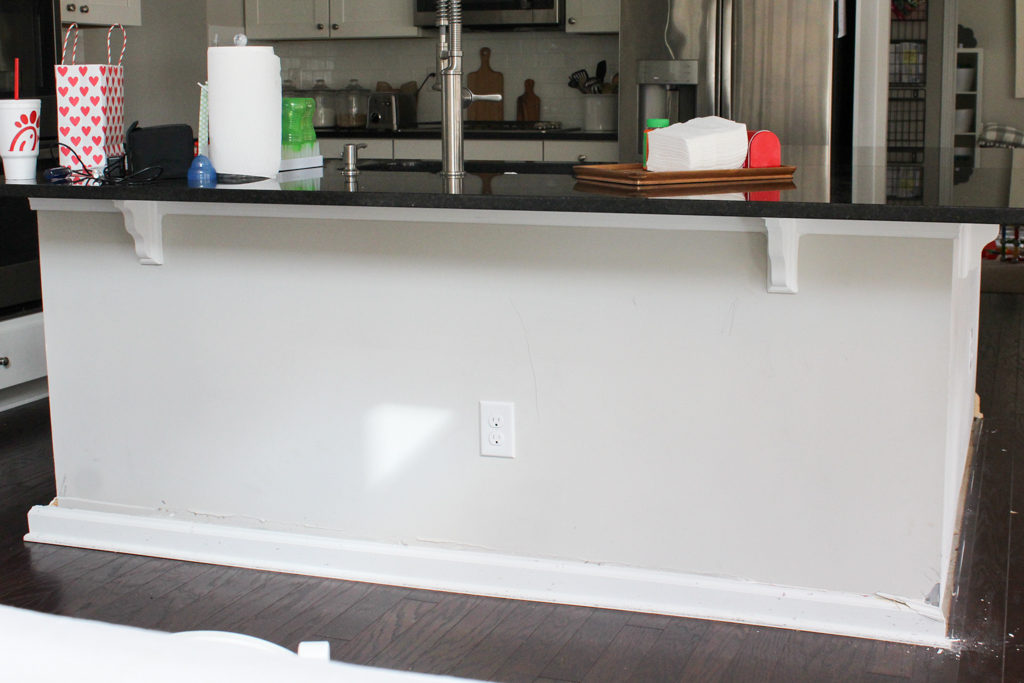
To make matters worse, our entire house (including the kitchen island) is painted in a flat finish paint (whyyyy?!). Translation: it shows every little mark and cannot easily be wiped down without damaging the paint. You can imagine how that went over with metal barstools and feet constantly hitting against the sheetrock. Spoiler alert: not well at all!
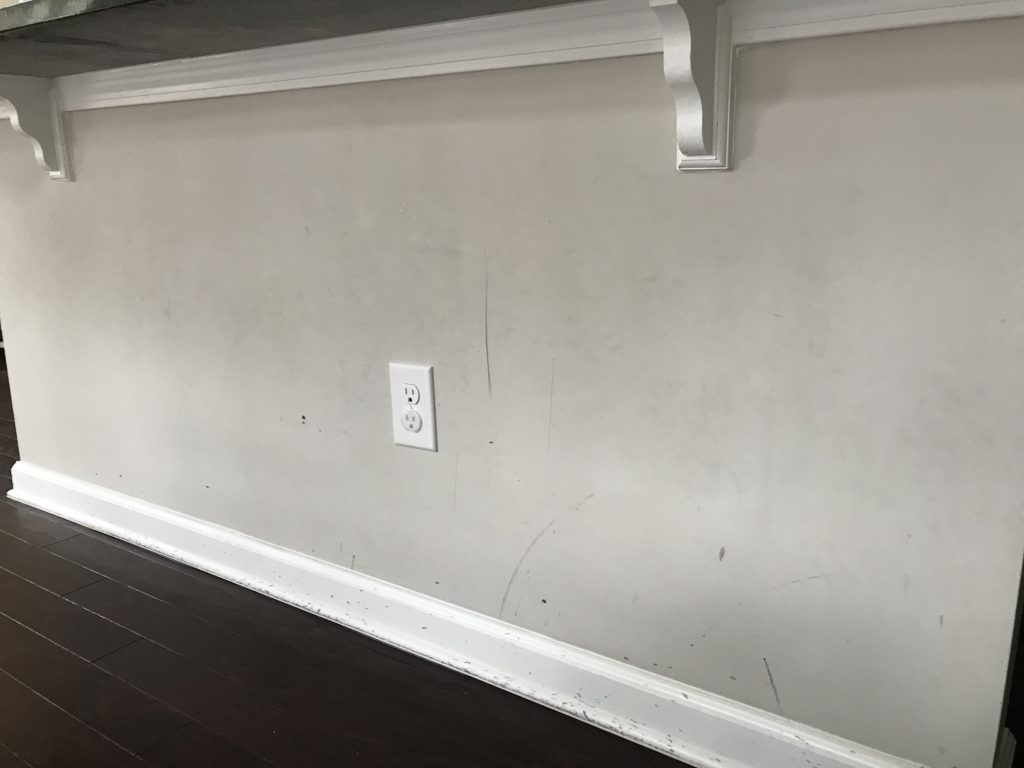
I can’t believe I am actually showing you this picture. How embarrassing!
But this is the reality of what happens when you have a (hard-working) kitchen island that is finished in sheetrock and painted with a flat finish paint. Add in two young kids + black metal barstools and this is what you get. Not pretty!
It bothered me every time I looked at it. Which was approximately one million times per day because we live in our kitchen and my kids need a snack every five minutes 😉
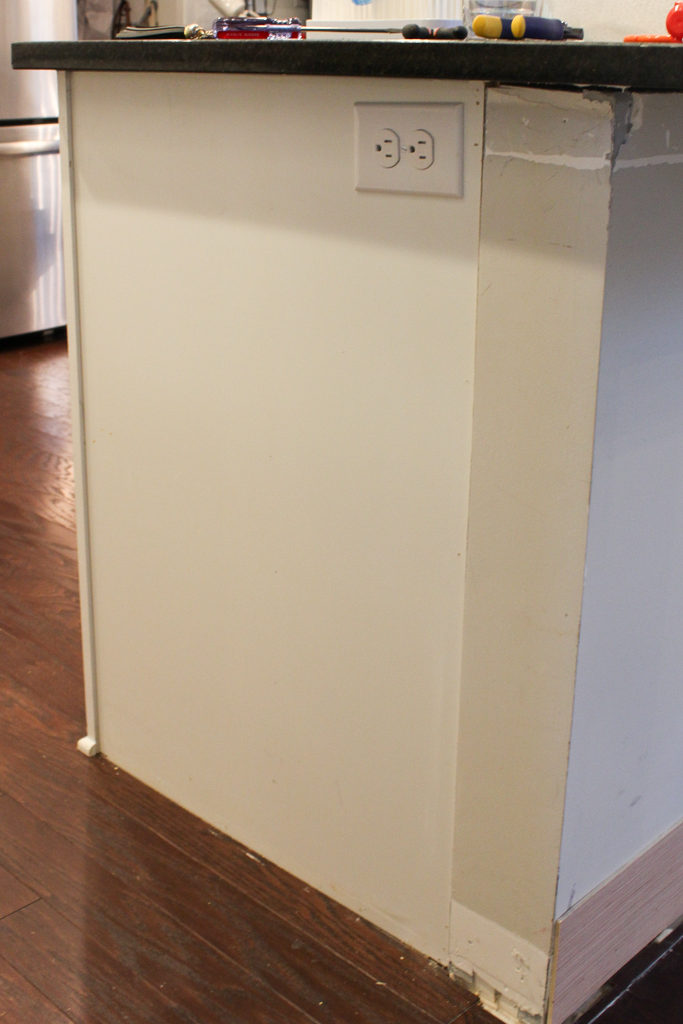
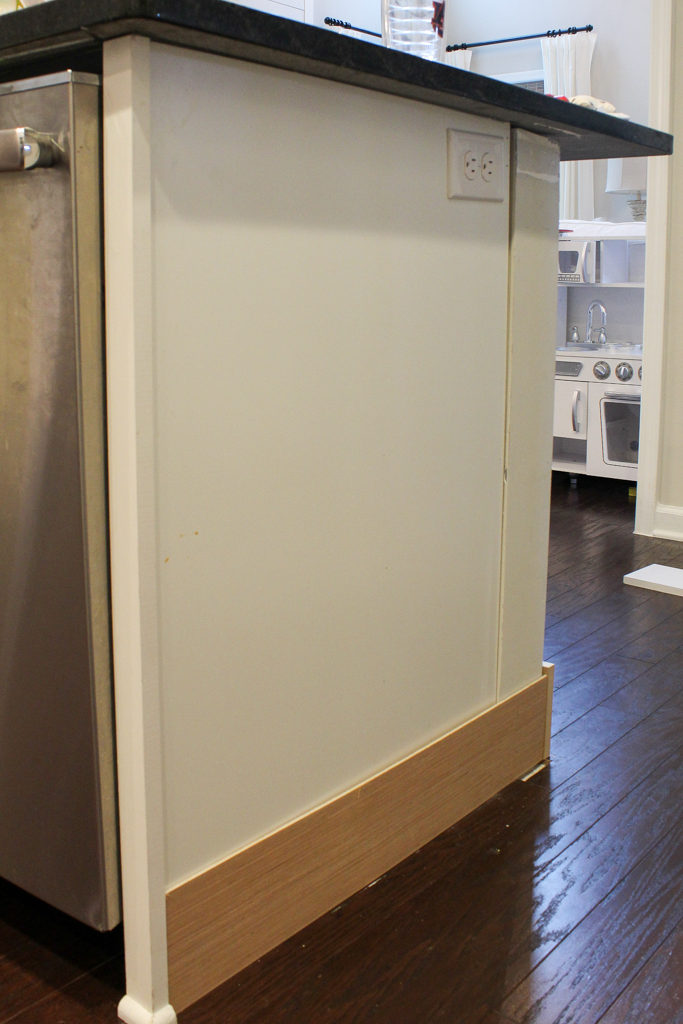
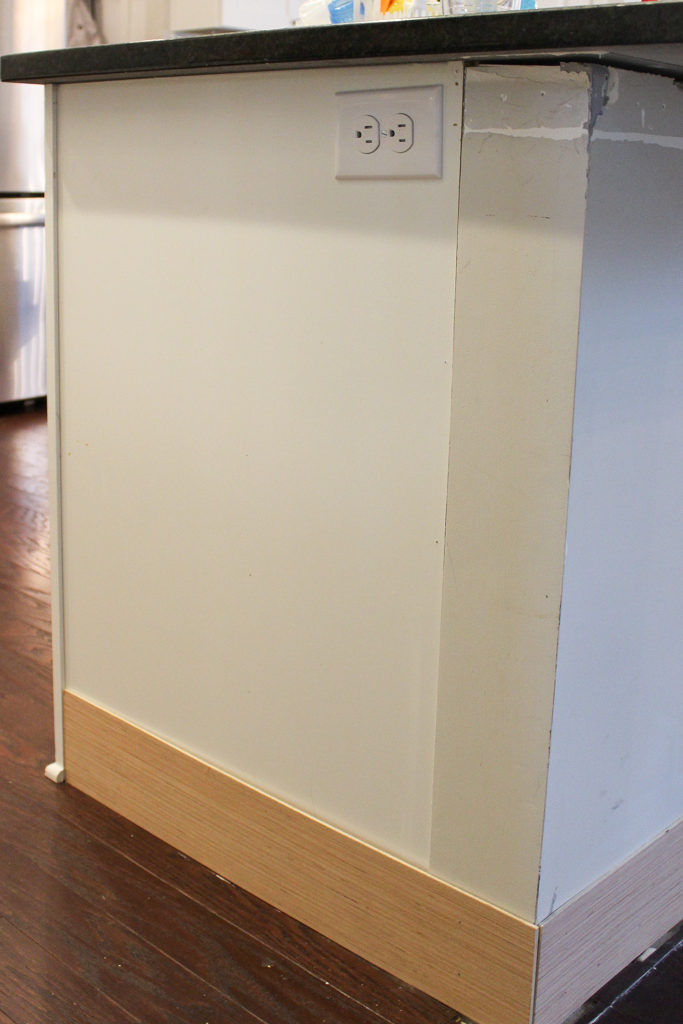
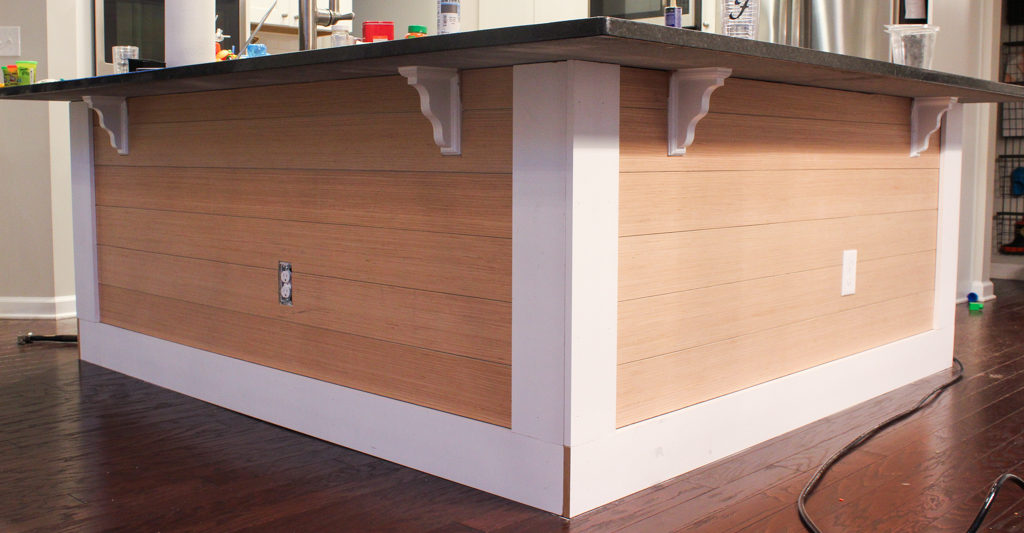
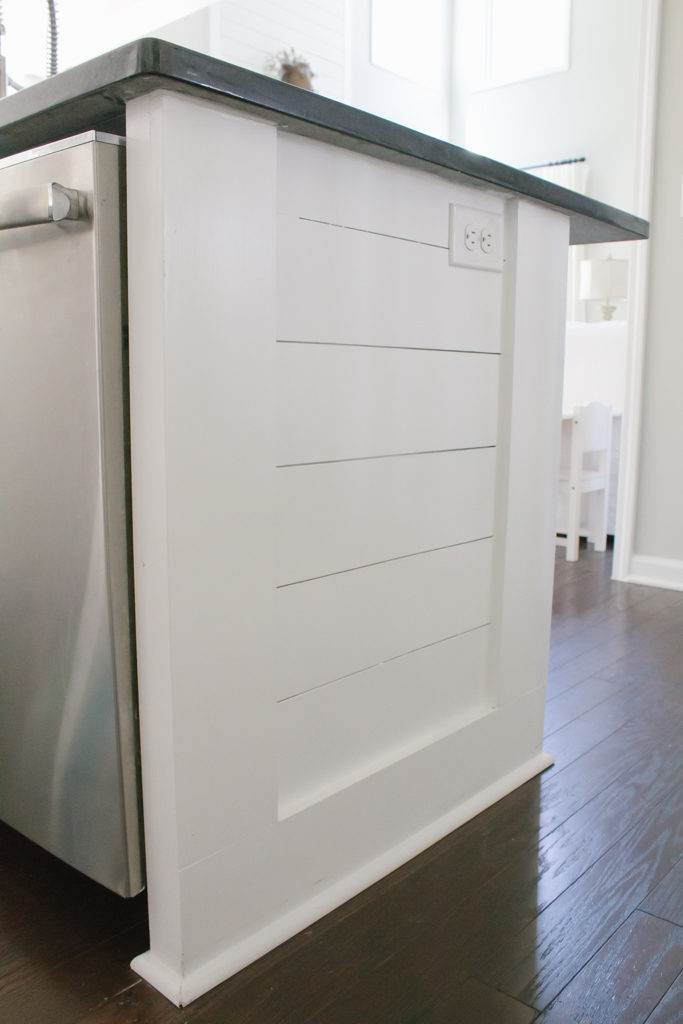
Another thing I hated were the ends of the kitchen island. It looked cheap and unfinished to me, and it was one of the first things I saw every time I walked through the door.
Easy + Affordable DIY Kitchen Island Shiplap
My solution? Easy + affordable DIY kitchen island shiplap!
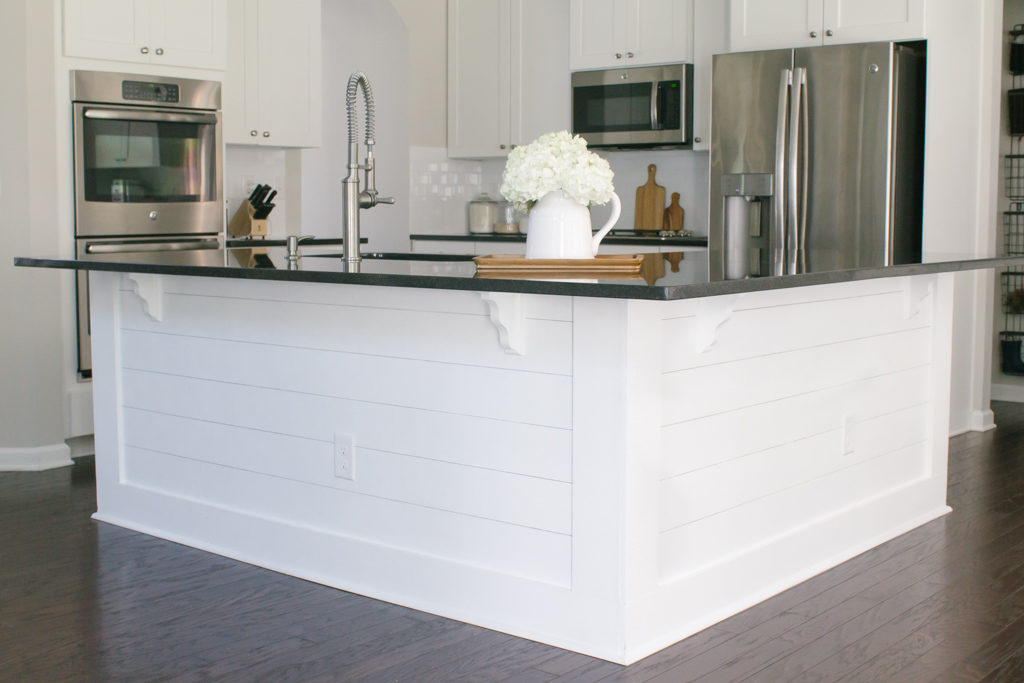
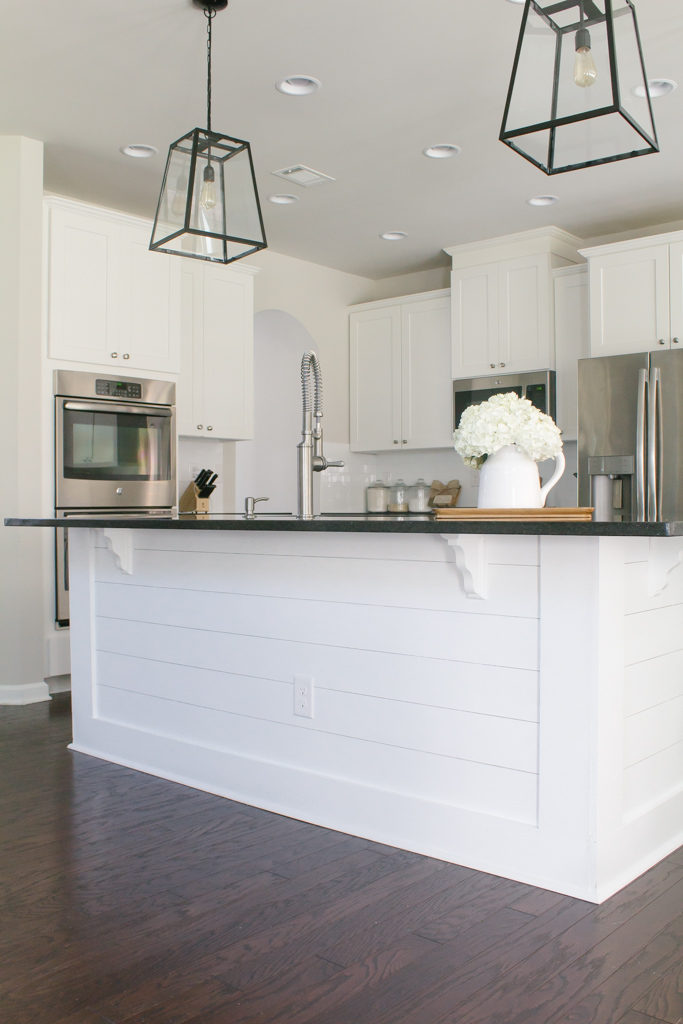
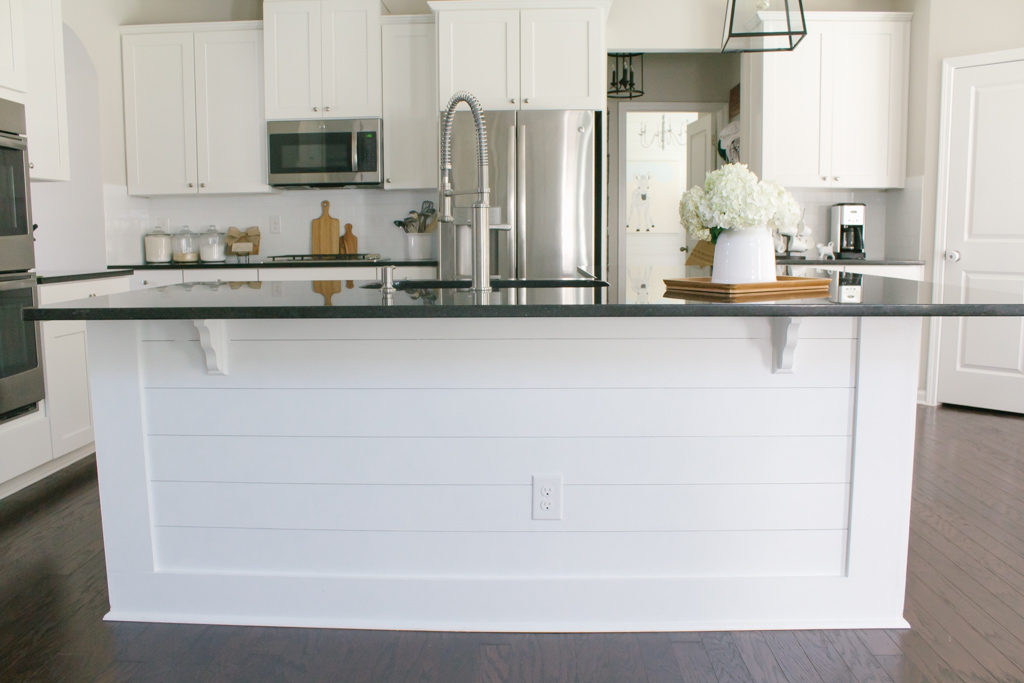
In this tutorial I will show you how we turned this boring, builder grade kitchen island into…
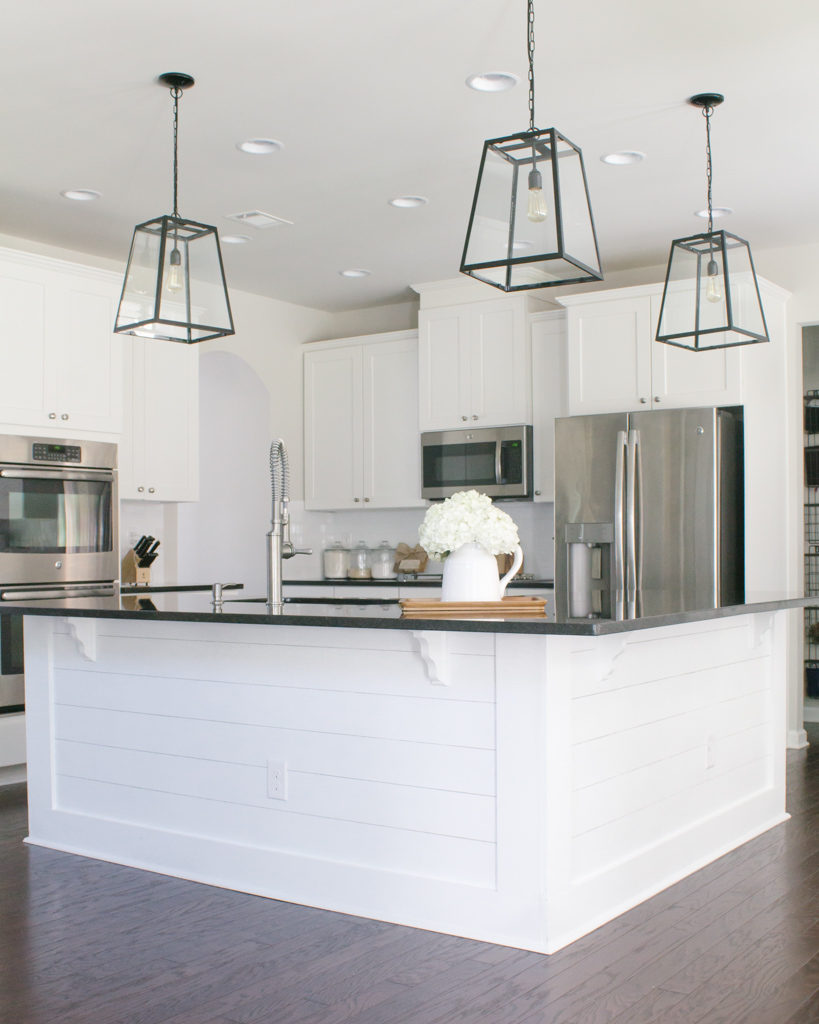
… this beautiful, bright, custom shiplap kitchen island!

And I will show you how you can do it too!
This DIY kitchen island shiplap tutorial is easy, inexpensive, and can be completed in one weekend. What are you waiting on?!
DIY Kitchen Island Shiplap: Materials List
Here’s what you will need:
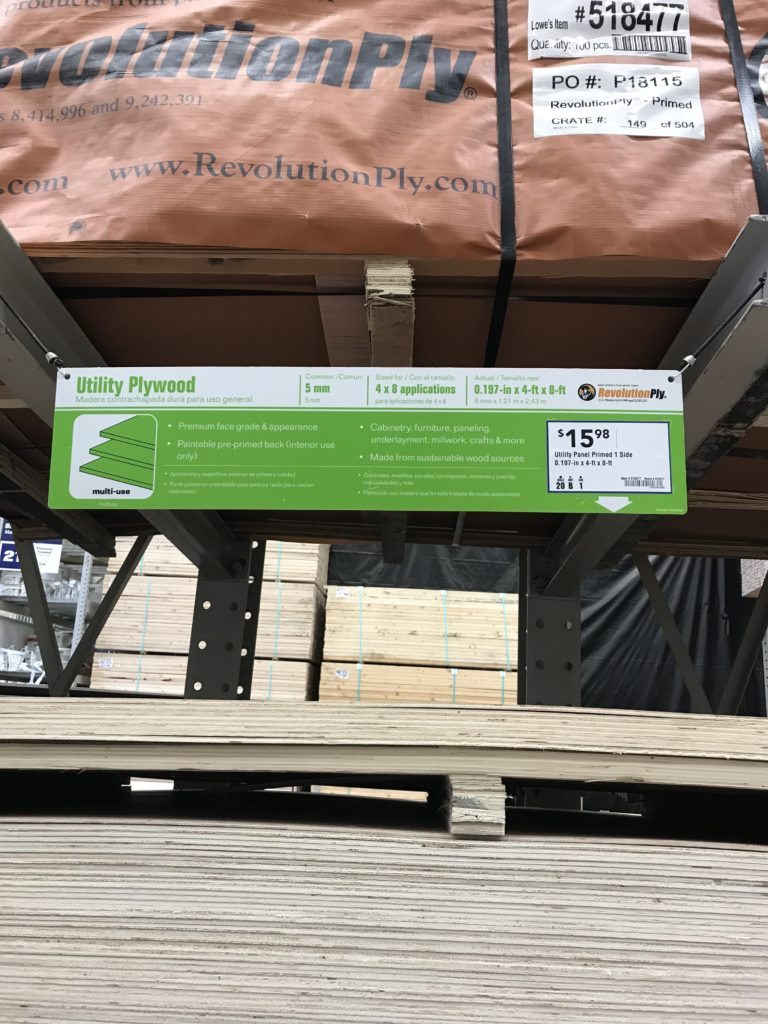
- 5mm plywood sheets ripped into 5″ boards (Lowe’s will cut them for you)
- We needed a little over two sheets for the project (I had plans to use the leftover for another shiplap project 🙂 ). We bought 3 sheets total for just under $48
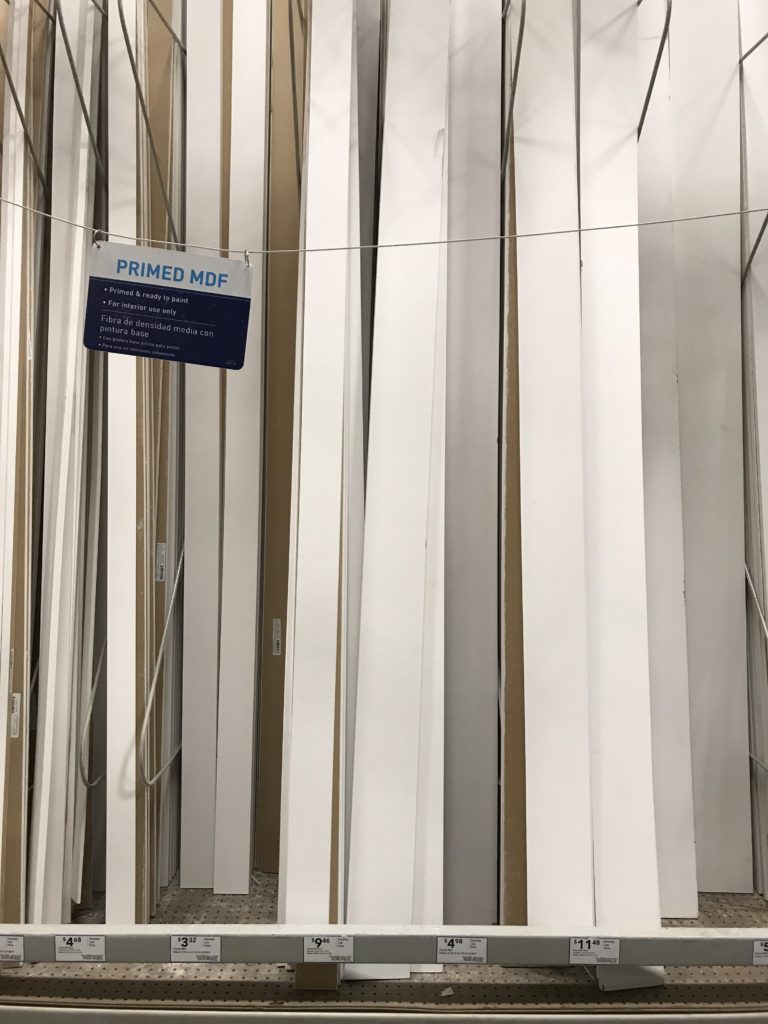
- Primed MDF
- We used primed MDF to trim out the shiplap. Measure your kitchen island to determine how many MDF boards you will need to trim out the bottom and vertical edges
- Based on the size of our island we needed around $25 dollars worth of MDF boards
- Bostitch Nailer and Air Compressor
- Liquid Nails
- Kobalt Laser Miter Saw
- 6 in 1 Tool
- Hammer
- Measuring Tape
- Sandpaper
- Jig Saw
- Caulk
- Painter’s Tape
- Zinsser Bullseye Primer
- Paint (we used Sherwin Williams ProMar 200 Zero ZOC Interior Latex paint)
- Receptacle Spacers
Step One: Remove Existing Trim and Outlet Covers
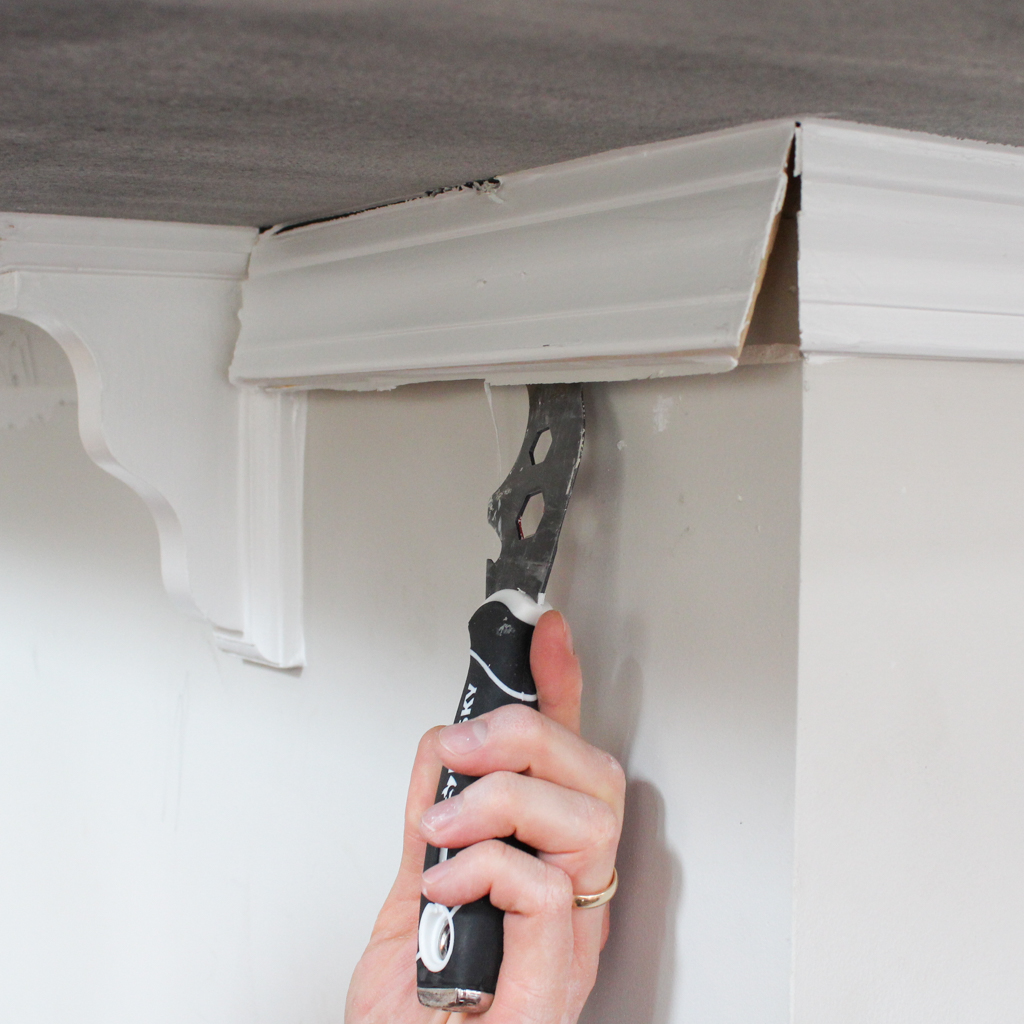
Hubby used his 6 in 1 tool (one of the best little tools that we use for so many things!) and a hammer to take off the existing trim work.
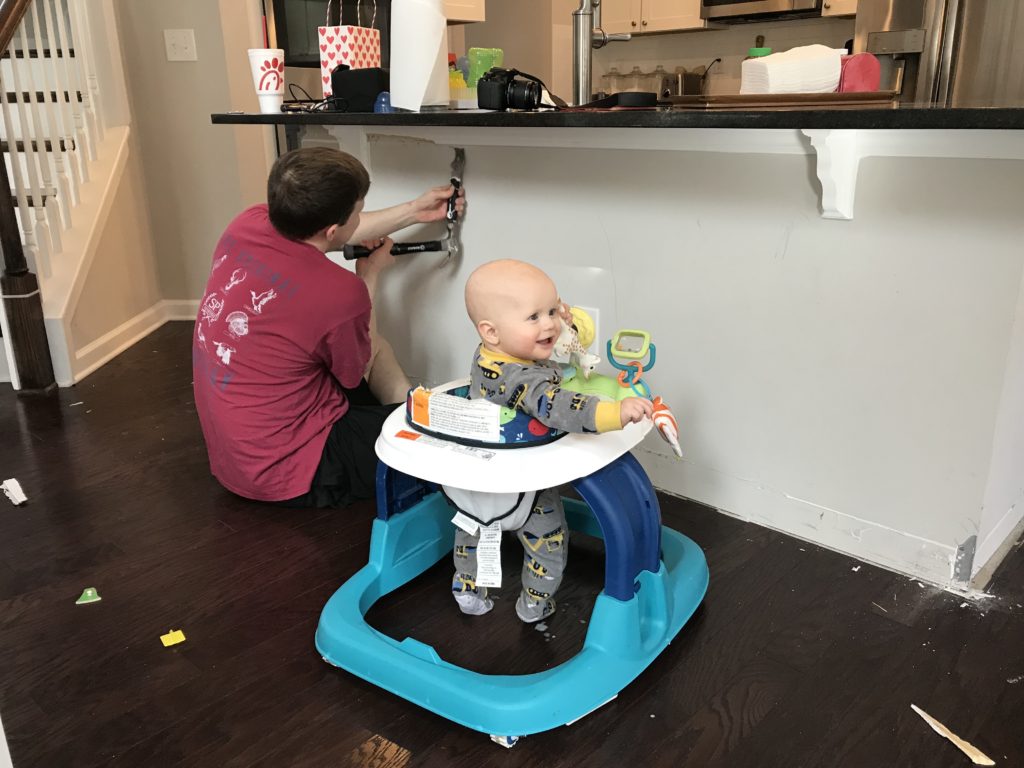
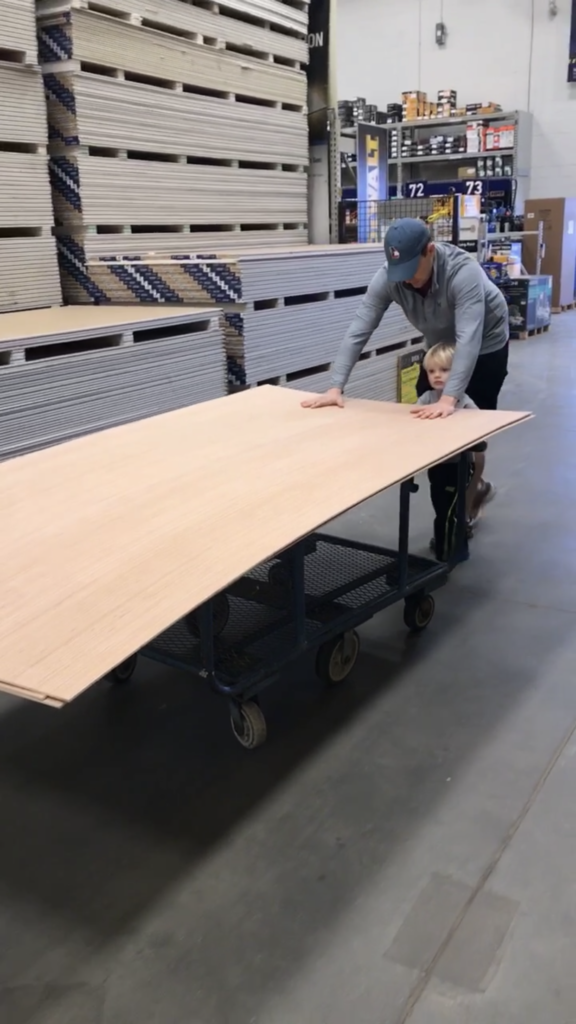
I came downstairs from getting John Davis down for a nap to find Fletcher helping Daddy 🙂
Remove all outlet covers and set aside. (Be sure you turn the electrical breaker off before removing your outlet covers).
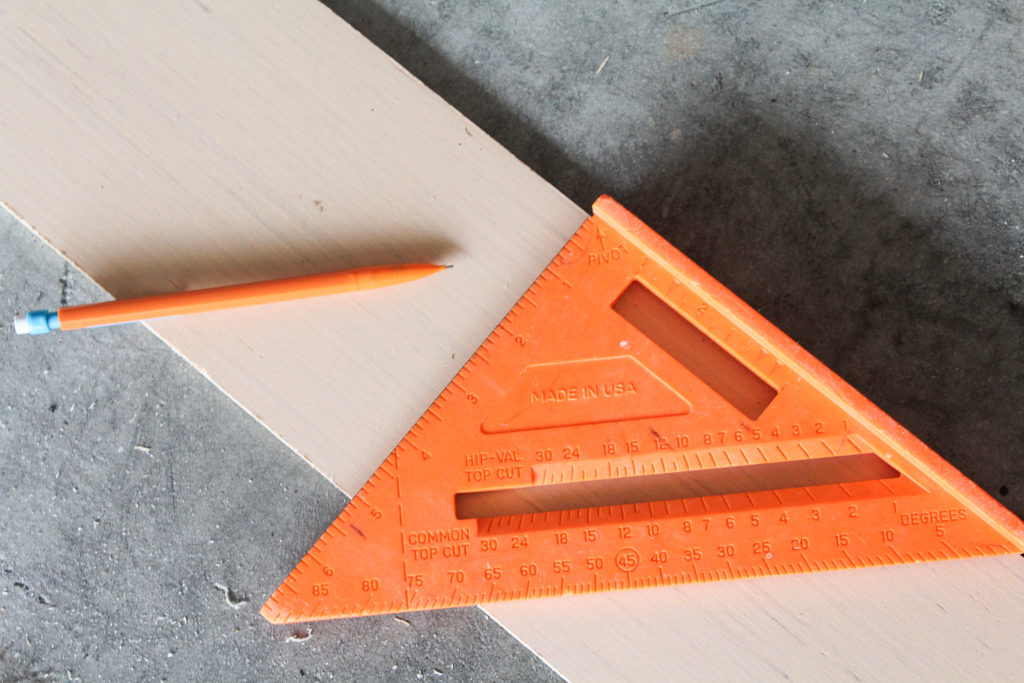
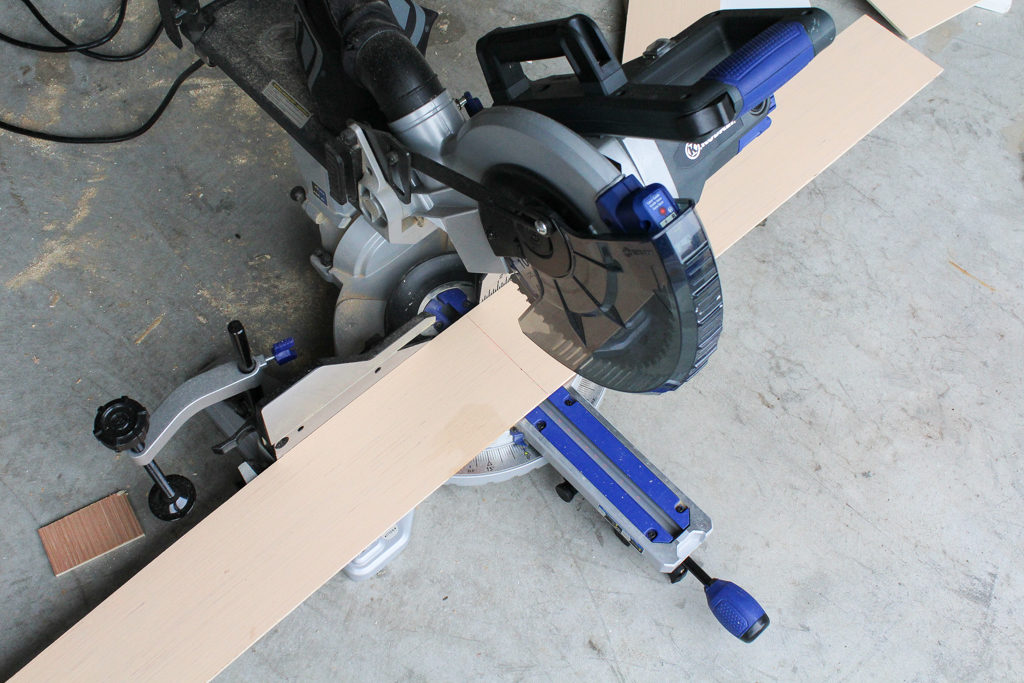
Step Two: Measure and Cut Shiplap Boards
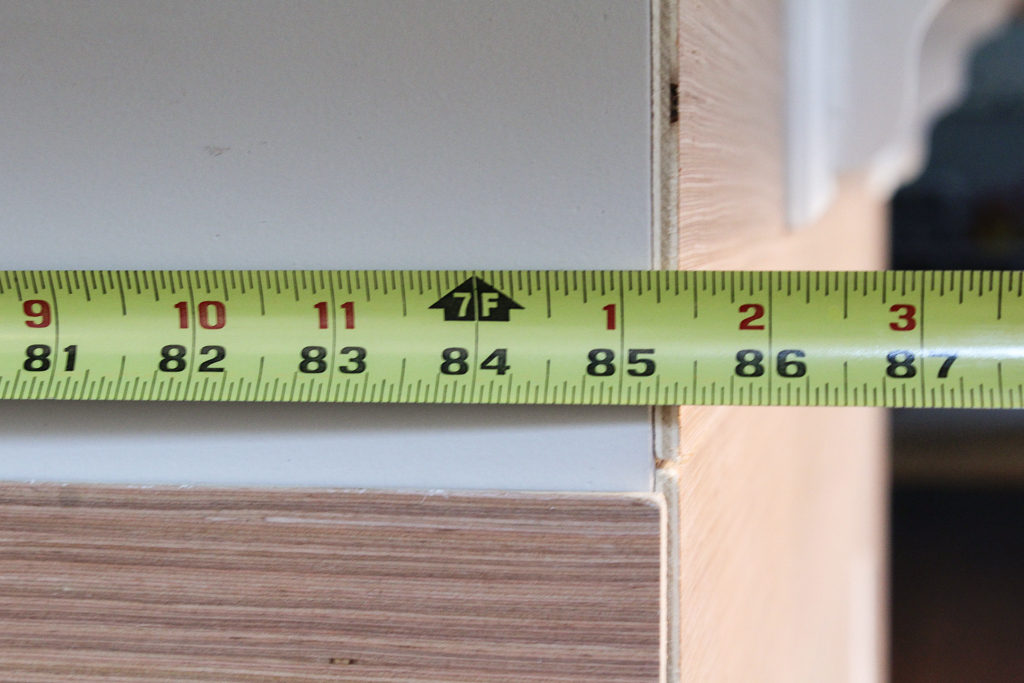
Measure the length of your kitchen island to determine the length needed for your shiplap boards. Mark the length of your shiplap to this same measurement (we use this tool to make it a little easier).
Use your miter saw to cut your shiplap boards to the correct length. We got this miter saw for Christmas two years ago and we have been so happy with it!
Step Three: Sand Edges of Shiplap Boards
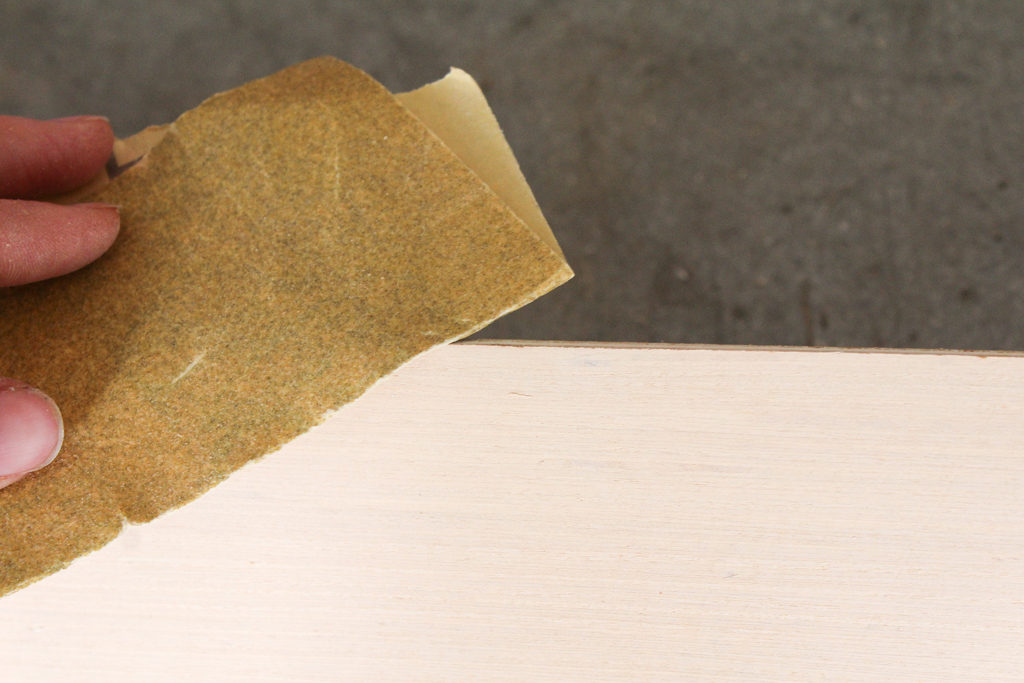
This is one of the most important steps in the entire process, so don’t skimp here!
The long edges of the shiplap boards became rough and splintered when Lowe’s cut them in the store. Use a medium grit sandpaper to sand the edges of the boards until they are completely smooth.
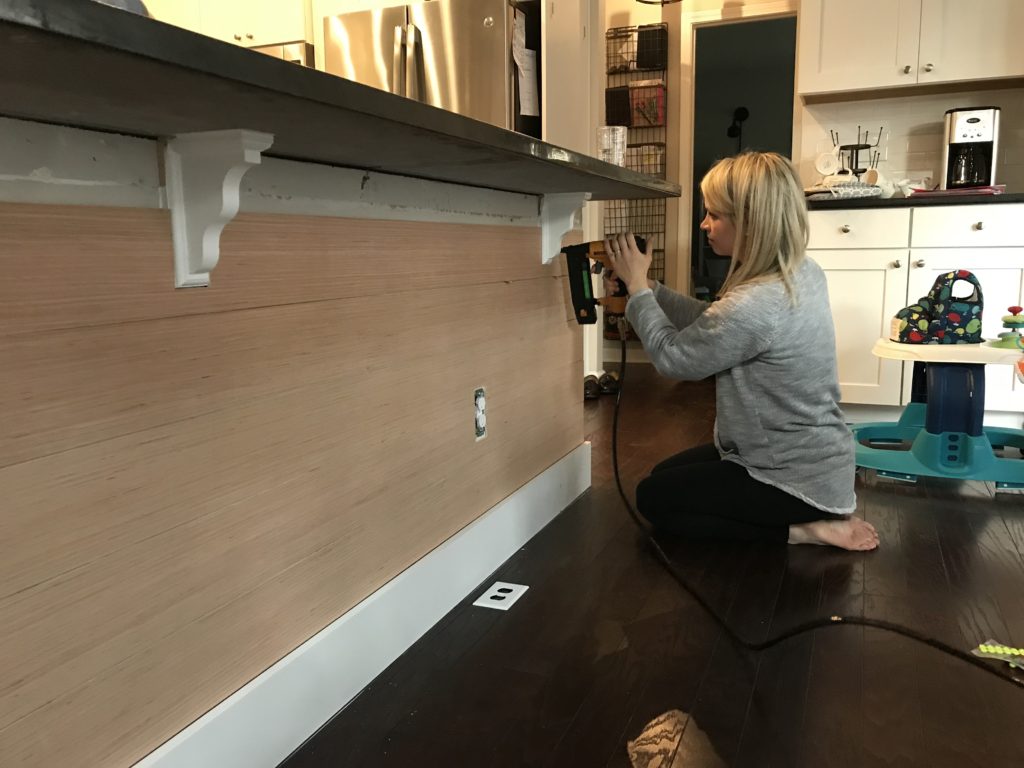
Step Four: Attach Shiplap Boards to Kitchen Island
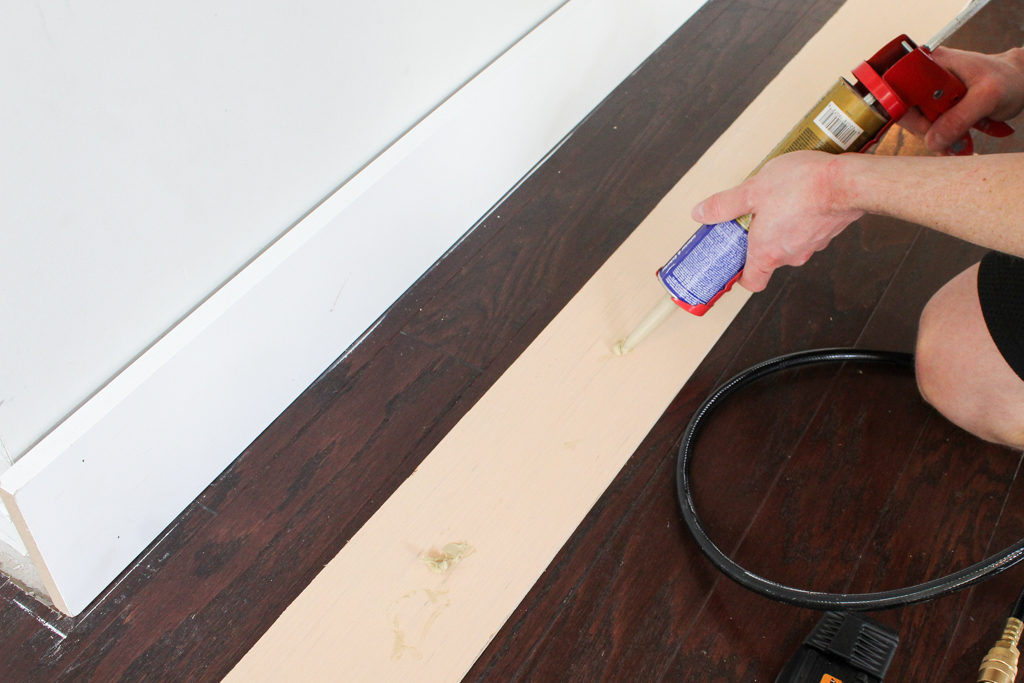
Start by applying liquid nails as directed to the back of your shiplap board.
Starting at the bottom, use your nail gun to attach each shiplap board to the kitchen island directly over the existing sheetrock.
Continue to work your way up from bottom to top.

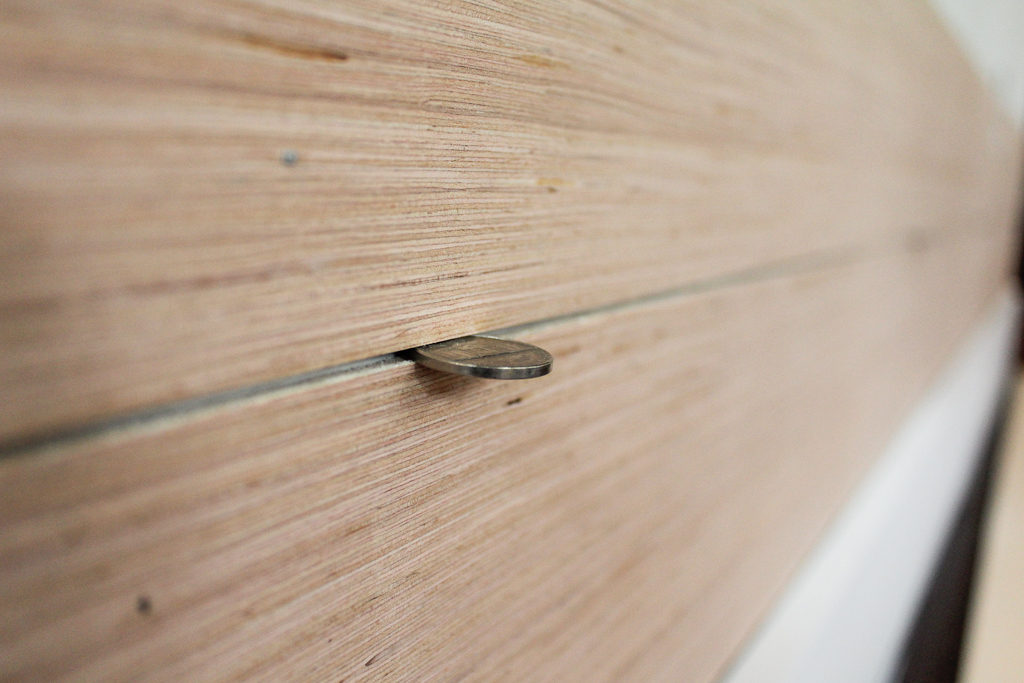
Make sure your shiplap boards are evenly spaced by using either tile spacers, or a nickel if you’re like us and don’t want to make another trip to the store : )
Continue to work your way up on all sides of the kitchen island.
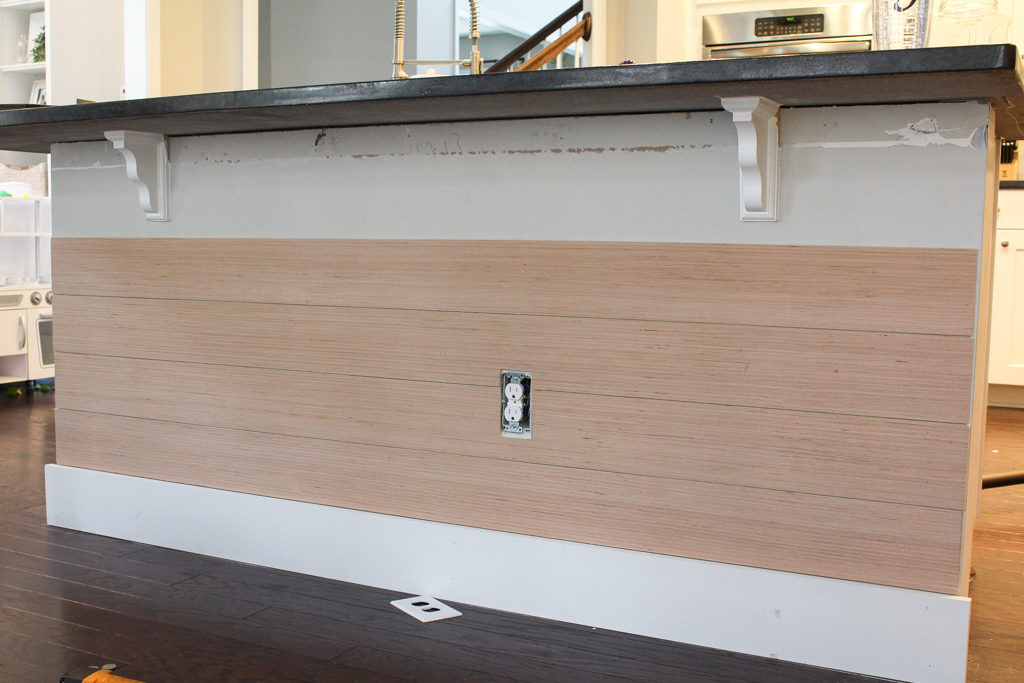
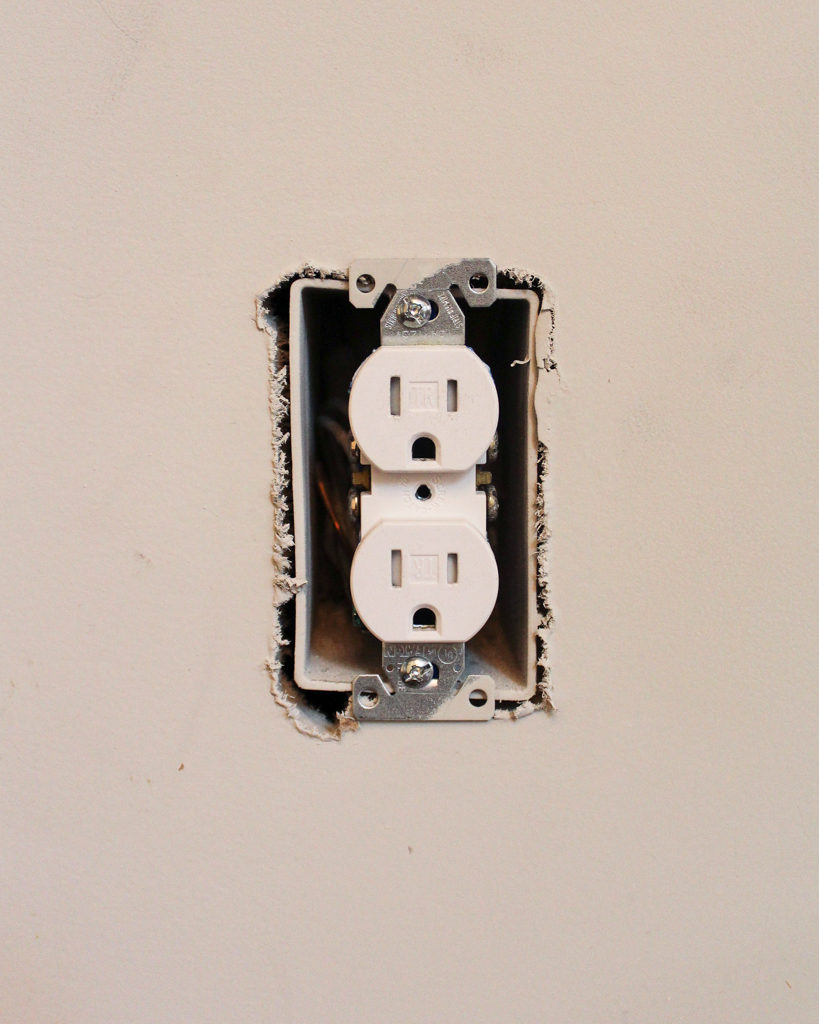
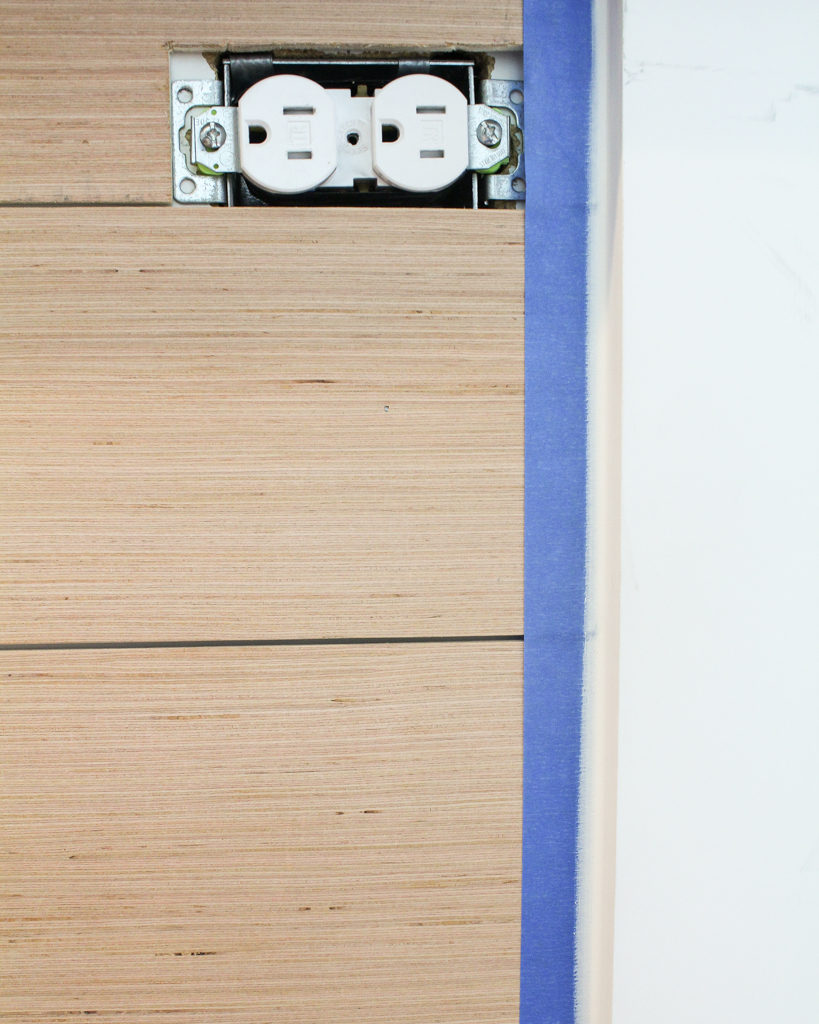
Step Five: Cut Around Outlets and Corbels
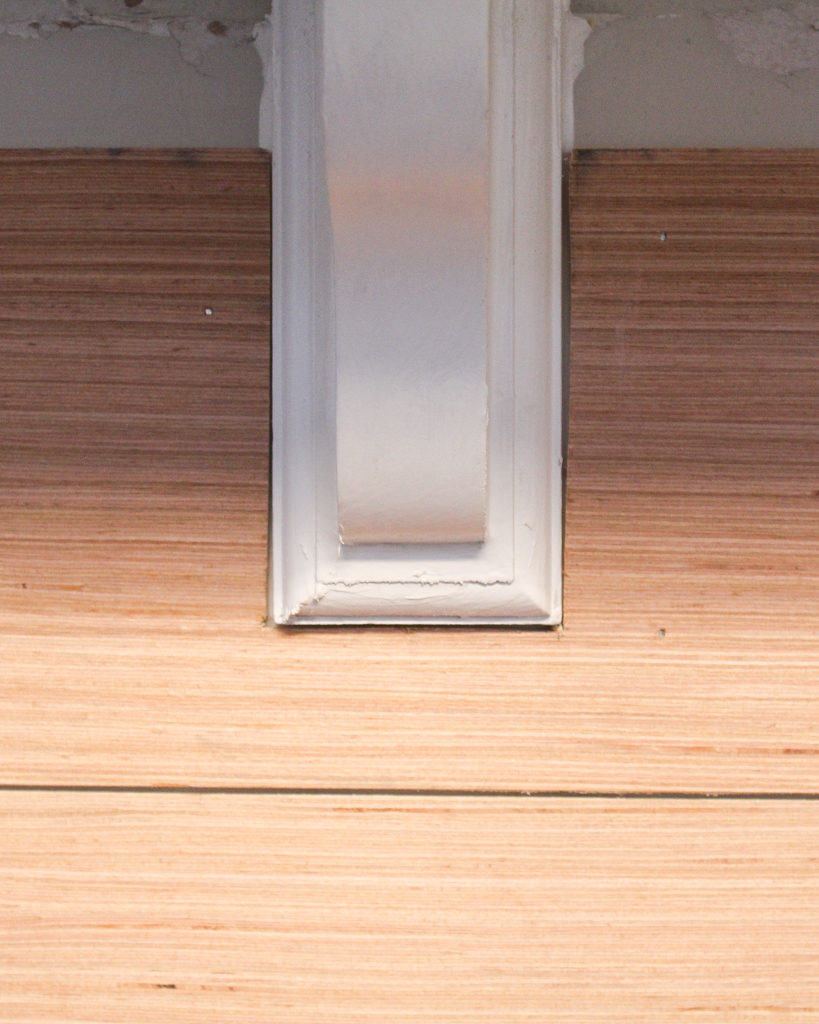
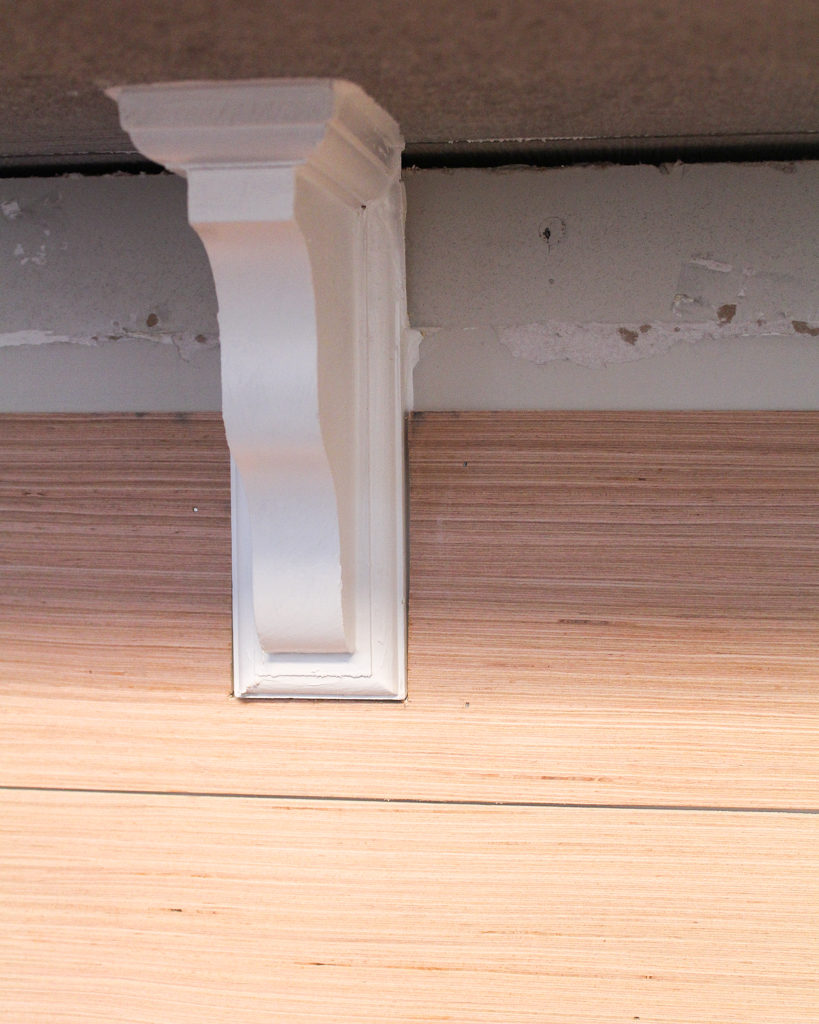
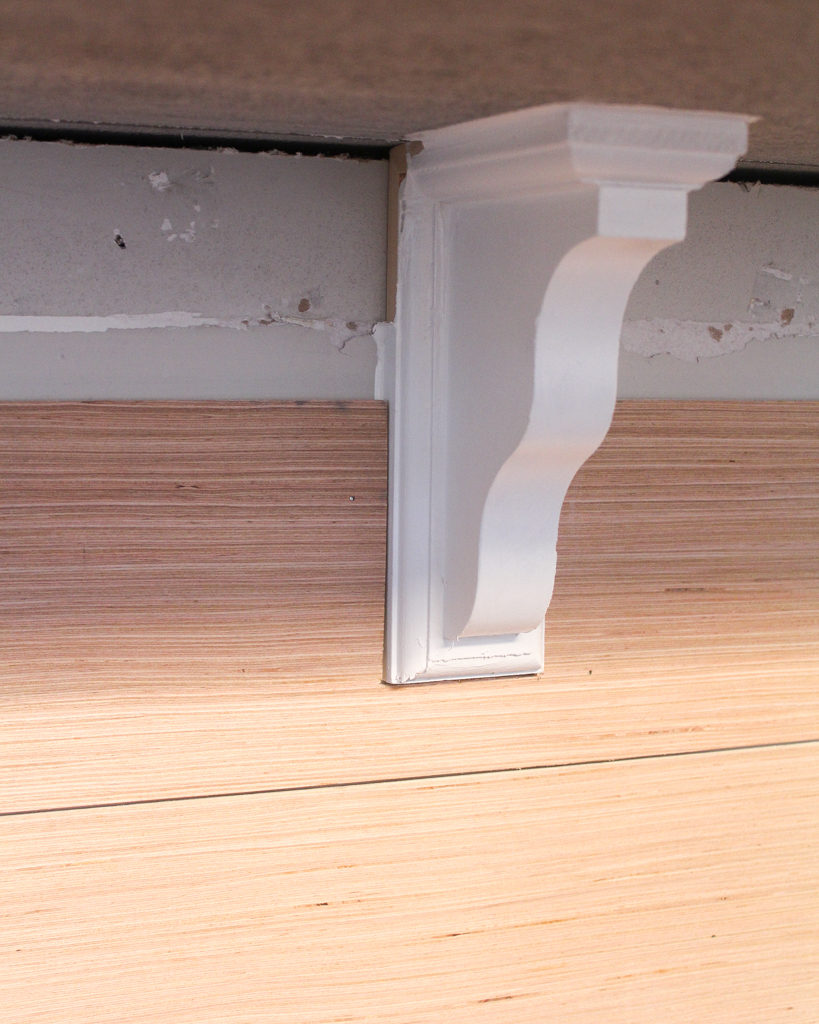
As you work your way up you will need to cut around the existing outlets and corbels.
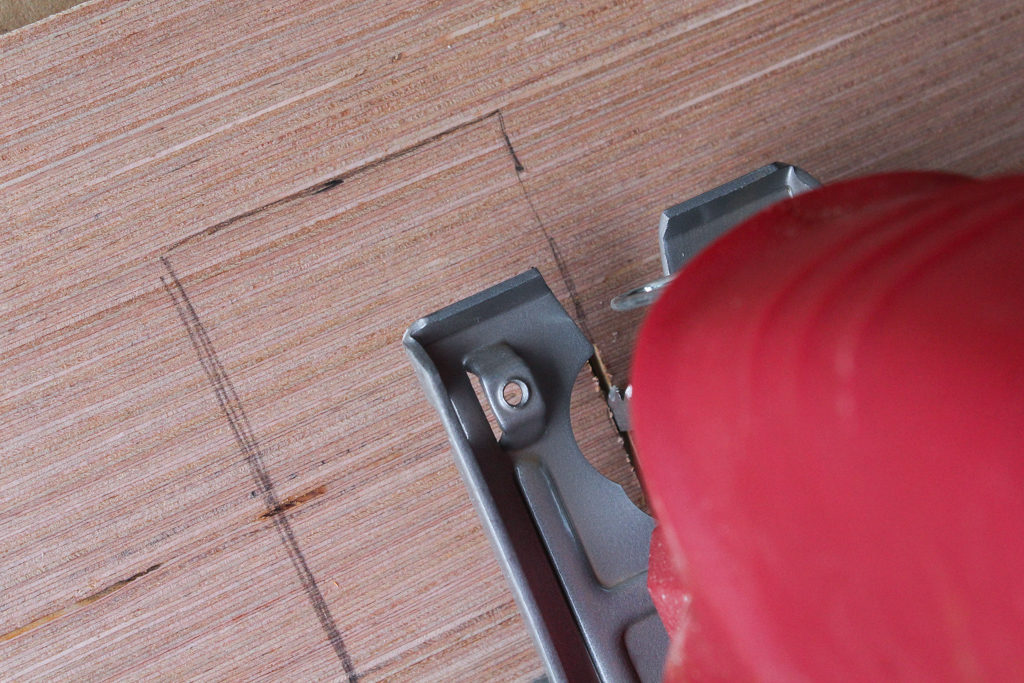
Here’s my very unprofessional way of doing this: I hold the shiplap board up to the kitchen island, mark the area that needs to be cut with a pencil, then use our little jig saw to cut it out.
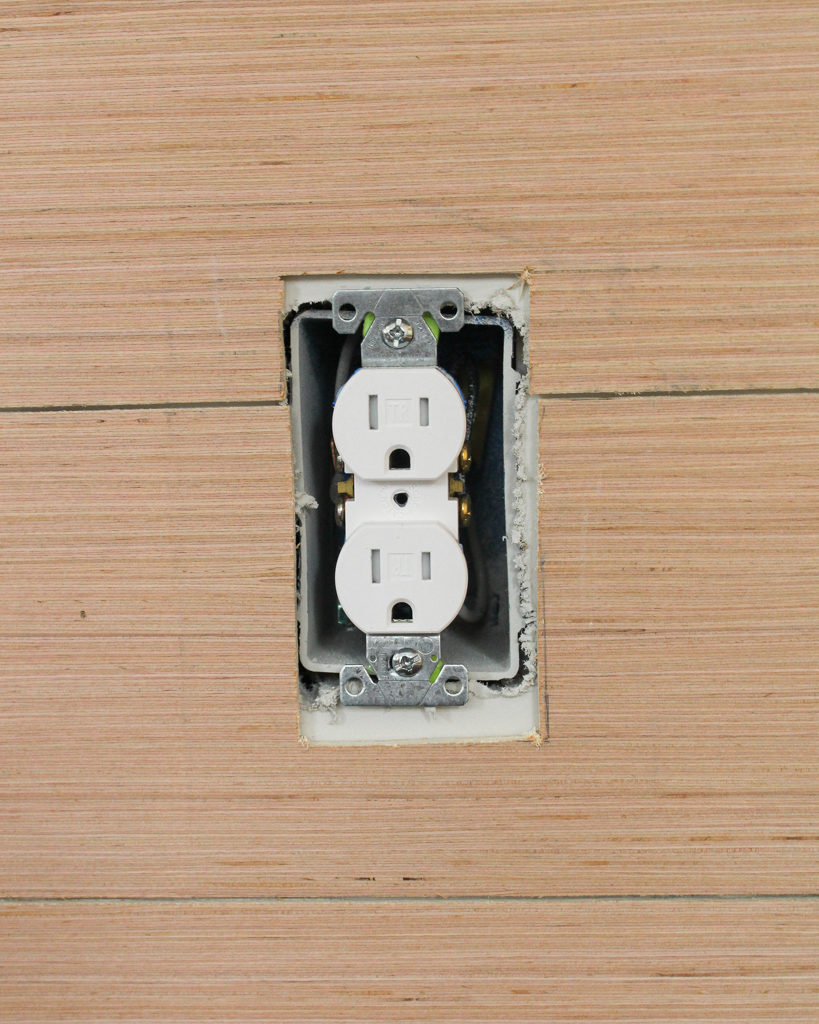
Thankfully the outlet cover is forgiving 😉
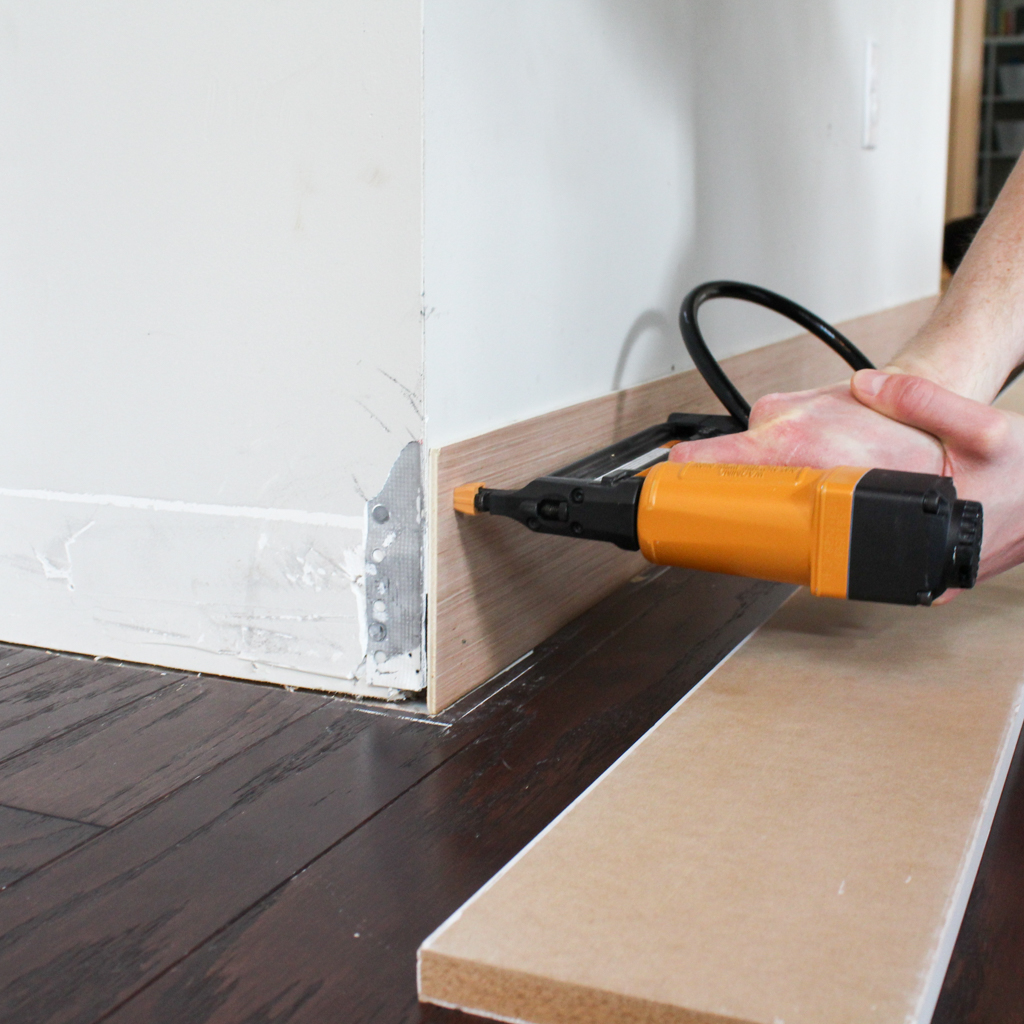
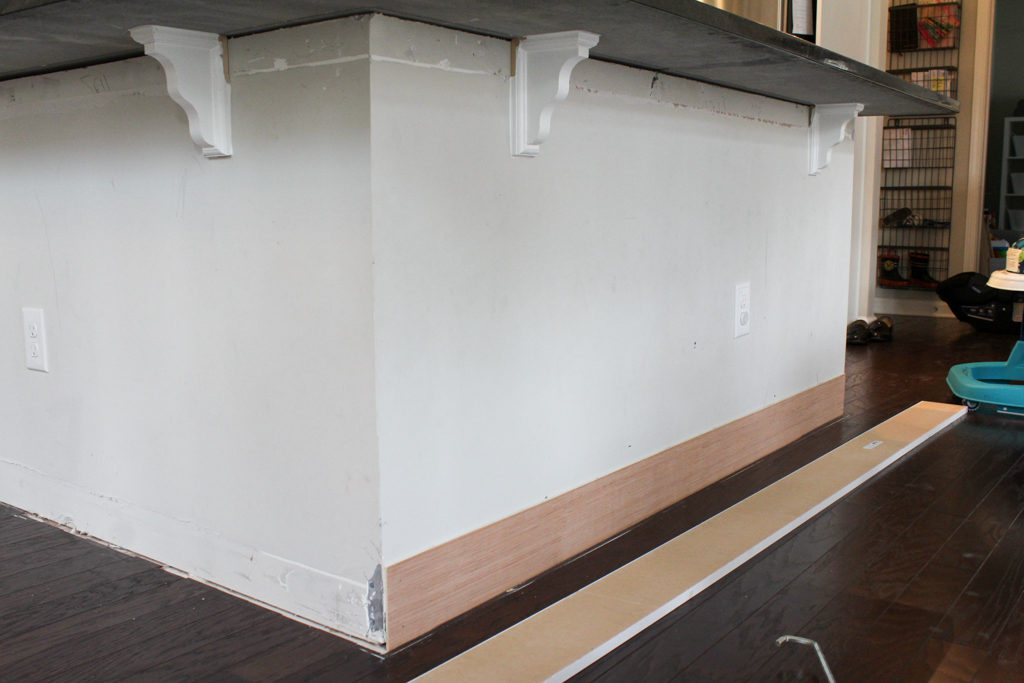
Step Six: Add MDF Trim and Quarter-Round Shoe Molding
Once all of your shiplap boards are installed, trim the bottom and the vertical edges with primed MDF board.
I didn’t get a picture of us attaching the shoe molding (oops!), but that step is pretty self explanatory and there are a million tutorials out there. The hardest part is mitering the edges, but they are all 45 degree cuts so it’s not too bad. I cut them all myself 😉
Step Seven: Caulk, Prime and Paint
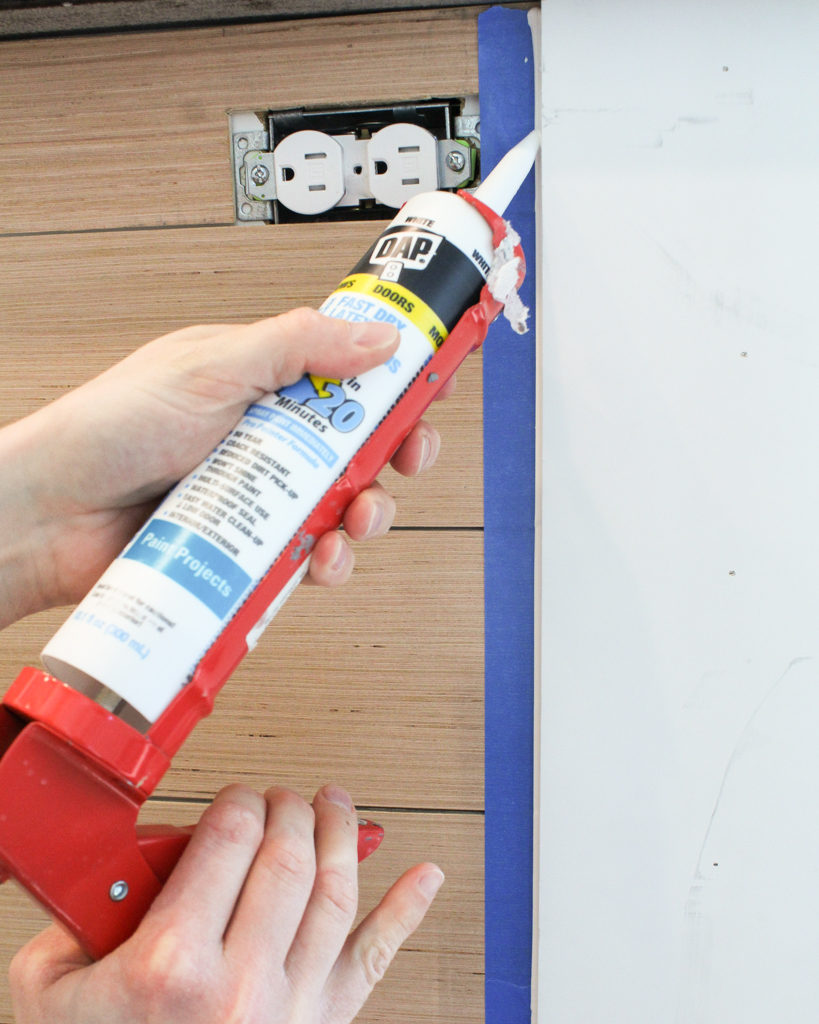
When caulking the vertical edges (where the vertical MDF meets the horizontal shiplap), be sure to run a strip of painters tape along the edge. This will give you a clean caulk line and ensure that your caulk doesn’t get globbed up in the empty spaces between the shiplap boards.
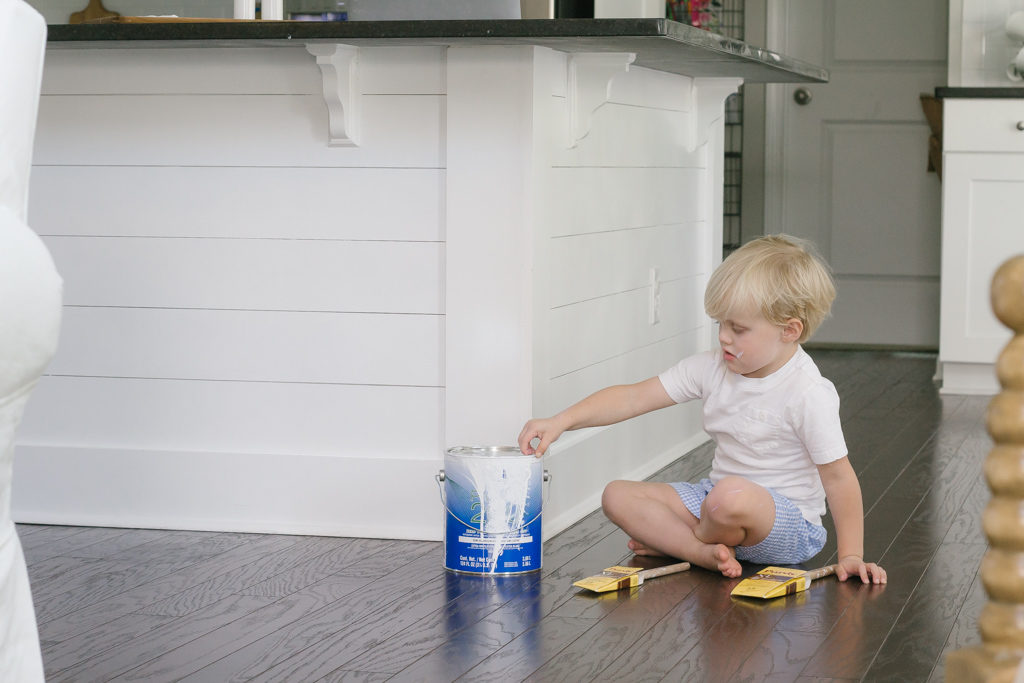
This is the part in the process where I got really bad about taking pictures, so forgive me! (Instead here’s a picture of my cute helper). I was in a time crunch because I was trying to get this project finished the week before John Davis’s third birthday party.
Most nights I was up way past my bedtime trying to plan his party, finish the kitchen island, oh… and finish the other shiplap project I started the same week. (I was installing shoe molding after 11 PM one night and I’m sure my neighbors could hear me using our miter saw in the garage. As if they didn’t already think we were crazy enough.)
Prime your shiplap boards with Bullseye Zinsser 1-2-3 Primer. This is the very best primer out there and the only one I will use!
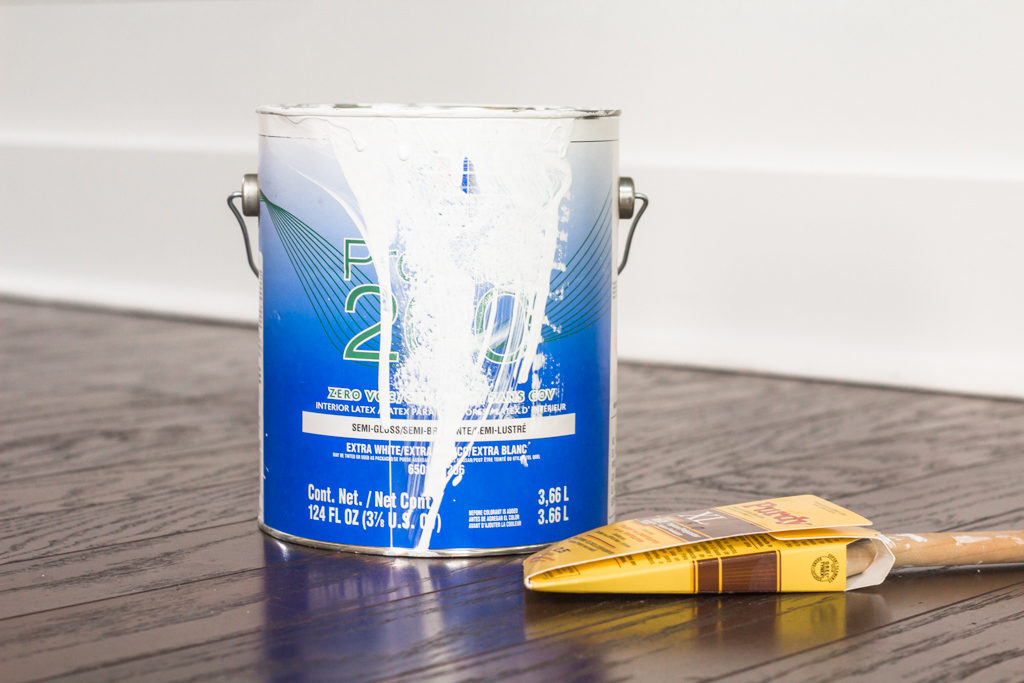
We painted the shiplap in Sherwin Williams ProMar 200 Zero VOC Interior Latex paint in the color “Extra White” in a semi-gloss finish. This is the same paint that all the trim is painted throughout our house. Our builder gave us all the leftover paint so we already had it at home and it was one less thing to buy.
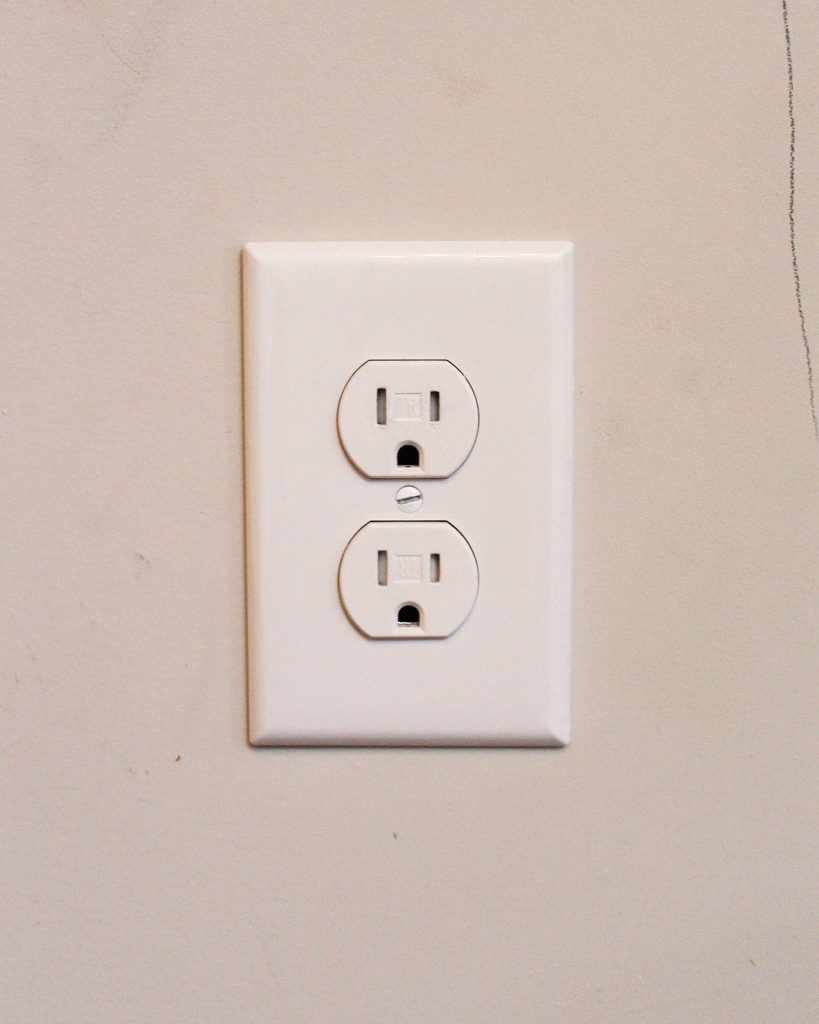
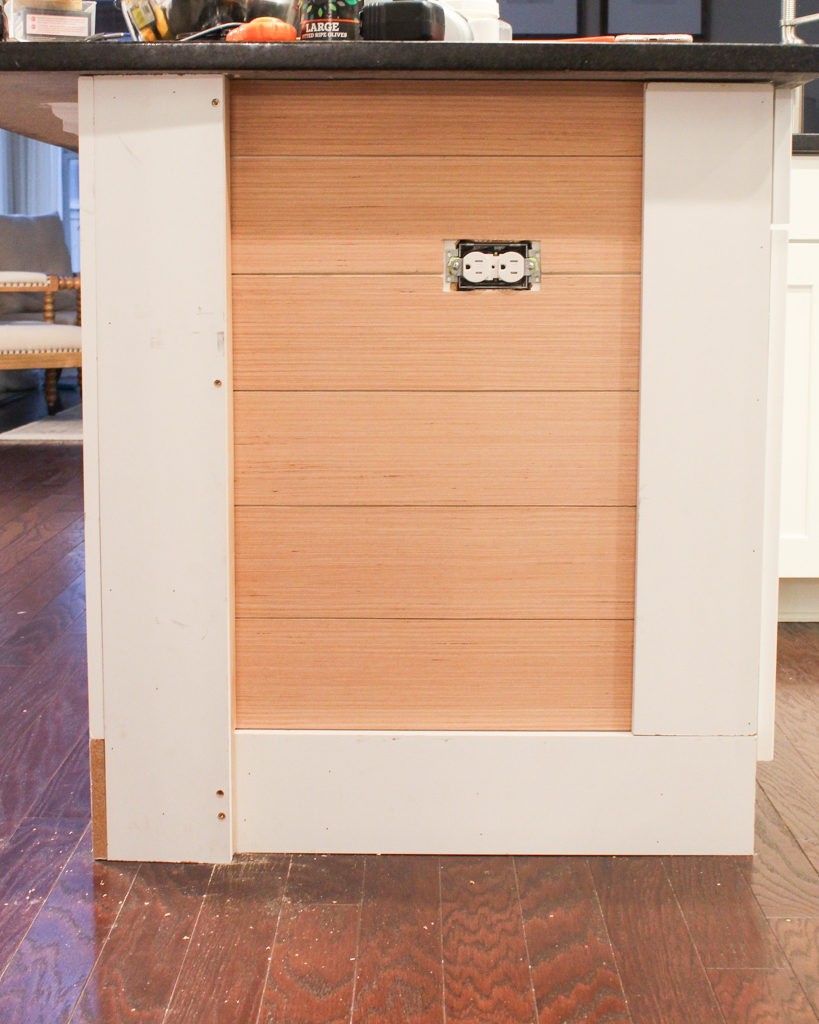
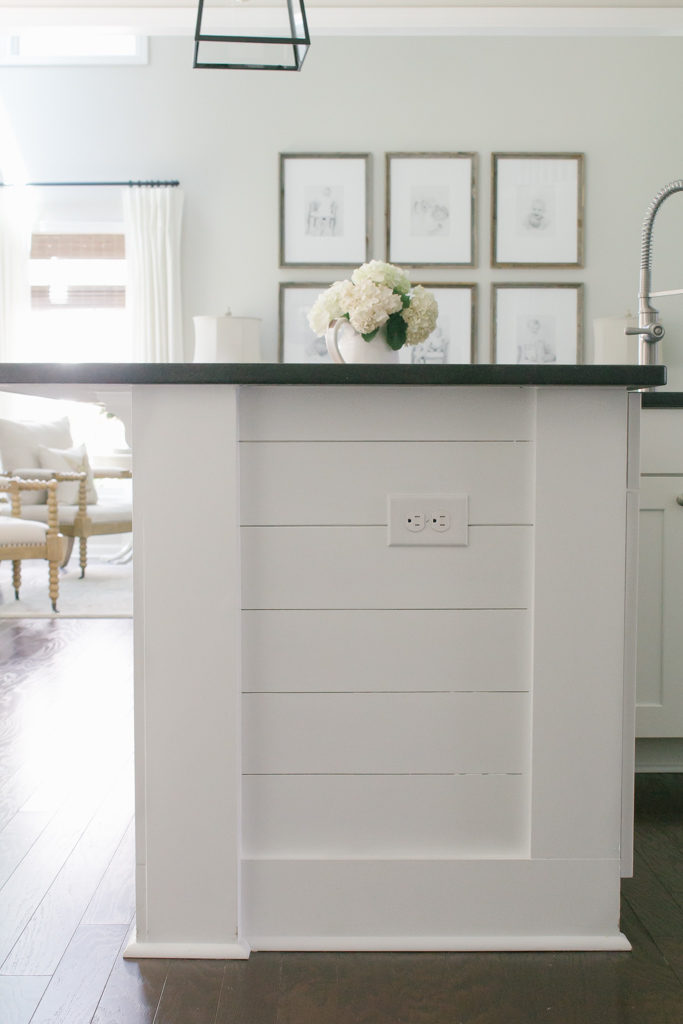
Step Eight: Re-Attach Outlet Covers with Receptacle Spacers
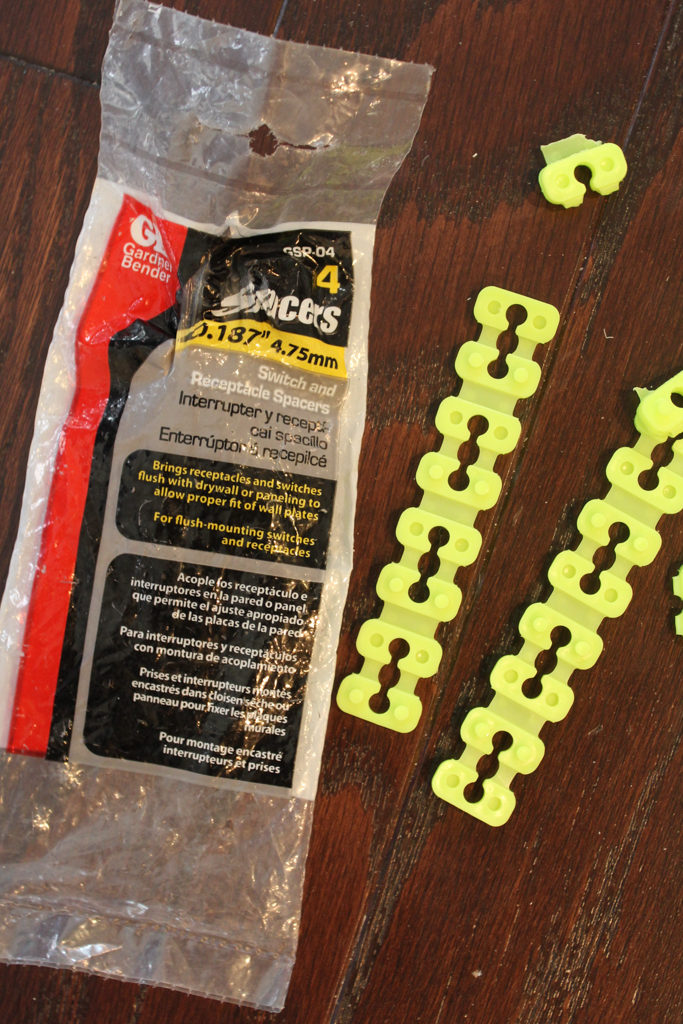
When you go to re-attach your outlet covers they are not going to fit properly due to the extra thickness added from the shiplap boards.
For an easy fix we used these receptacle spacers (we used these same spacers when we tiled the kitchen backsplash in our first home). You simply fold them up and install them behind the receptacle so that your outlet cover fits flush with the wall.
If you look closely you can barely see the lime green spacers in the photo above.
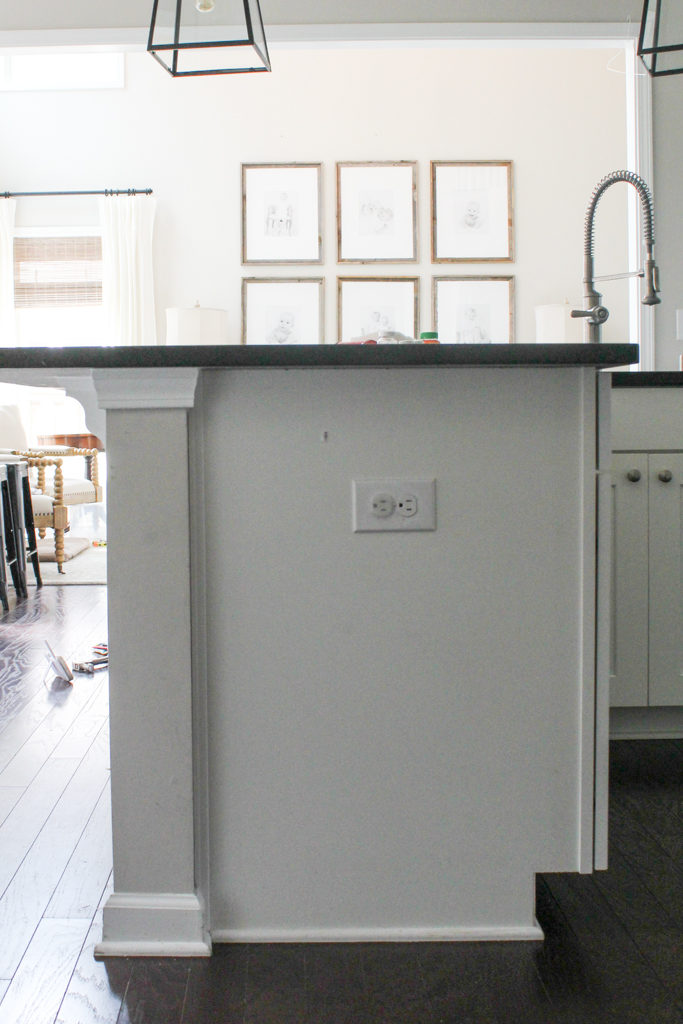
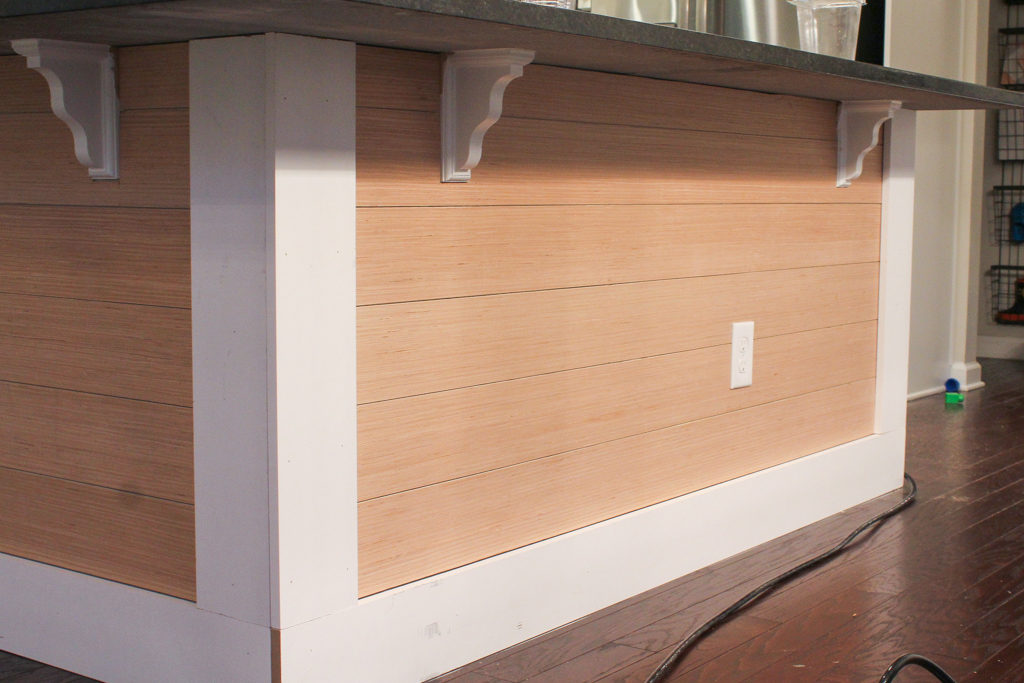
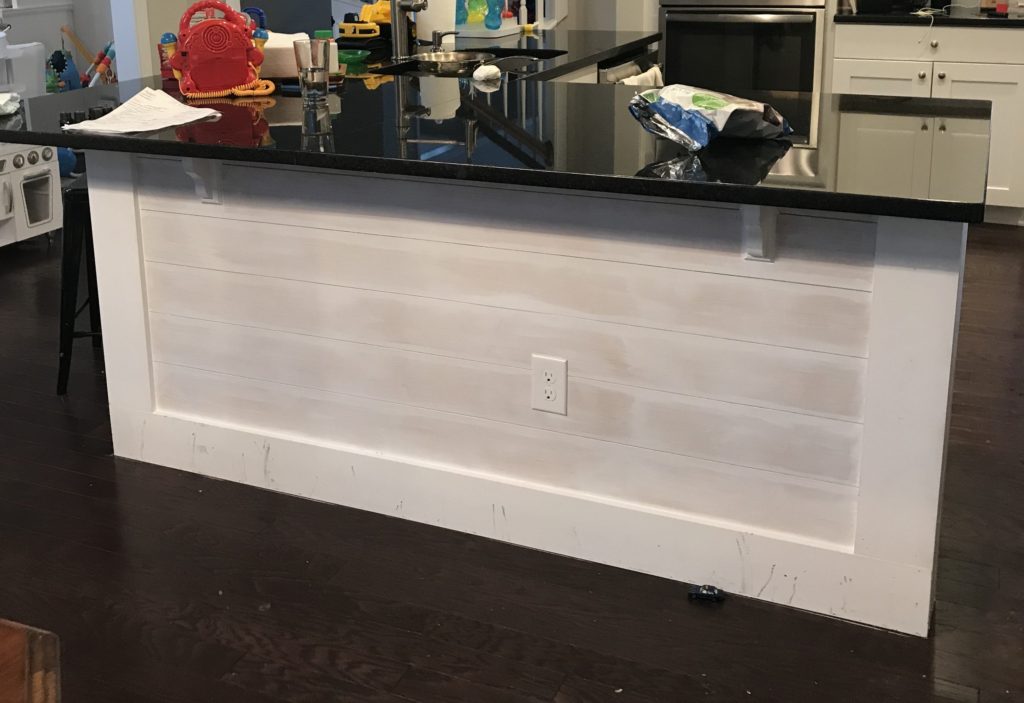
DIY Kitchen Island Shiplap: Before and After
Pendant Lights | Kitchen Faucet | Barstools (not pictured because the baby kept pulling them over on himself)
One last look at the before:
And the after! So. much. better. It cracks me up that you can almost always spot a child or a baby monitor (or both in this case) in all of my pictures.
For more inspiration be sure to follow along on Pinterest and on Instagram!
This post contains affiliate links. That means that if you make a qualifying purchase I may receive a small commission at no extra cost to you. Thank you for supporting the blog!