How to Build Your Own DIY Built-Ins Using Pre-Assembled Stock Cabinets
Well, this DIY built-ins blog post has been about three years in the making! We completed these DIY built-ins in summer 2017, but I just never got around to putting everything together in a blog post. Better late than never, right? 🙂
DIY Built-Ins
I had dreams of building my own DIY built-ins on the blank wall in our two story family room from the moment we started building our house.
Traditional built-ins are timeless, visually appealing, and add both character and tons of storage. They also add lots of value! And if you read THIS post, you know that we built our house with resale value in mind.
The only problem? Hiring a professional to build and install built-ins will cost you thousands of dollars (yes, multiple thousands at minimum!).
CostHelper.com says:
“Hiring a finish carpenter or a furniture builder to create one-of-a-kind built-in shelving units for your home can require hours of labor. Total costs can run $2,000-$5,000 and up, not including the cost of lumber and other materials.”
DIY Built-Ins Tutorial
As usual, I thought to myself, “I think I can build those.” 🙂
My parents had beautiful built-ins at our house growing up. We lived with them when John Davis was a baby while we were in between our first house and our second house. Every day I would stroll, bounce, and rock him around their family room to get him down for a nap. And while I did, I would study their built-ins! I studied how they were built and how they were put together. I did this everyday for a few months and by the end of it I was fully confident I could recreate them myself. : )
Built-ins are fully customized to each individual space, so each and every built-in is different. Unless we have the exact same room, the dimensions and scale of my built-ins will likely be different than yours!
So instead of a detailed DIY built-in “tutorial”, this post will walk you through the general steps we took to build our own custom DIY built-ins so that you can recreate and customize them in your own space!
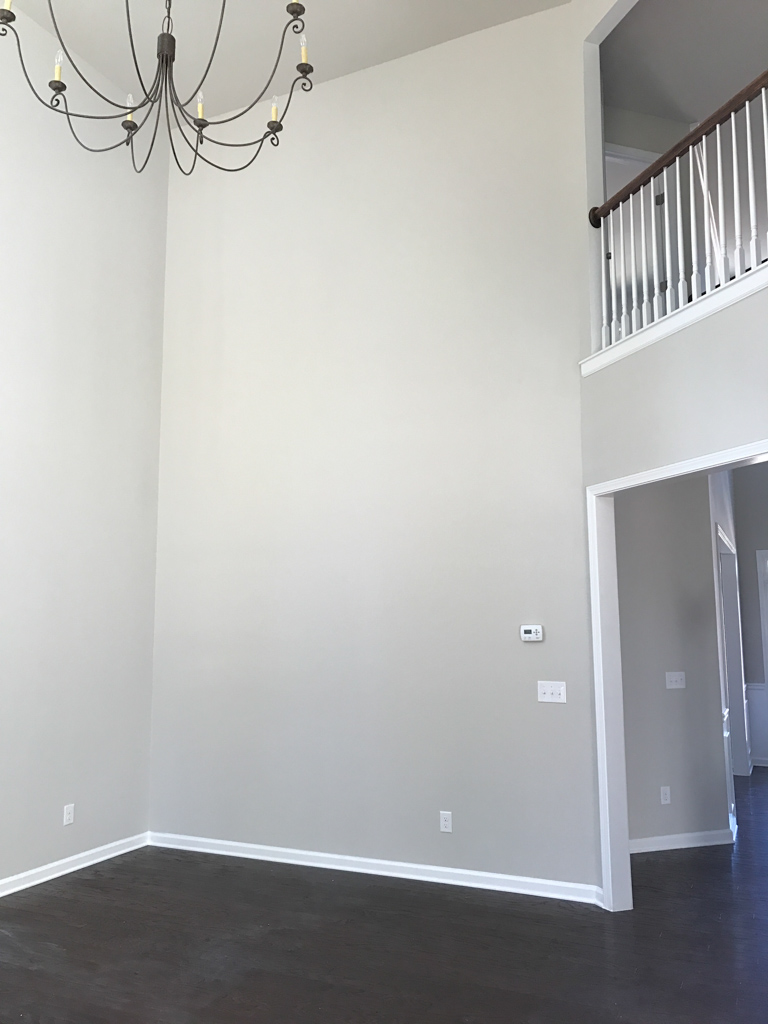
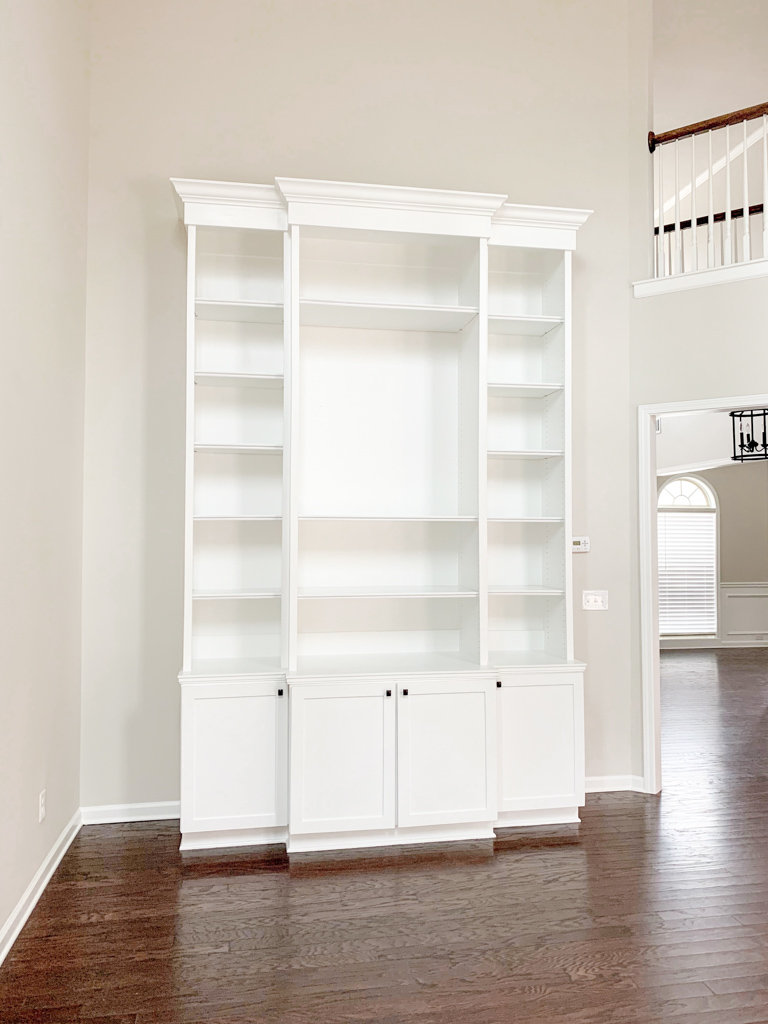
DIY Built-Ins: Before
Here is the family room before we built and installed our DIY built-ins. Lots and lots of blank drywall! Wasn’t this wall just screaming for some custom built-ins?!
The large two story room was lacking character and warmth. (You can see how we added character with DIY shiplap above the fireplace on the opposite wall HERE, and you can see before and after photos of the entire room HERE.)
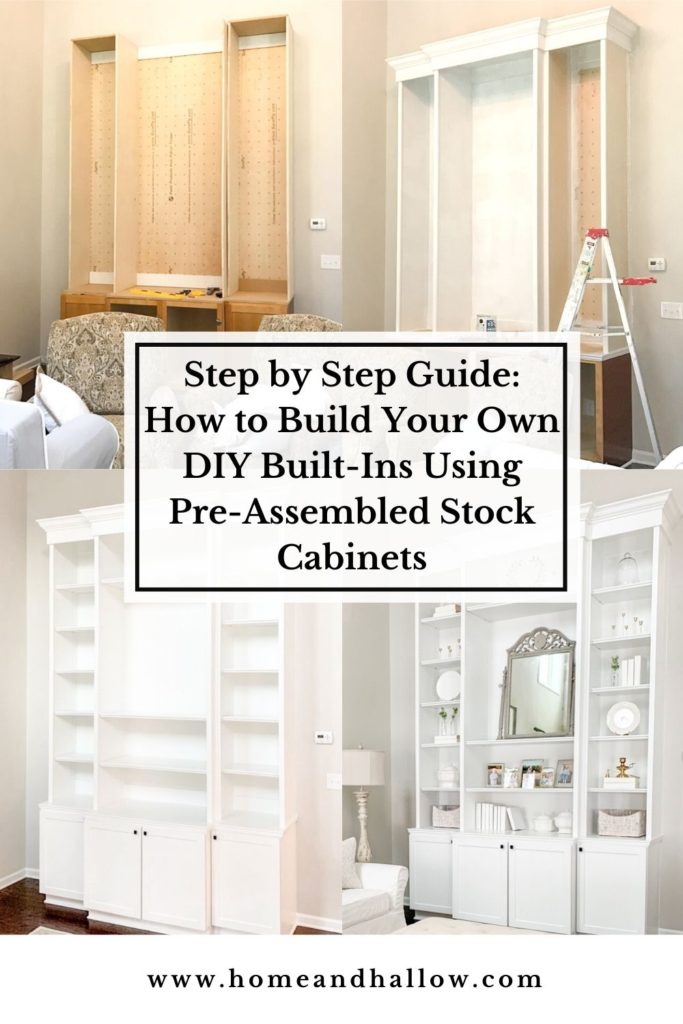
DIY Built-Ins: Before, During & After
Left: Before; Middle: Completed DIY Built-Ins; Right: Styled DIY Built-Ins
And before we get started, here is a look at the transformation of the space.
DIY Built-Ins Step One: Base Cabinets
We decided to make things easier on ourselves by buying base cabinets rather than building our own.
You are probably wondering what in the world are these photos?!
Well… you know I’m always looking for a good deal. I found an ad on Craigslist for a warehouse full of cabinets in downtown Atlanta. Seemed legit enough.
And it was legit, because we got four large, high-quality, solid wood base cabinets (shaker style that perfectly matched our kitchen cabinets) for around $50 each.
But…. walking through this old warehouse full of cabinets in a not so great area of downtown Atlanta felt somewhat like a scene out of a horror movie. We also wondered if they were selling more than just cabinets… if you get my drift.

So we paid for our cabinets, I ran to my car, and Hubby and Daddy loaded them in the back of the Expedition while I snapped these pictures.
At least it makes for a good story now?!

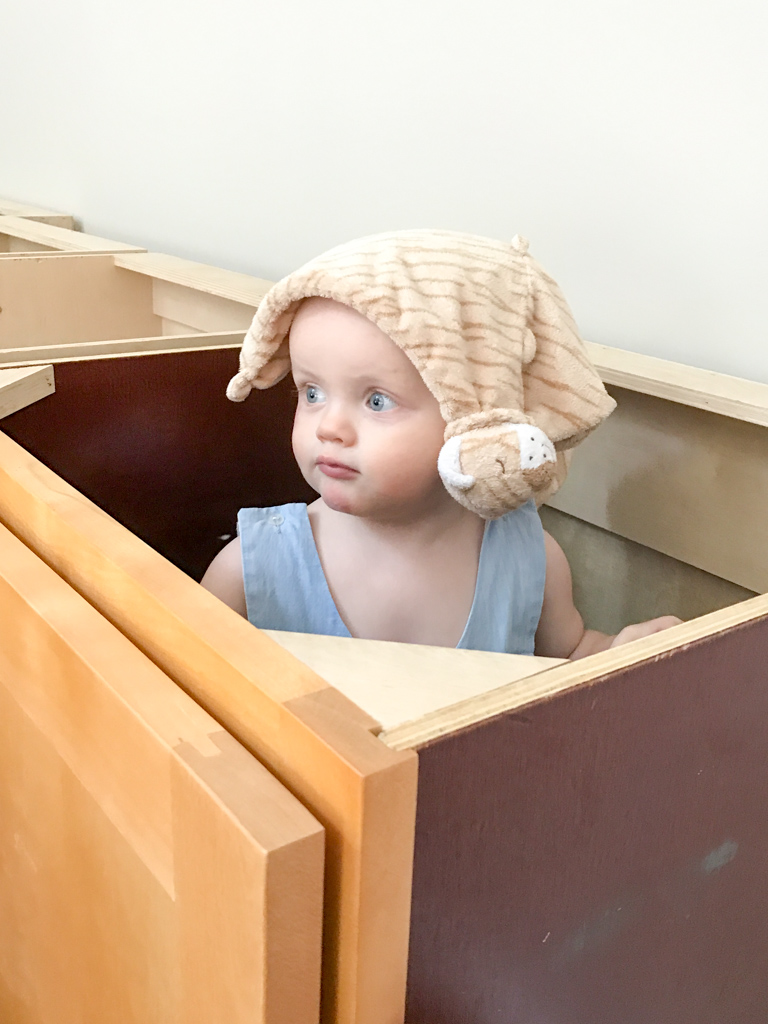
We got the base cabinets home and John Davis thought they made the most fun playground! 🙂
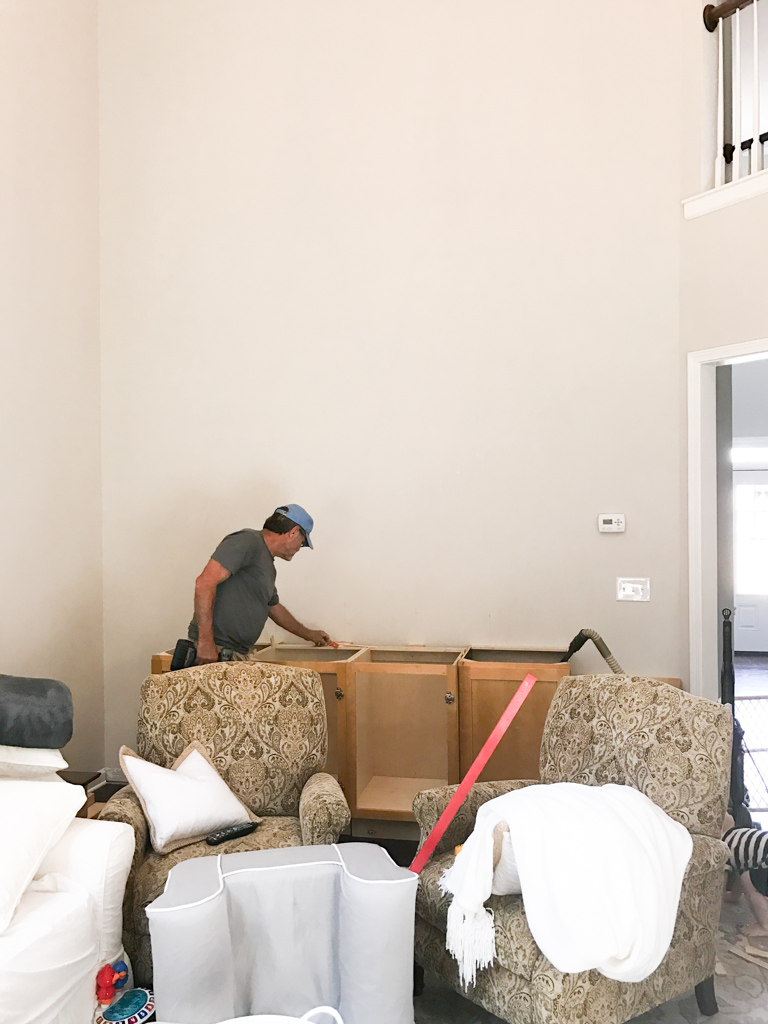
DIY Built-Ins Step Two: Install Base Cabinets
The first step is to securely install your base cabinets to the wall.
You will need to remove the baseboards from the wall. They will be reinstalled around the cabinets when the project is complete. We also removed the doors from the cabinets to make them easier to work with.
Then, use a stud finder to find the studs on the wall where the cabinets will be installed. Use a pencil to mark the stud location directly on the drywall so it is easily visible.
The most important step is making sure that the cabinets are completely plumb and level.
Most likely your cabinets and your walls/floor will not be perfectly level to begin with. Use shims and a level to ensure that everything is 100% plumb and level.

Once everything is level, attach the base cabinets to the wall. Drive screws through the back of the cabinets directly into the studs.
You will also need to attach the cabinets themselves together. We did this by driving screws through the face frames of each cabinet into the adjoining cabinet.
In the photo above you can see how we used shims in between the cabinets (you can’t see them in the photo but there are also shims underneath the cabinet bases).
We also added 2×4’s behind the two middle cabinets. This pushed the two middle cabinets out in front of the side cabinets. This was simply a design choice and was purely to create some visual interest on the front of the built-ins.
DIY Built-Ins Step Three: Select Plywood
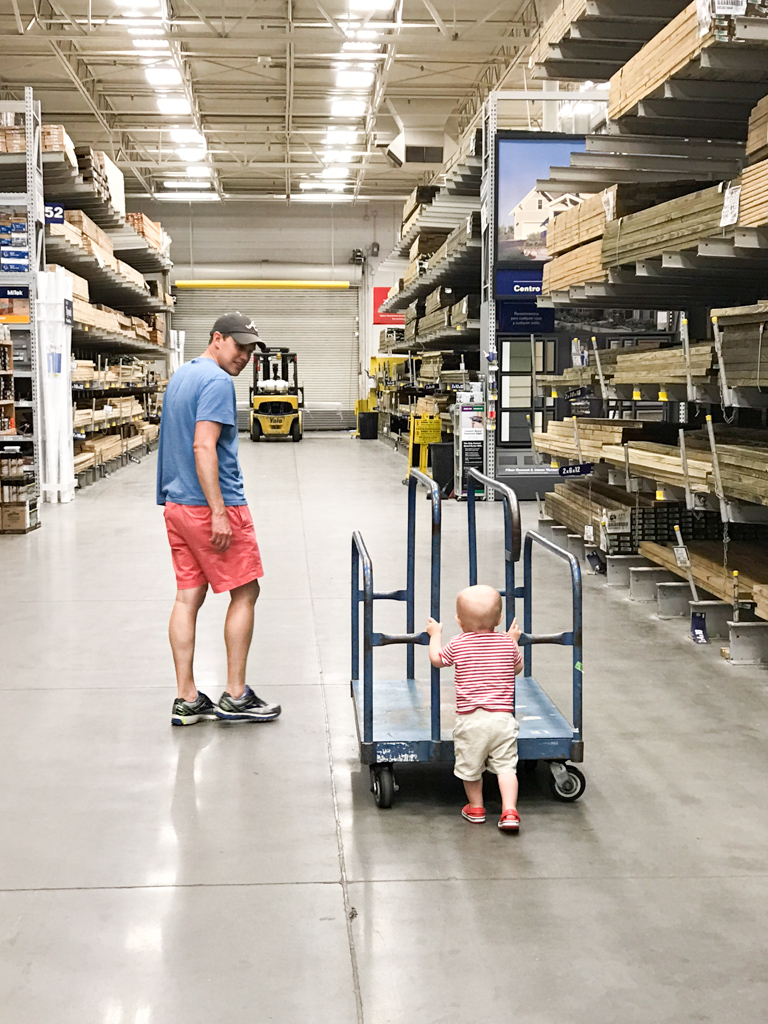
Once the base cabinets were installed we were ready to start building up!
We headed to Lowe’s to select plywood and have the large pieces cut in store.

We went with our measurements in hand so that Lowe’s could make the large wood cuts for us.
This makes transporting the plywood easier, and it saved us a little work at home!
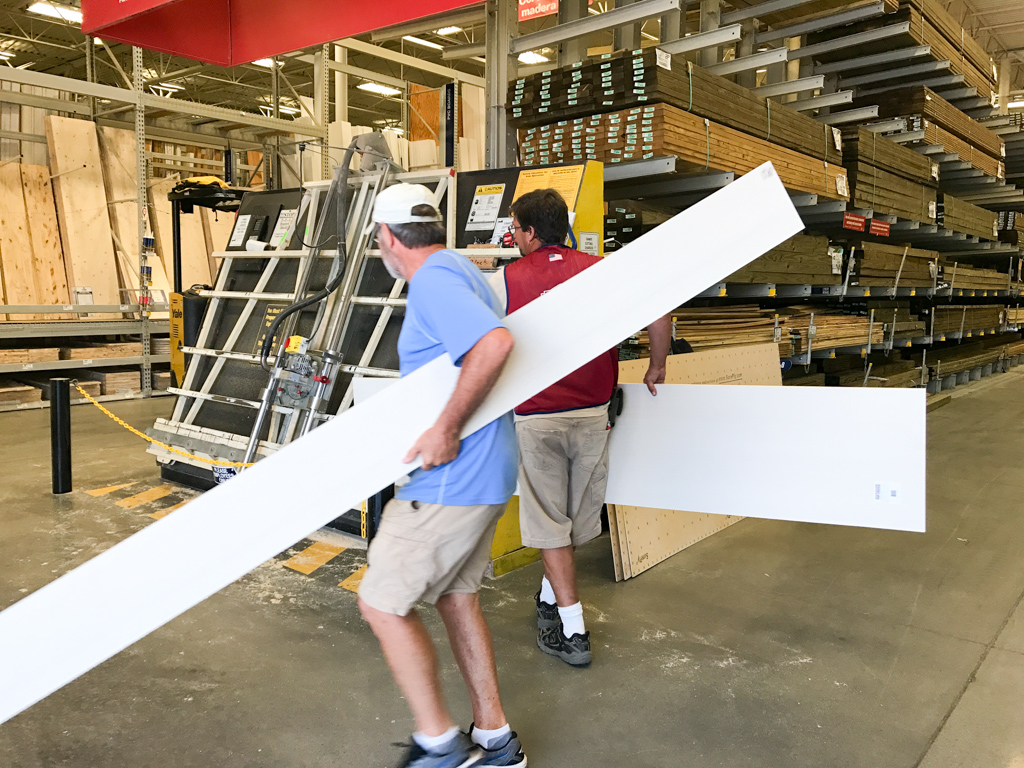
We went with a high-quality, premium grade plywood. Definitely more pricey, but the quality of the wood is very important when it comes to built-ins!
DIY Built-Ins Step Four: Install Base Cabinet Top

To determine the measurement for our top, we measured:
the length of the installed base cabinets x the width of the base cabinets at the widest point (these are the dimensions Lowe’s cut for us)
Since the two middle cabinets stick out a little bit, the top is not a perfect rectangle. We set the wood on top of the base cabinets, then used a pencil to mark the two recessed areas that needed to be cut out on each side.
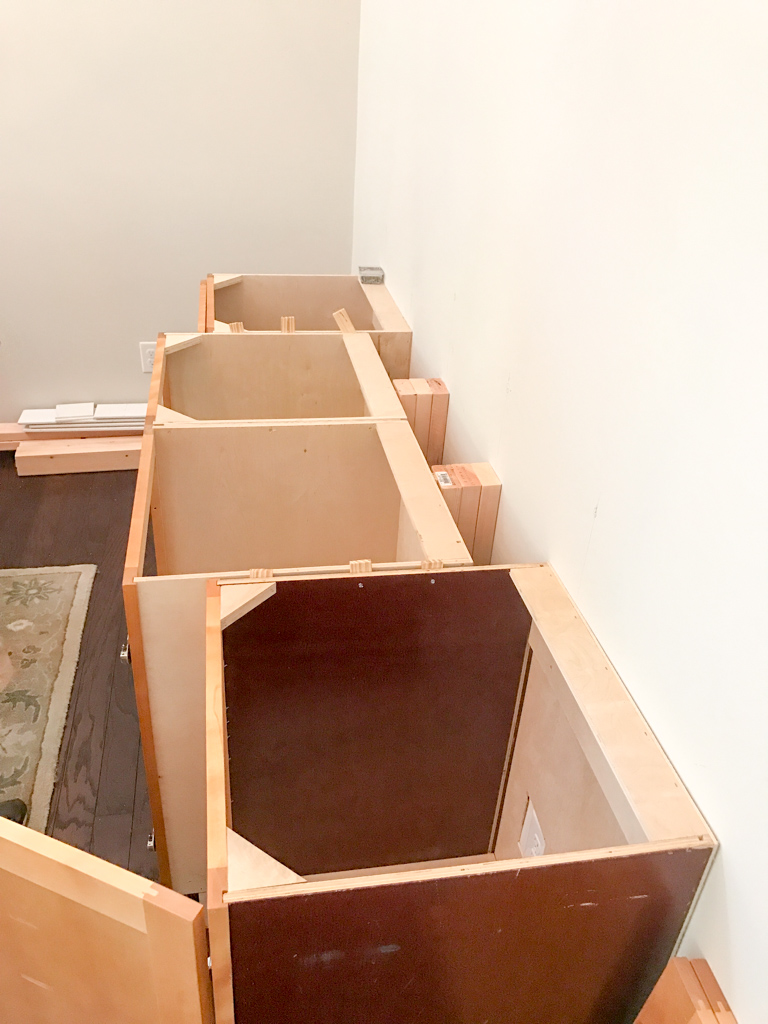
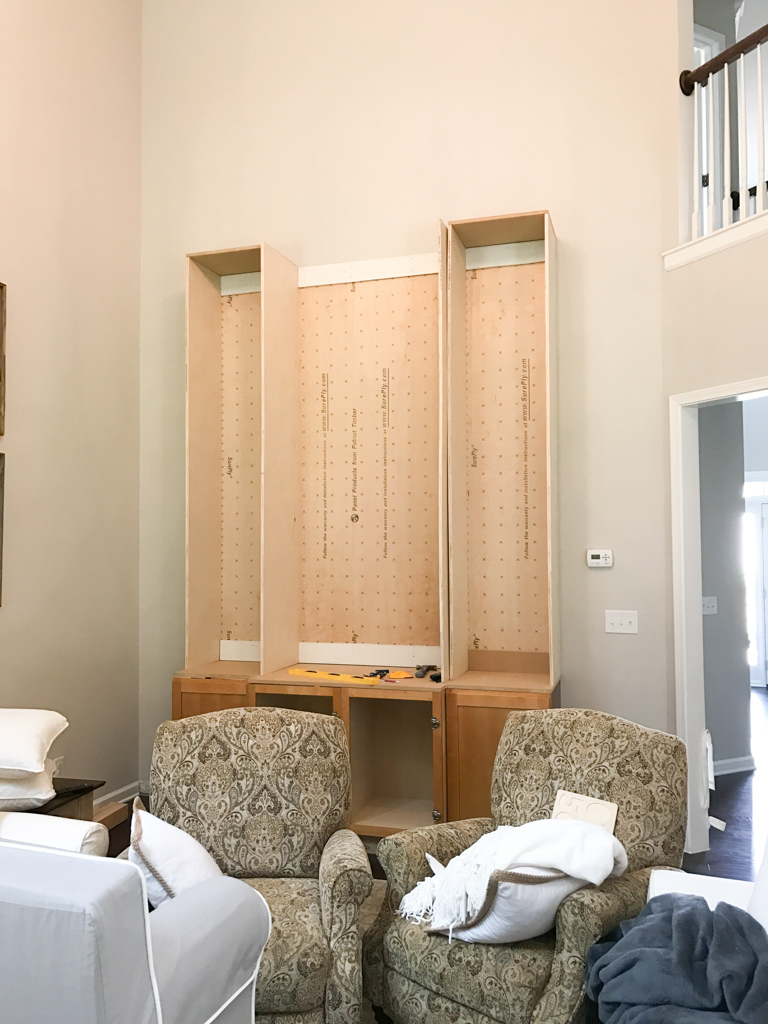
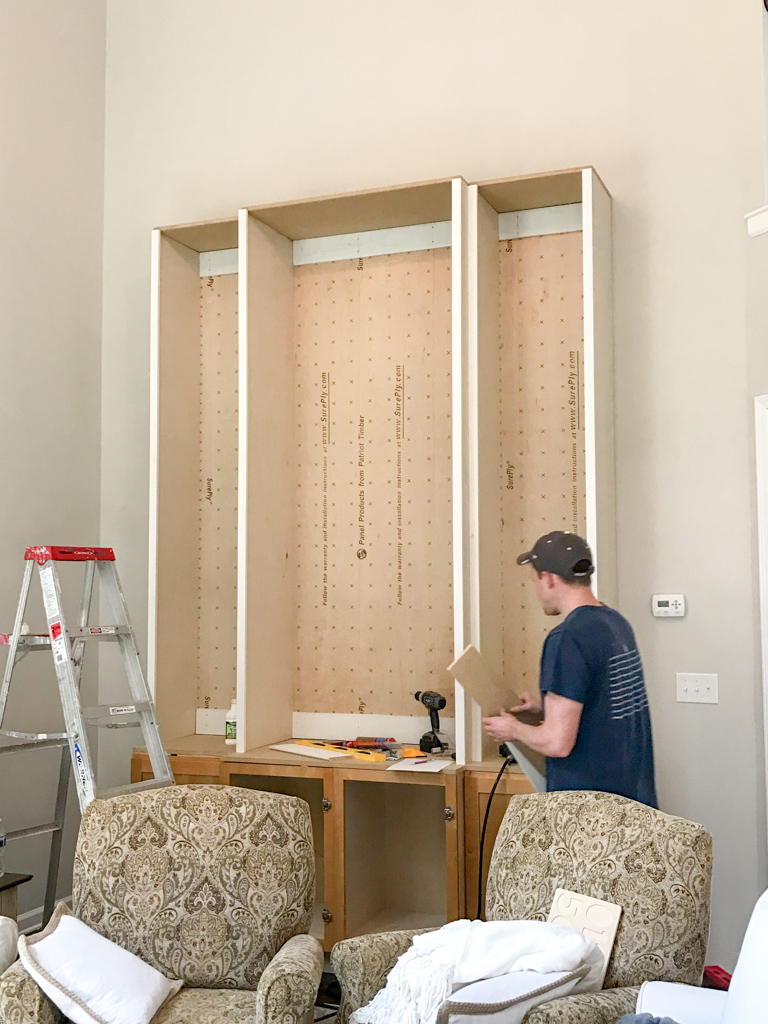
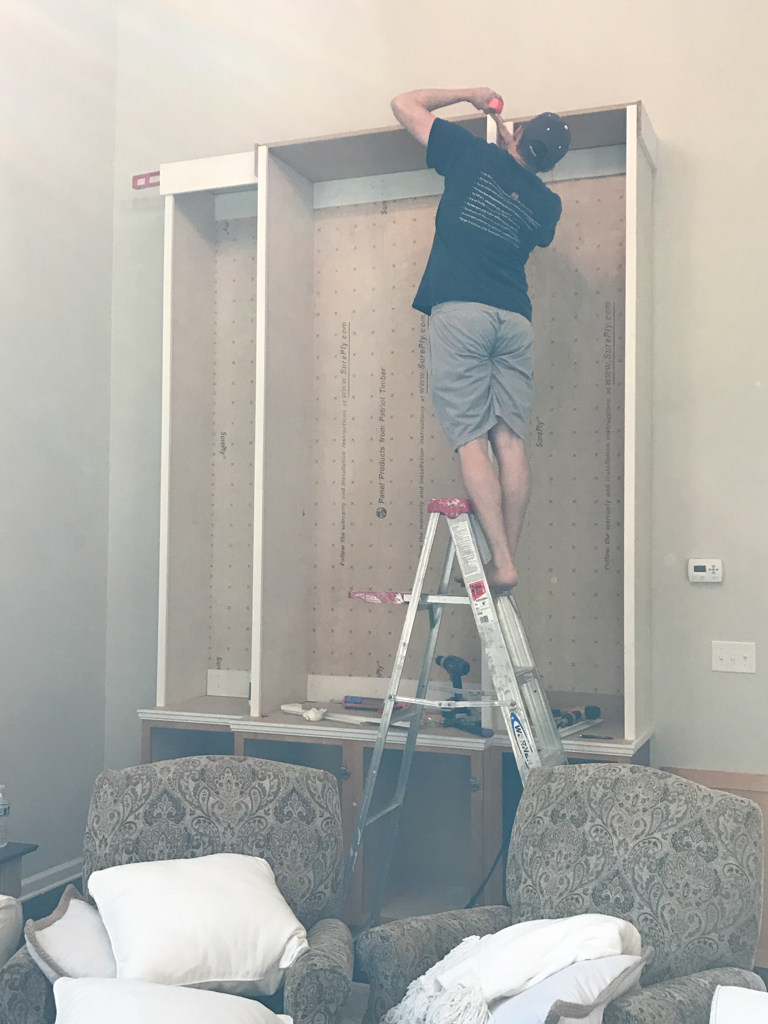
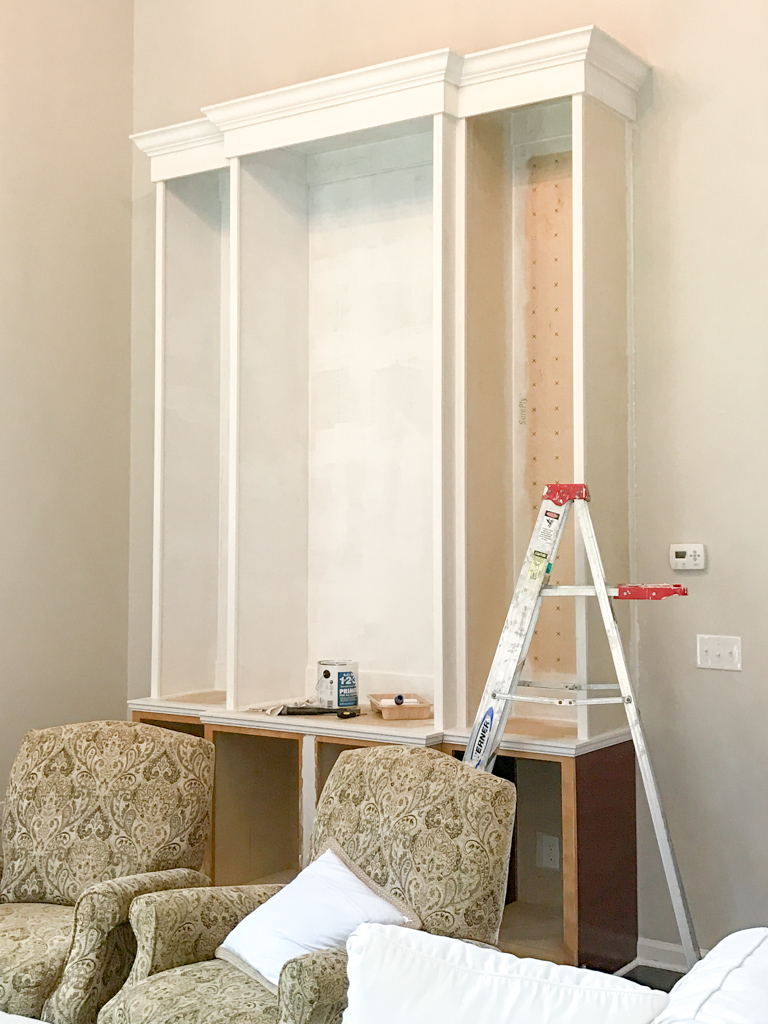
DIY Built-Ins Step Five: Build Top Shelf Columns

Next we constructed three separate “columns” to sit on top of the base cabinets.
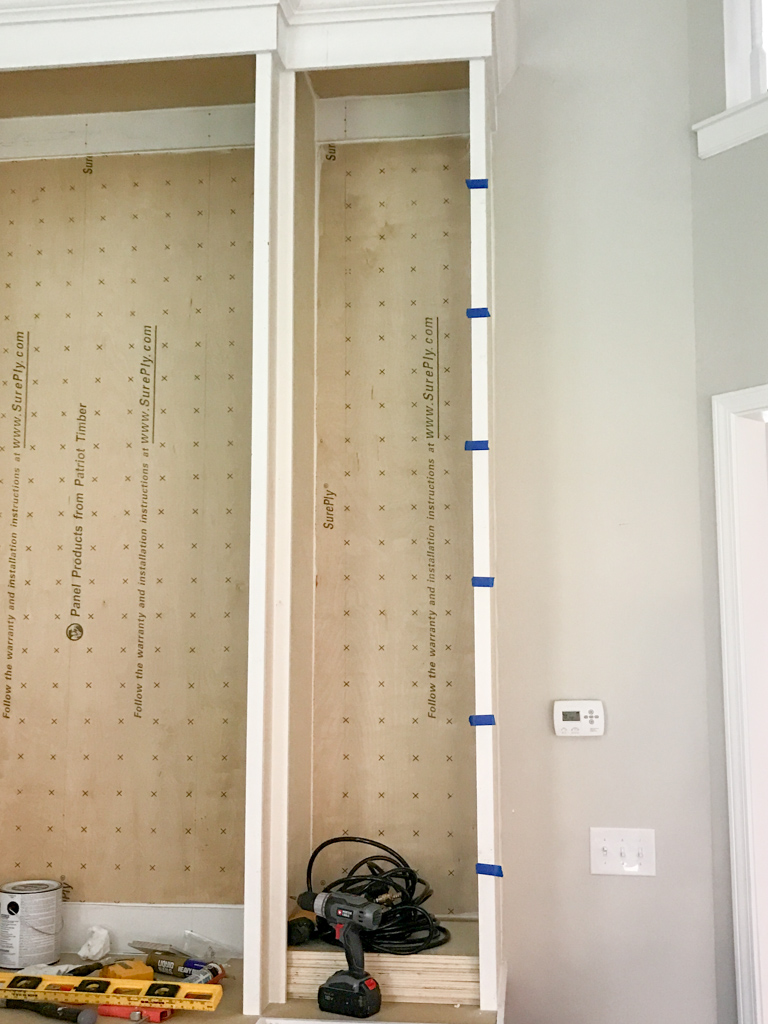
Each column was made of a two plywood sides, a plywood top, a thin wood backing, and two support braces (one at the top and one at the bottom).
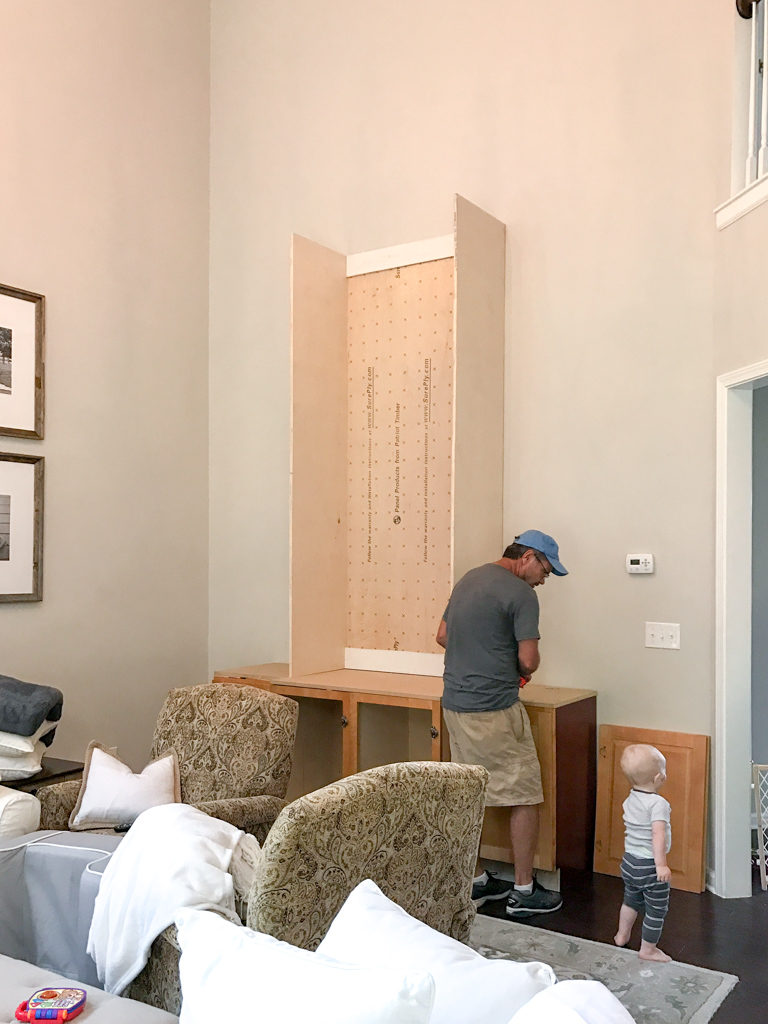
Each “column” was attached directly into the studs, and each column was attached to one another on each side.
In the phot0 above you can see where the wood was slightly bowed, creating a gap between the two columns on the right. This was fixed when we attached the two columns together. (But a good reminder to always check your wood in the store!!).
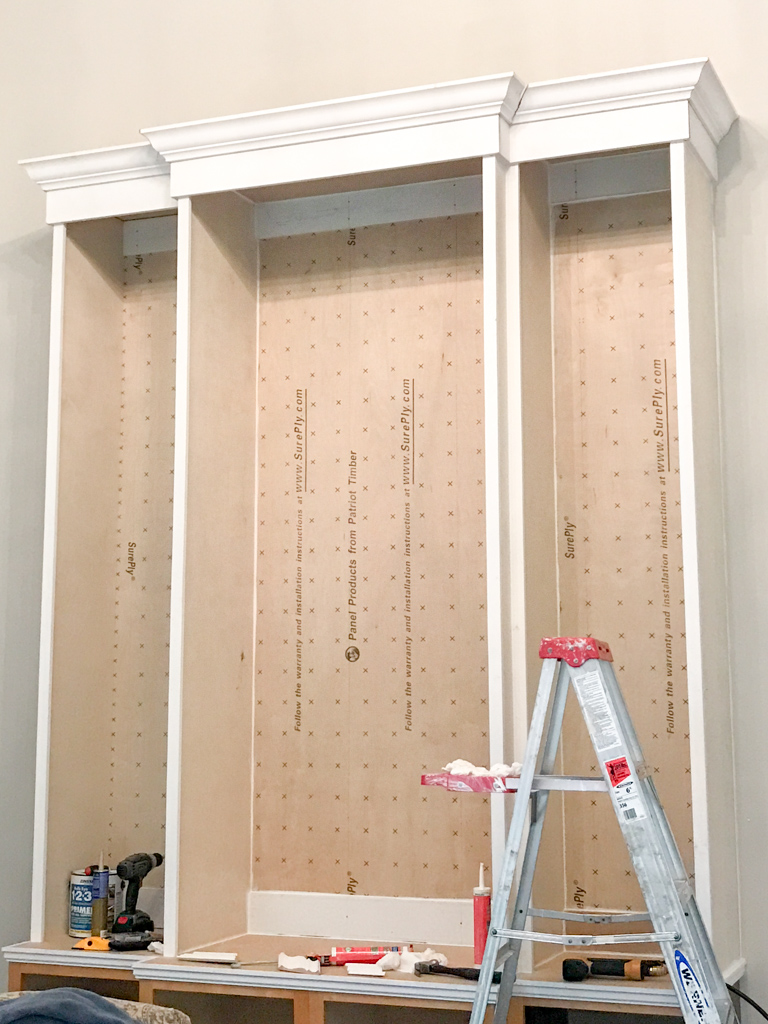
DIY Built-Ins Step Six: Trim Front of Shelves
We used 1×2’s to trim out the front raw edges of the shelves.
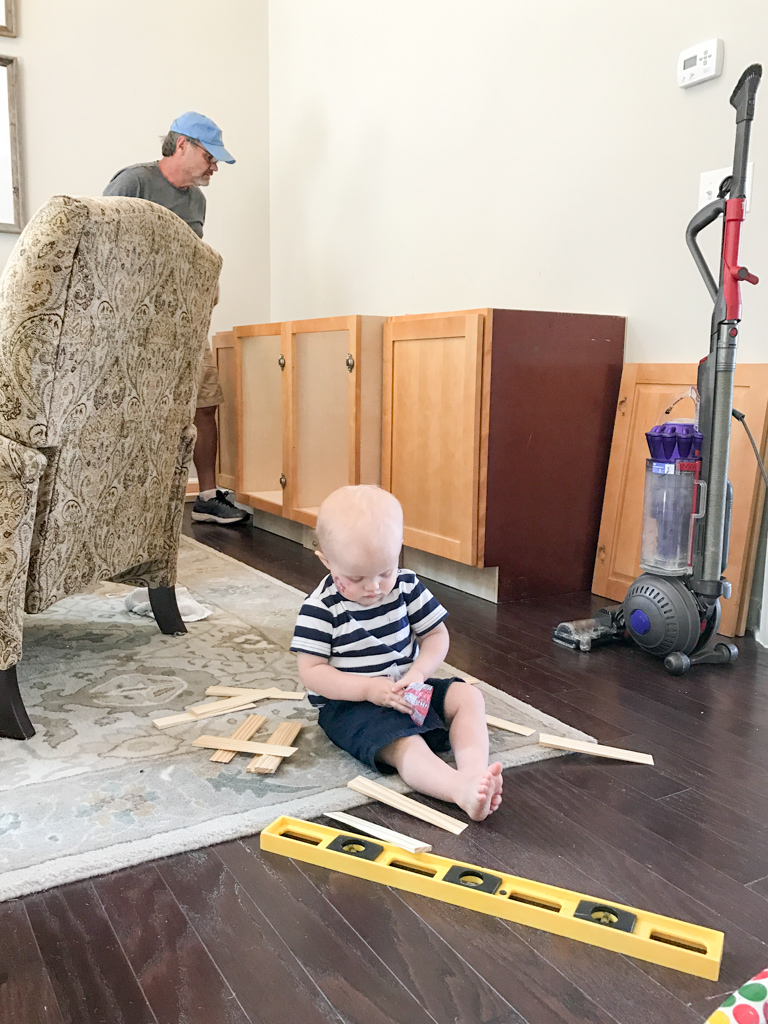
John Davis loved helping once again : )
And a few more pictures of him for memory sake. He was such a baby!
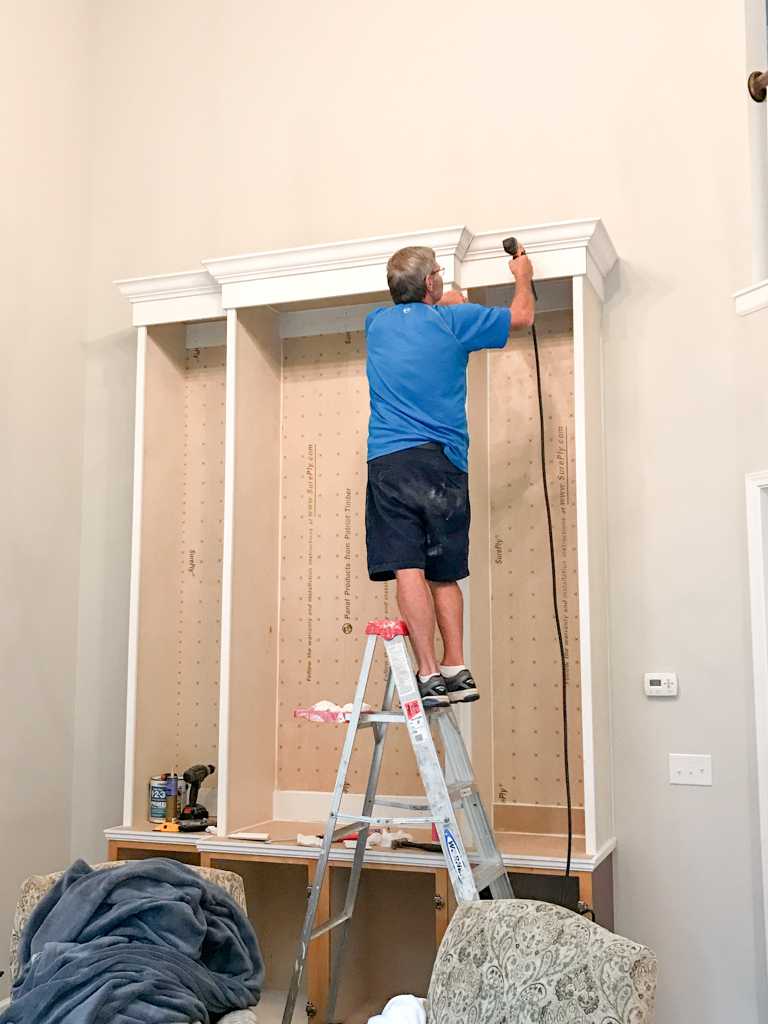
DIY Built-Ins Step Seven: Trim out the Top and Bottom
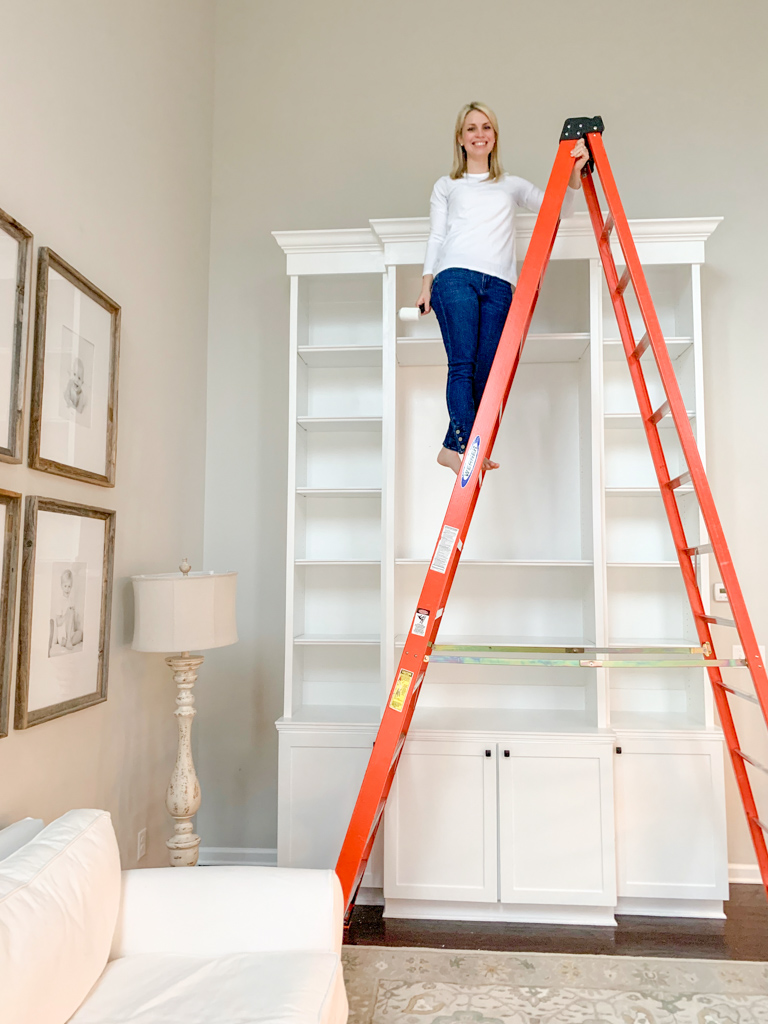
We used 1×5 and crown molding to trim out the top of the bookshelves.
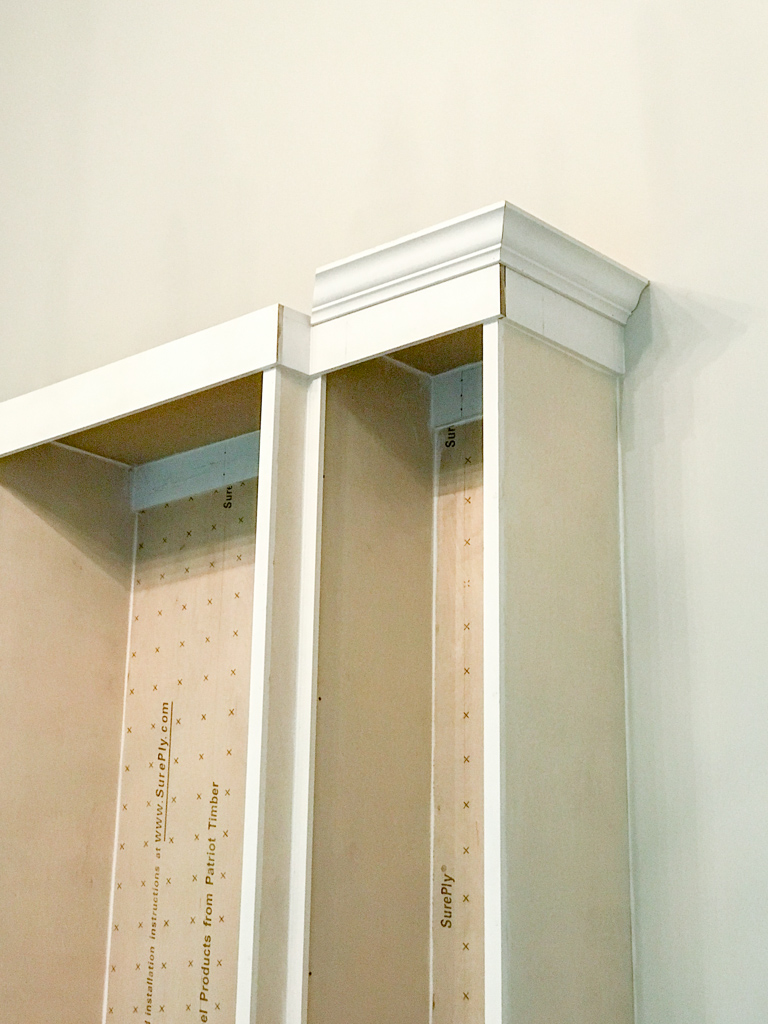
Cutting and installing crown molding takes time and practice!
My brother is a pro and can basically do it with his eyes closed. And he makes perfect cuts every single time! (He says that if you can fit a credit card in between the boards then your gap is too big! 🙂 )
He made “template cuts” for us to use as reference: both “inside” cuts and “outside” cuts. I can’t say that I fully understand it, but as long as I use his templates as a guide, I can make the cuts!
Lets just say that caulk is my best friend, because I could fit an entire wallet full of credit cards in between some of my cuts! 😉
We used our brad nailed to install the crown molding on top of the 1×5.
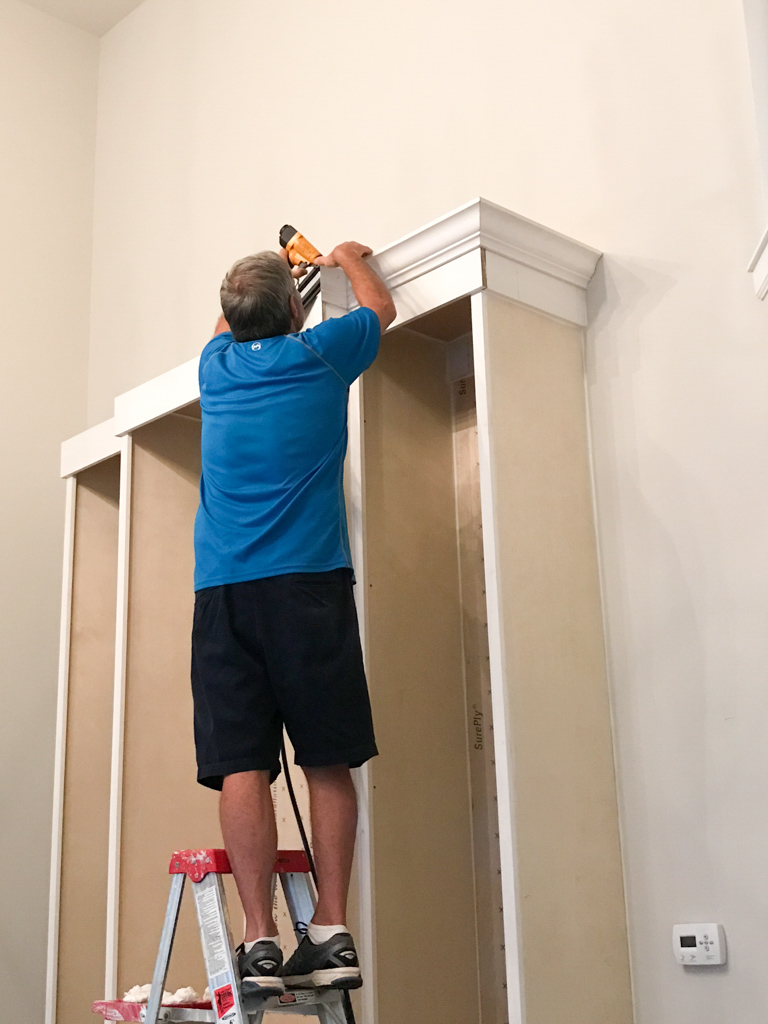
Daddy is always willing to help me with my projects and I love spending time together working on projects with him.
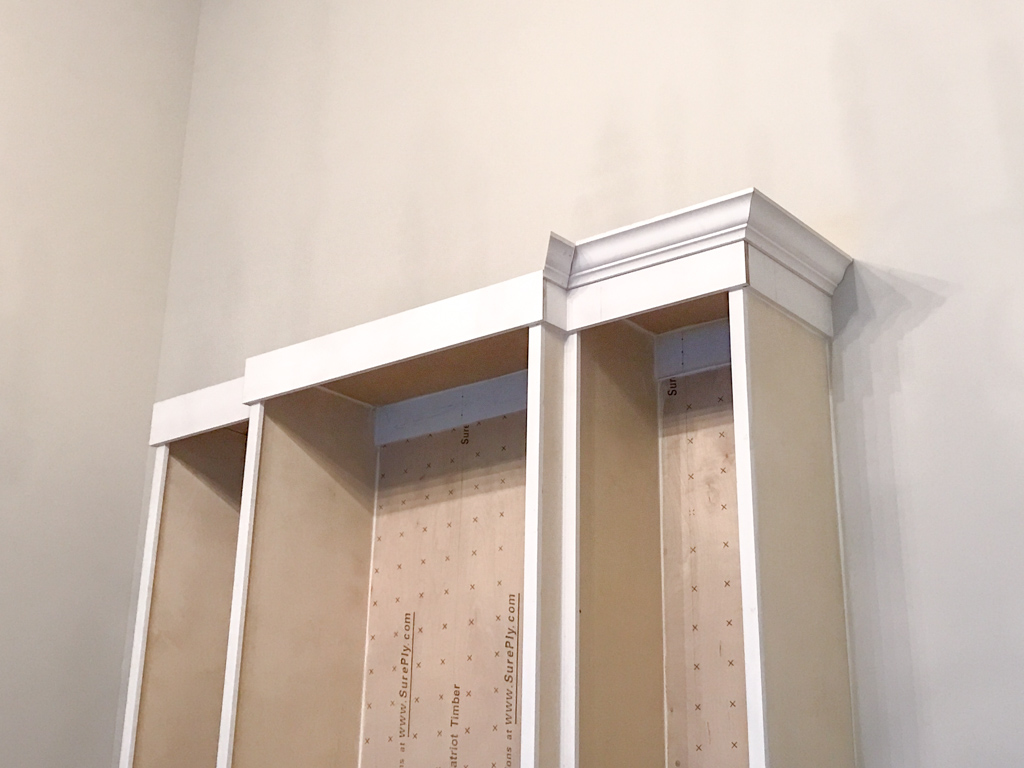
We also used decorative trim to trip out the raw edge of the plywood at the bottom (the piece that acts as the “top” of the base cabinets).
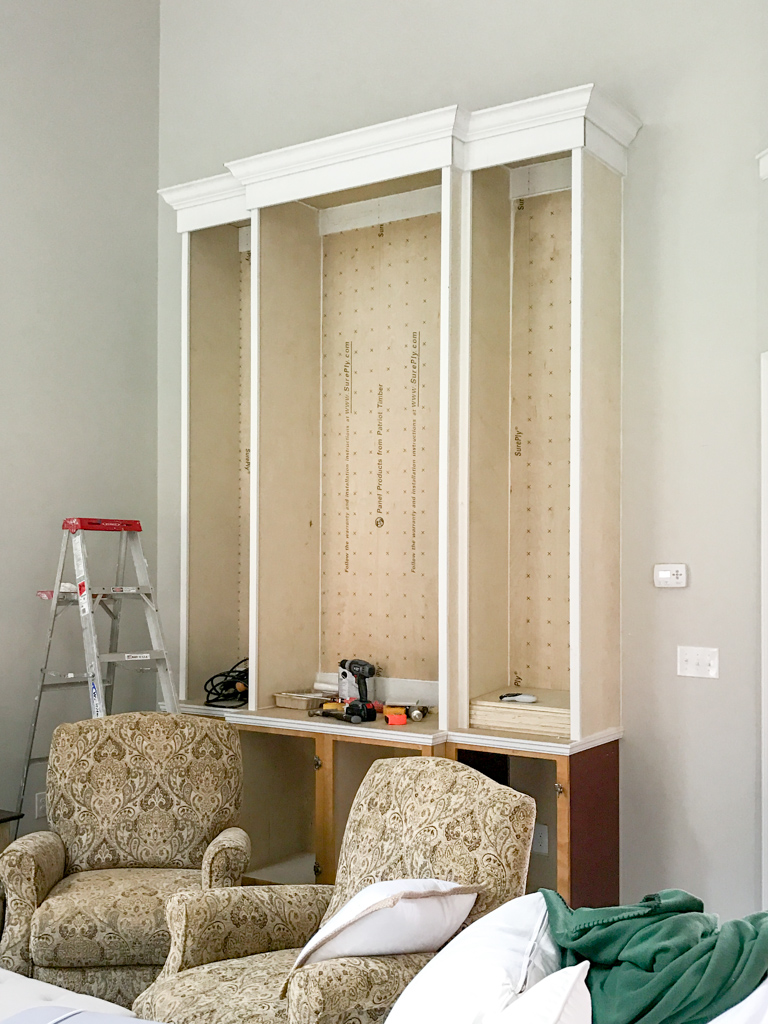
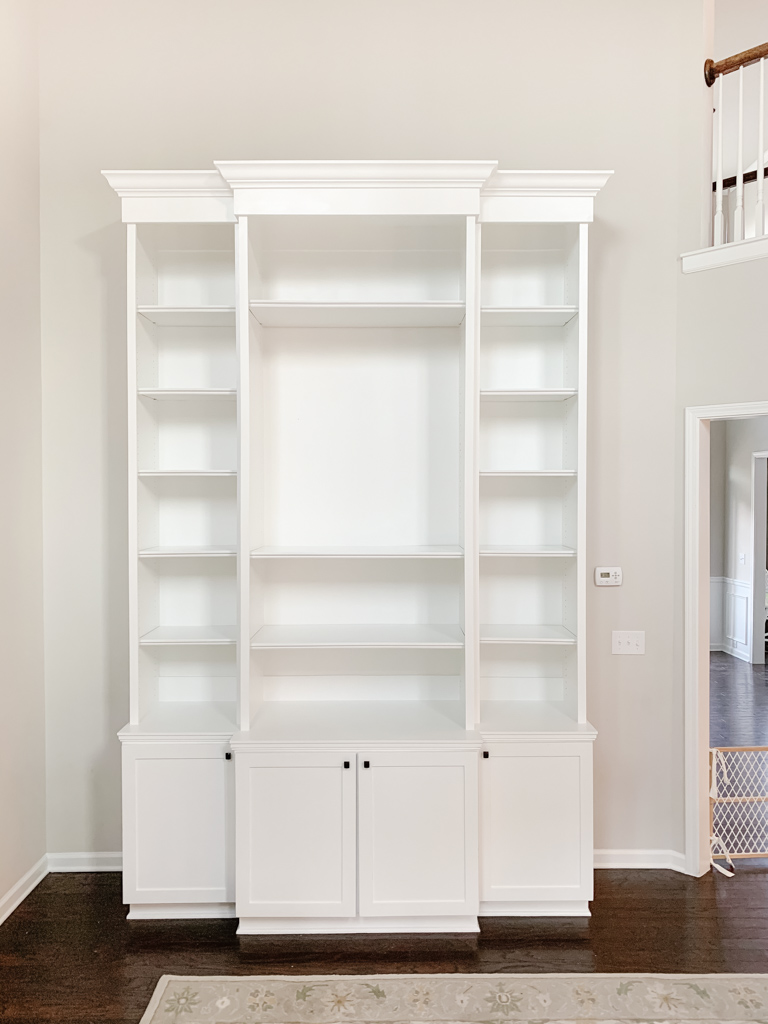
A look at the DIY built-ins fully trimmed out, caulked, and ready for paint.
DIY Built-Ins Step Eight: Cut Shelves
I used painters tape to visualize and plan out the shelf spacing.
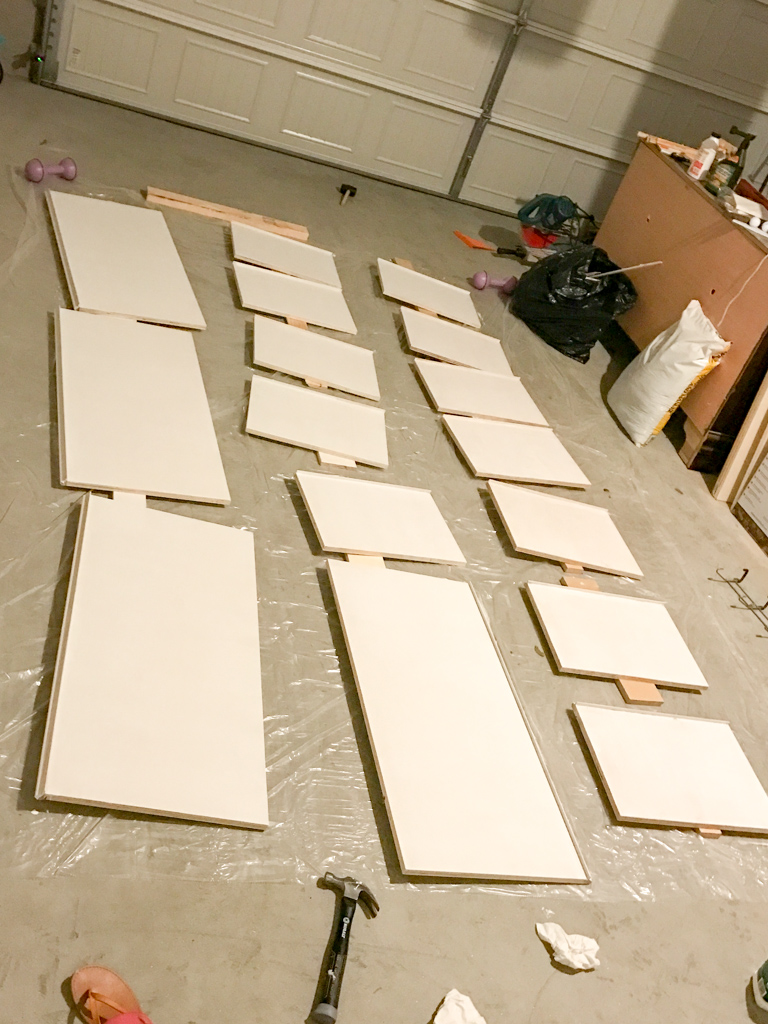
We cut the shelves out of plywood and installed a small decorative trim on the front of each shelf to hide the raw edge.
DIY Built-Ins Step Nine: Caulk, Prime, and Paint
Before painting begins you will need to caulk every joint/crease.
I primed the entire built-in unit with my favorite primer: Zinsser Bulls Eye 1-2-3 Primer.
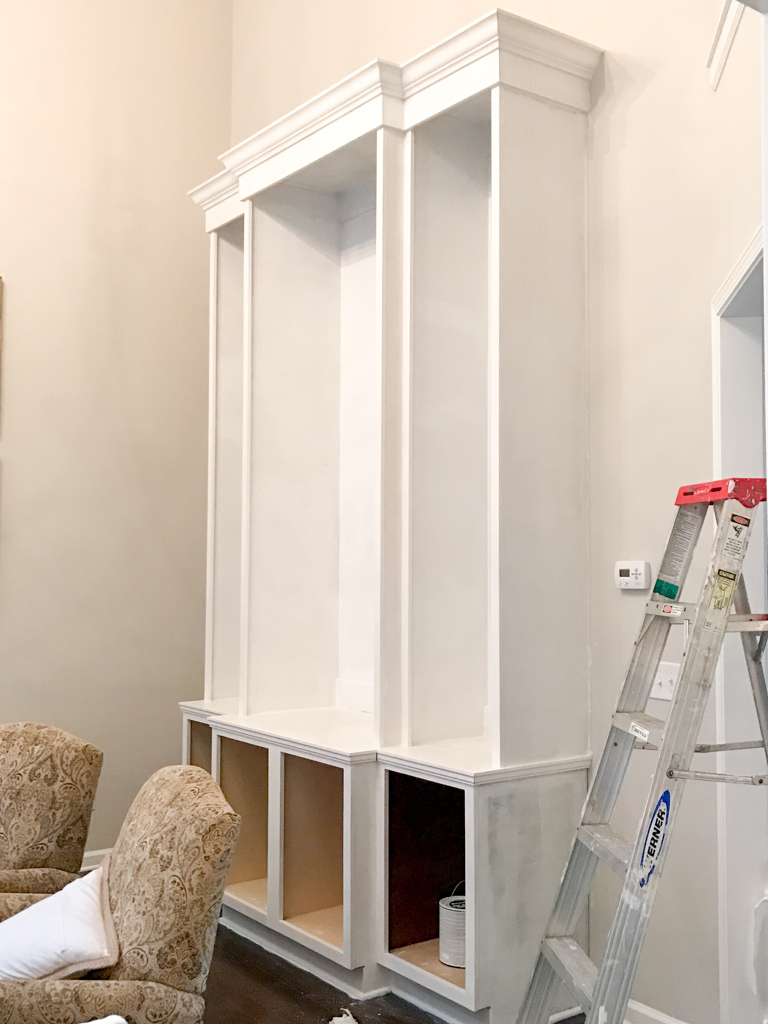
After one coat of primer we painted the entire DIY built-in unit with two coats of white paint. We used the same white paint that the builder used on the white trim in our house. The color is Sherwin Williams “extra white” in semi-gloss.
A paint sprayer would have been a huge time saver for this project! We used foam rollers specifically made for cabinetry to roll the paint on by hand.
As you can see our new spindle chairs arrived in the middle of this project!

You will also need to caulk and paint the seam where the built-in meet the wall.
As you can see we had a little mishap here! We accidentally painted the wall with our exterior gray paint. Oops! At least it was an easy fix.

Painting the DIY built-ins was probably the most time-consuming part of the entire project!
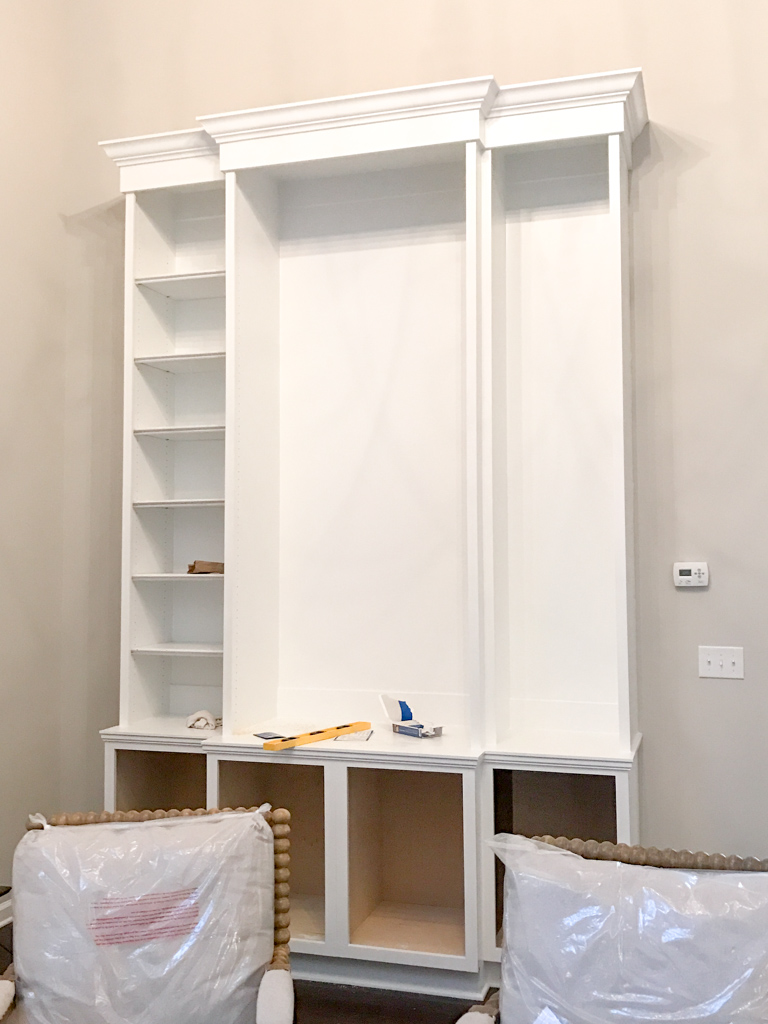
DIY Built-Ins Step Ten: Install Shelves
Here is where we made a beginner mistake! DIY is a constant learning process.
We decided we wanted adjustable shelves (as opposed to fixed) so that we could move and adjust them as we pleased.
We bought THIS Kreg Shelf Pin Jig to make the holes for the pins that hold the shelves.
It worked great for making shelf pin holes!
However, I learned the hard way that it would have been SO much easier to make the pin holes in the wood before we built the shelf columns.
Trying to make the holes on an upright surface where the jig couldn’t be clamped to the edge (because of the trim), made this task so much harder than it should have been.
But I persevered (really didn’t have a choice!) and they turned out great nonetheless.
DIY Built-Ins Step Eleven: Finishing Touches
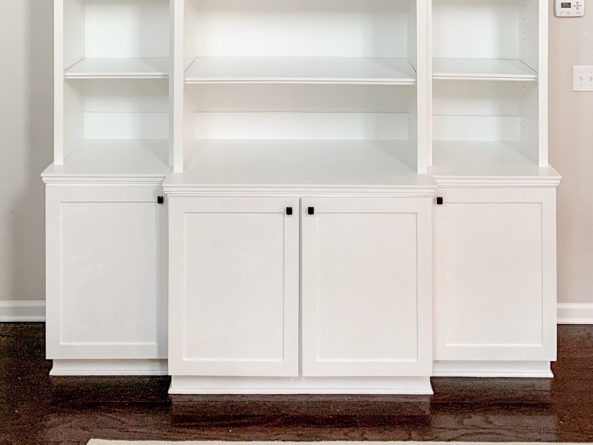
We finished off the DIY built-ins by adding shoe moulding to the front of the base cabinets and by adding black pulls to the cabinets.
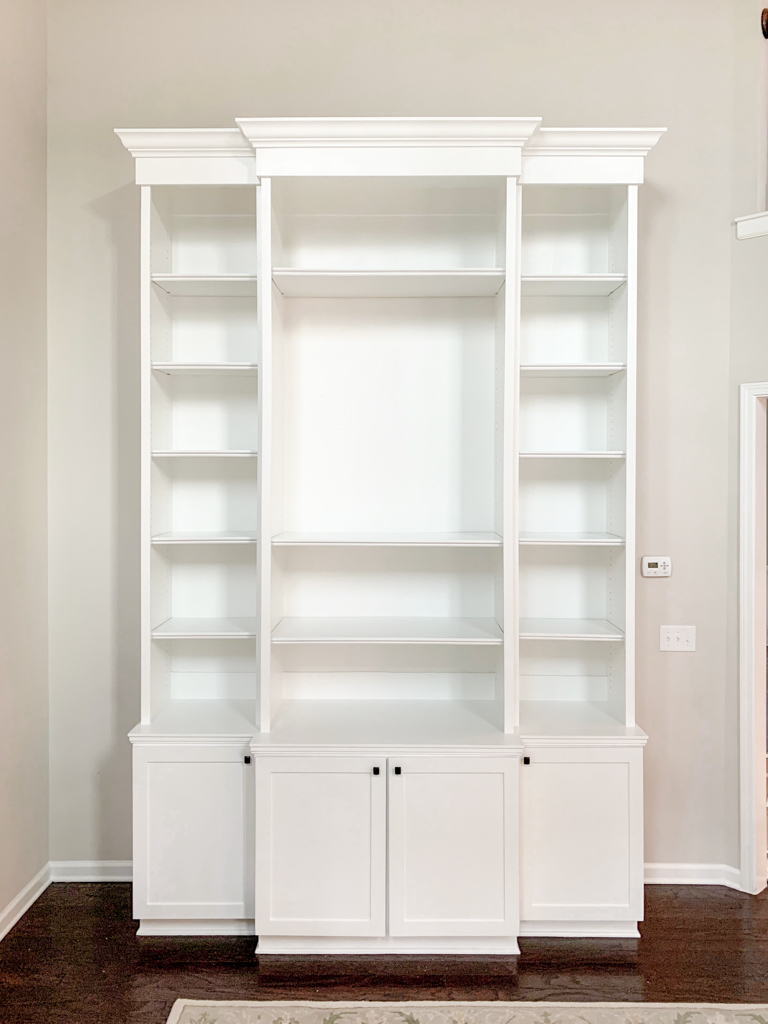
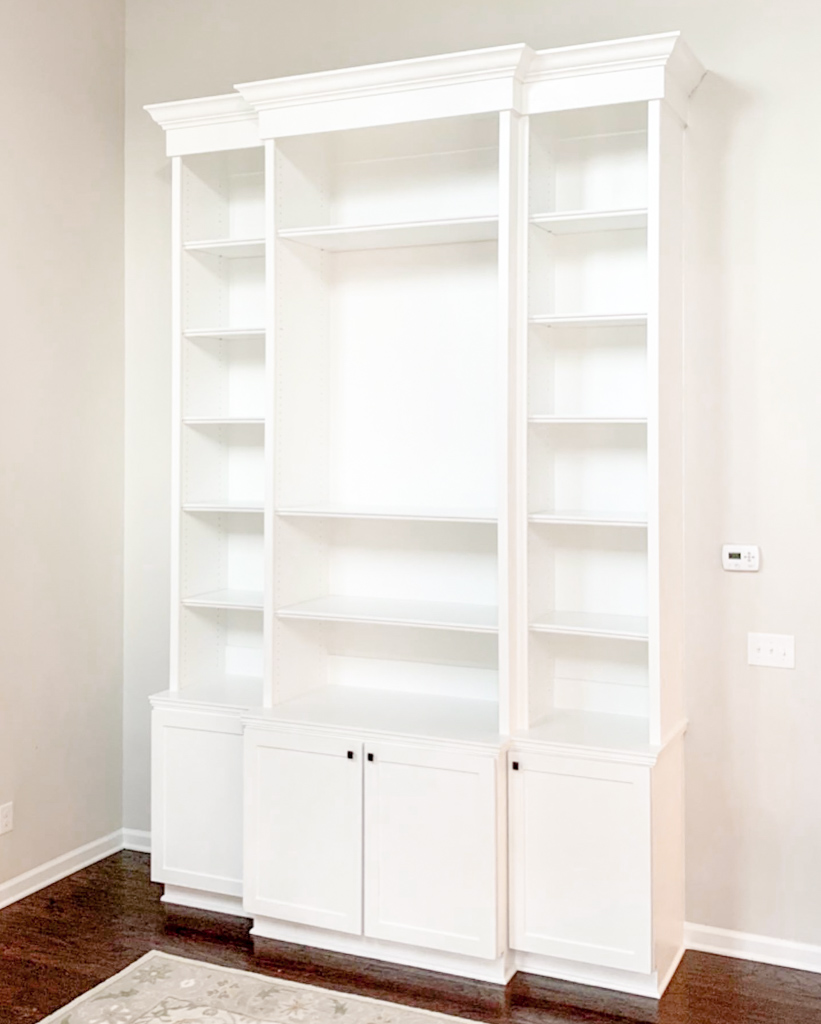
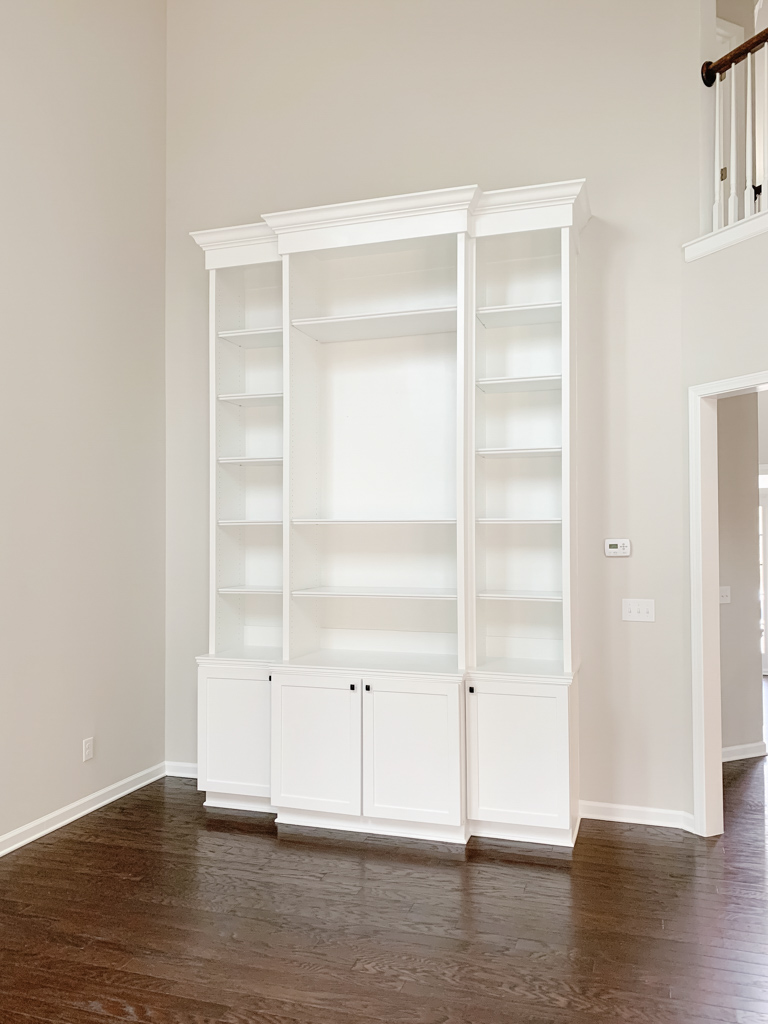
DIY Built-Ins: After

Our DIY built-ins were certainly a labor of love.
We absolutely loved the way our DIY built-ins turned out, and it was so gratifying to see our hard work pay off!
We saved thousands of dollars by DIYing them ourselves and we learned so much in the process.
We ultimately saw our hard work pay off when we sold our house!
I’m hoping we can try our hand at built-ins again when we build our new house : )
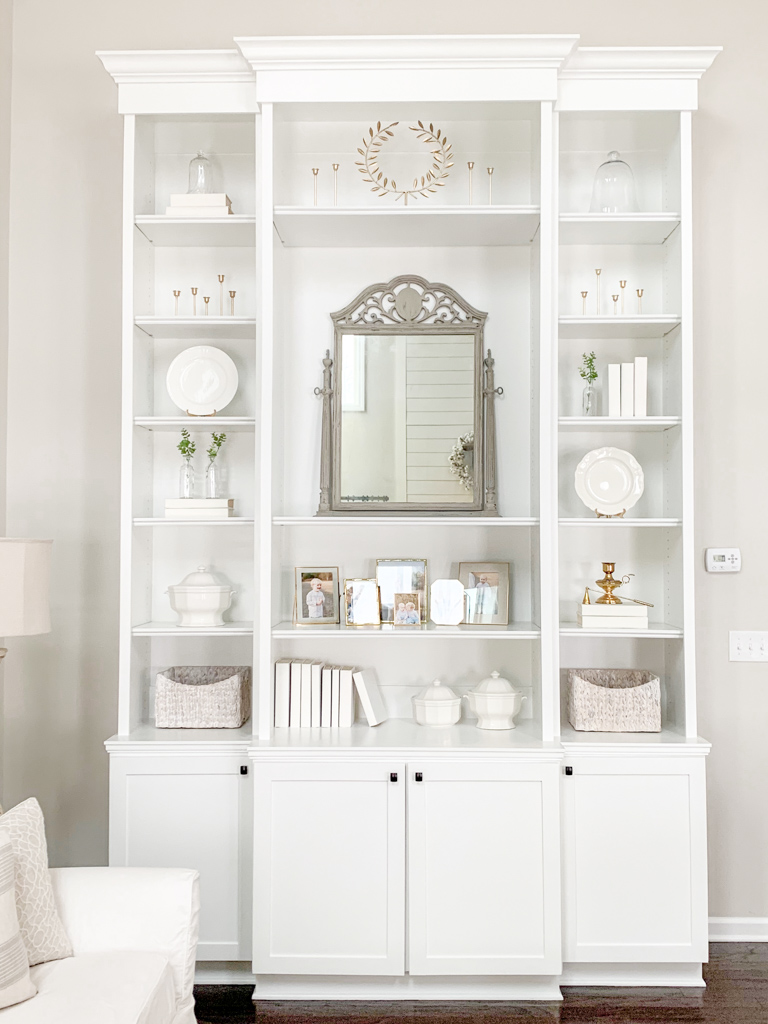
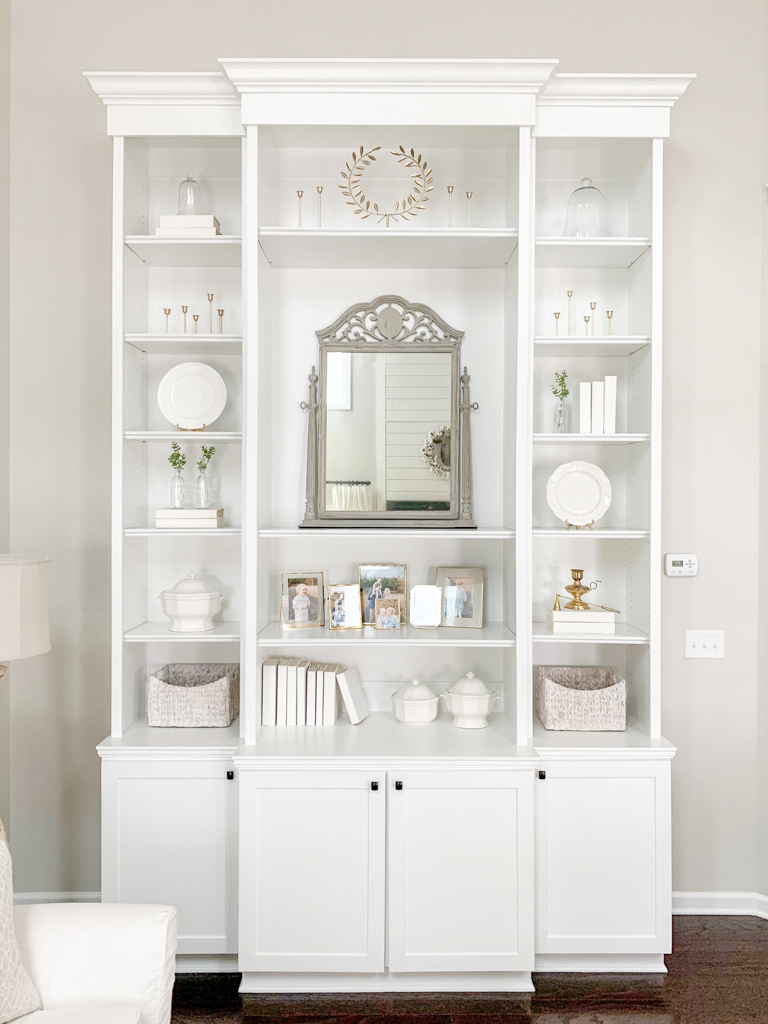
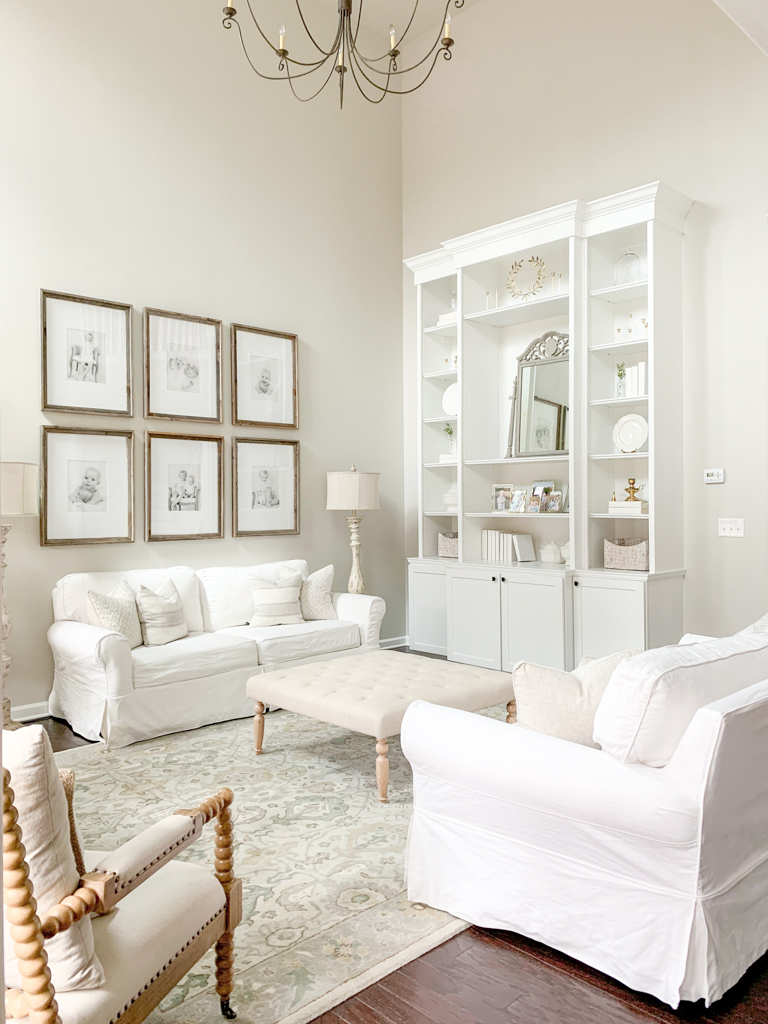
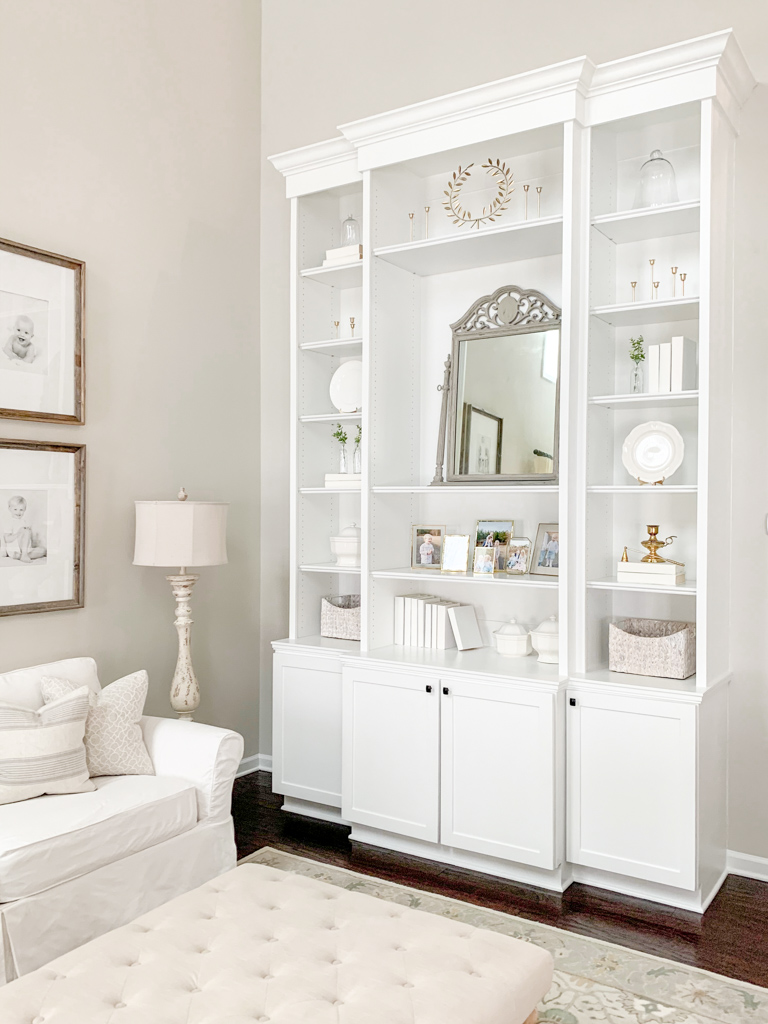
DIY Built-Ins: Styled
Building shelves? Easy! Styling said shelves? Not as easy!! At least for me 🙂
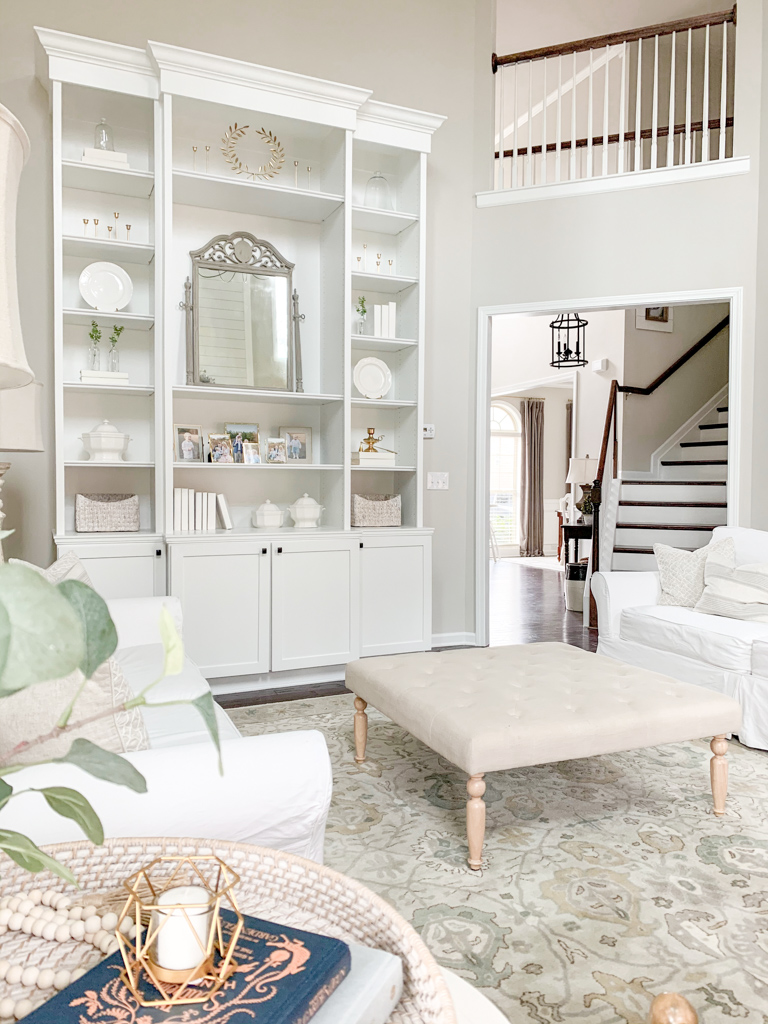
I was constantly tweaking these shelves for three years! I finally got them looking just the way I wanted right before we sold the house. Go figure!
Whatever you do, work at it with all your heart, as working for the Lord – Colossians 3:23
Save “How to Build Your Own DIY Built-Ins” to your favorite Pinterest board!