How to Build DIY Kitchen Open Shelves with Corbels in 7 Easy Steps
Learn how to build easy + inexpensive DIY Kitchen Open Shelves with Corbels in this detailed step by step tutorial.

Kitchen Open Shelves with Corbels
Nothing adds charm to a kitchen quite like open shelving with corbels. Although open shelving has become increasingly popular over the last few years, open shelving has actually been around since the 18th century. Traditional cabinets with doors did not become mainstream in kitchens until the 1920’s, so up until this time kitchens were designed purely for function. Open shelves provided easy access and visibility to cooking necessities. Today open shelving blends both beauty and function by providing storage space to display kitchen items in a beautiful way.
When I first shared my plans for open shelving with corbels in our kitchen over on Instagram, I was met with some really strong opinions from both sides of the aisle. Who knew that open kitchen shelving was such a divisive topic!
It has since been a few years since I built our DIY open shelves with corbels. I’ve had the chance live with them for a awhile now and I’m here to share the nitty gritty – both the good and the bad!
Spoiler alert: Open shelving with corbels added instant charm and character to our kitchen and I couldn’t love them more!
Open Shelves with Corbels: Table of Contents
Advantages of Open Kitchen Shelves
- Open shelves blend beauty with function: they provide ample storage space while also providing a beautiful way to display your dishware and accessories
- Convenient – open shelves provide easy access and an unobstructed view to the items stored on them
- Open shelves are aesthetically pleasing and add visual interest to your kitchen
- Open shelving can make a small kitchen feel larger and more open without the bulk of upper cabinets
- Open shelves add historic charm and character to your kitchen
- Kitchen open shelves are inexpensive
- Open shelves are easy to DIY
- Open shelves can work with a variety of designs styles by customizing the material, paint color, wood finish, brackets, corbels or hanging technique: i.e. floating shelves lean more modern while open shelves with corbels are more traditional
Disadvantages of Open Kitchen Shelves
- Everything on open shelves is in view creating the need to keep shelves “styled” and tidy; the last thing you want is for your open shelves to look cluttered and messy
- WIth no cabinet doors to close, open shelves collect dust
Are open shelves going out of style/too trendy?
See above! While open shelves have gained popularity over recent years, and dare I even say have become “trendy”, classic design never goes out of style! Hence the reason that open shelves have been around since the 18th century and are still popular in kitchens today. I think it’s safe to say they aren’t going anywhere!
How to Style Open Kitchen Shelves
There is no right or wrong when it comes to decorating and styling kitchen open shelving. The great thing about open shelving is that it allows you to show off your own unique personality and style.
Keep these simple tips in mind for effortlessly styled open kitchen shelves:
- Decorate your kitchen opensshelves with items you actually use! Think cookbooks, coffee mugs, cups, and plates
- Put frequently used items on the lower shelves (i.e. coffee mugs and plates), while reserving the top shelves for less frequently used items like serving pieces or tureens
- Pare down. Think of how many plates or coffee mugs you may use in a day, and do not display much more than this number. The last thing you want is for your shelves to feel cluttered and messy
- Mix in other items: combine everyday dishware with unique accessories to create a more visually appealing display. Consider adding plants, greenery, artwork, vases, trays or candles. Thrift stores are a great place to shop for these unique decorative items
Tutorial: How to Build DIY Kitchen Open Shelves with Corbels
It is both easy and inexpensive to build your own DIY open shelves with corbels. I’m outlining the steps I followed to build my own open shelving in our kitchen.
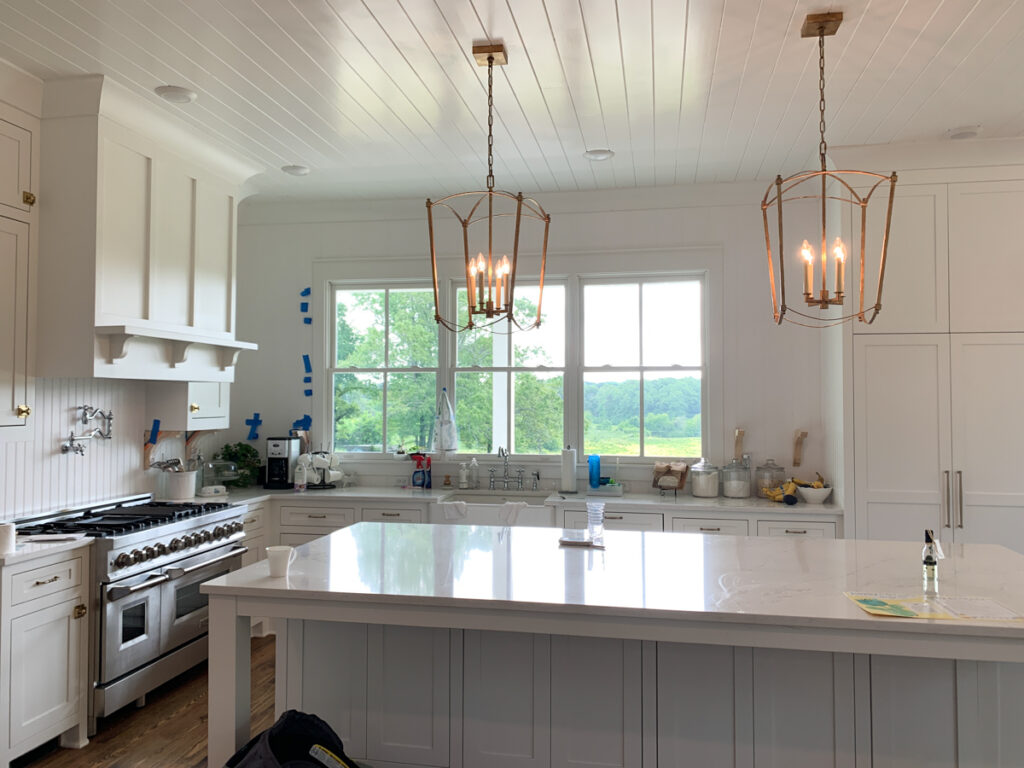
Kitchen Before DIY Open Shelves with Corbels
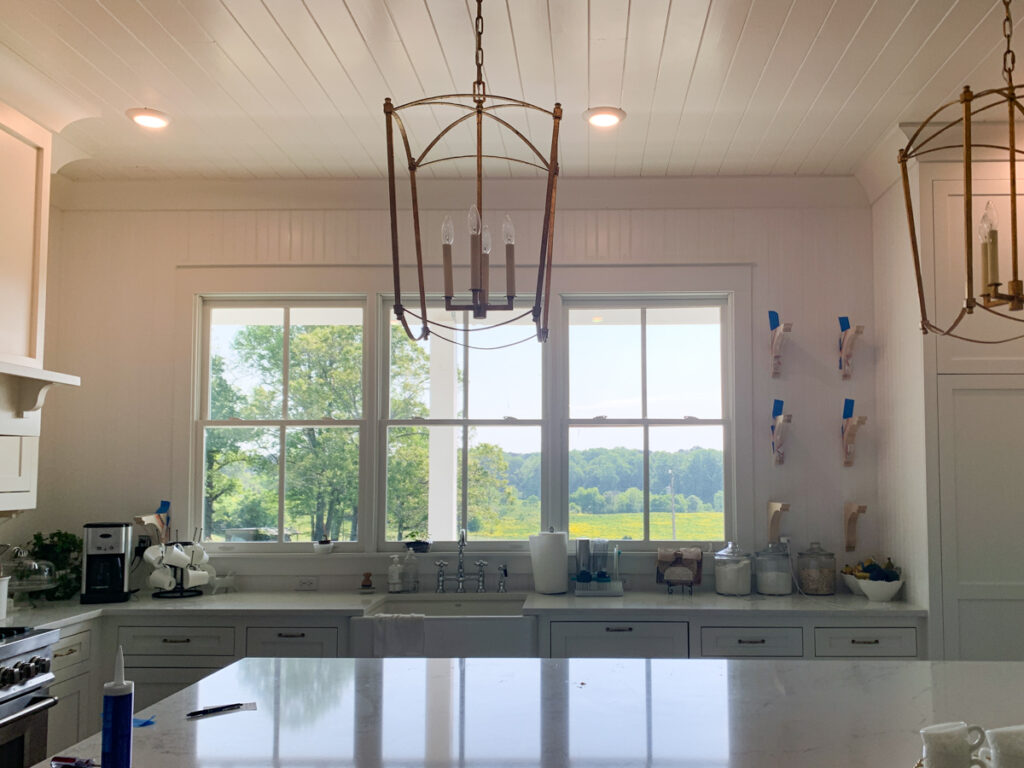
First let’s take a look at our kitchen before we added open shelves with corbels. Ignore the blue painters tape – I was playing around with shelf placement!
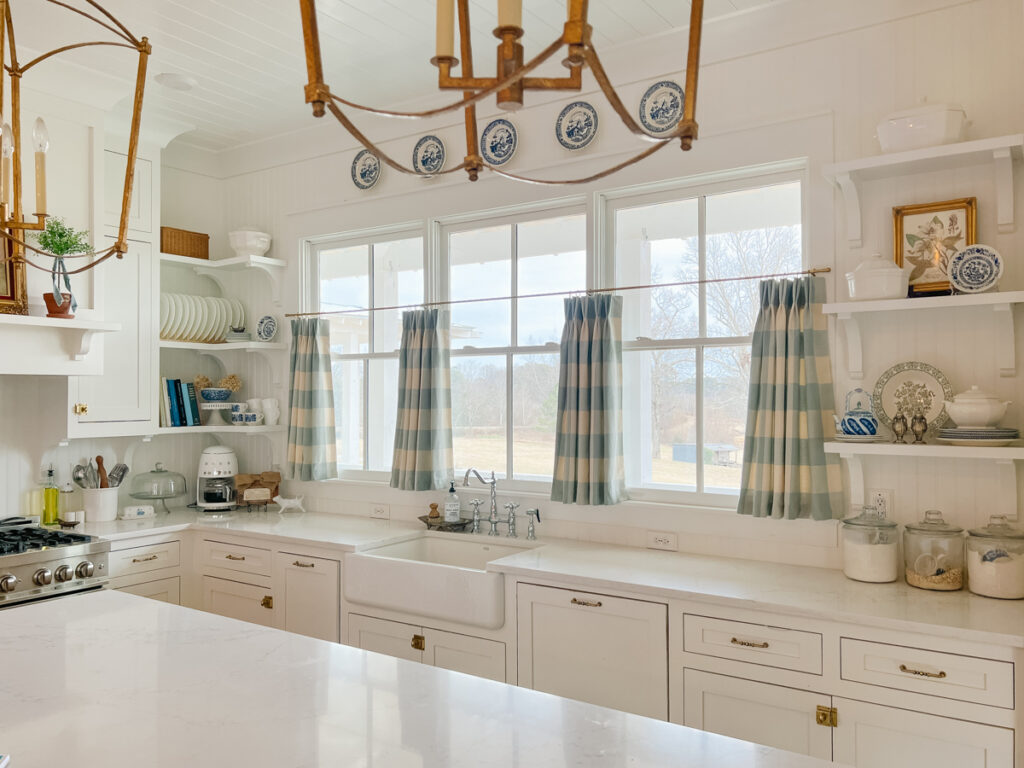
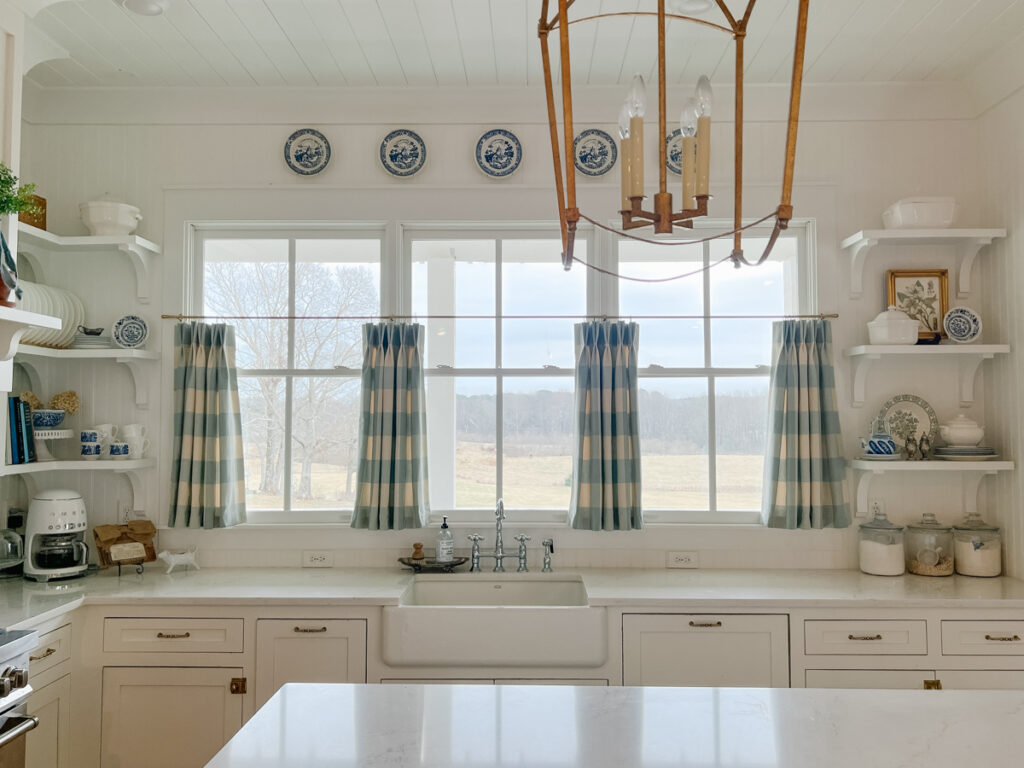
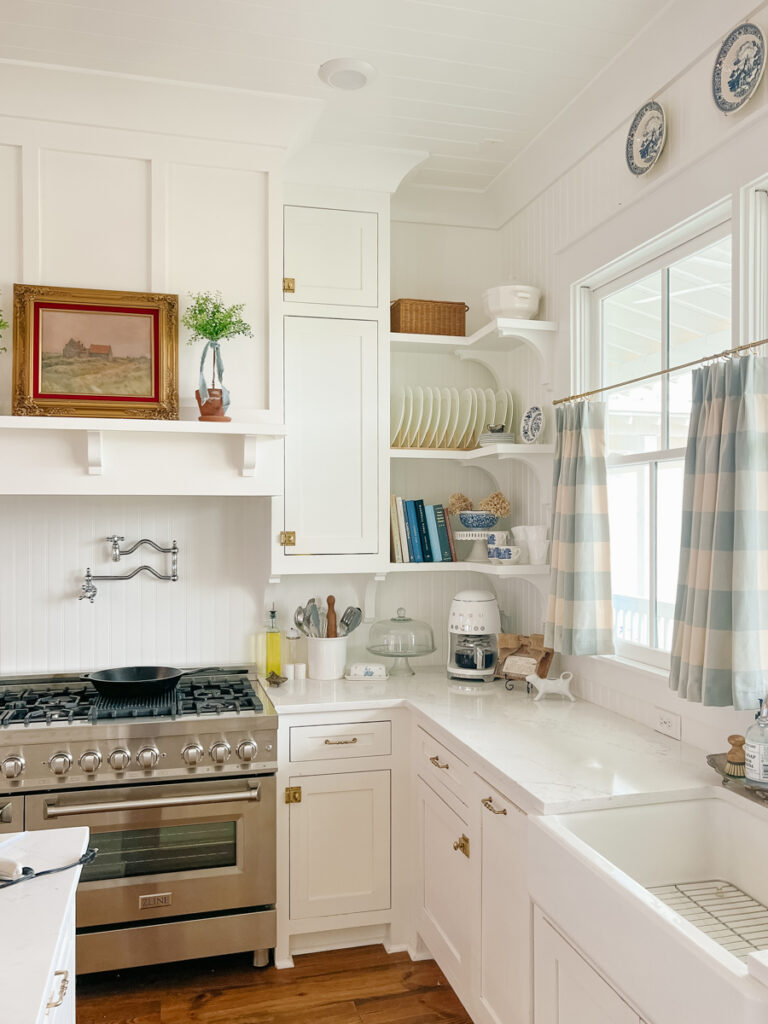
Kitchen After DIY Open Shelves with Corbels
And a look at the after! What a difference! It feels like a different kitchen thanks to the open shelves. They add so much visual interest, charm, character and historic nostalgia.
One more side by side view of the before and after of the corner in our kitchen.
Materials List: What You Need to Build Open Shelves with Corbels
- Wood Corbels – I used THESE
- 220 grit sandpaper
- Primer – I only use THIS primer
- Paint – I used Sherwin Williams Urethane Trim Enamel in the color “Pure White”
- Caulk
- Anchors
- Drill
- Construction Adhesive
- 3/4″ Plywood for Shelves
- Trim
- Miter Saw
- Nailer
- Paintbrush
- Paint Sprayer or Foam Roller

What is the best height for open shelves in a kitchen?
Once you have your materials it is time to determine the spacing for your open shelves. I like to use painters tape to help me visually see the spacing on the wall.
As a general rule the bottom shelf should be about 18-24 inches above the counter. Make sure you have room to use the counter space below your lowest open shelf.
You should aim to have about 15-24 inches between each shelf.
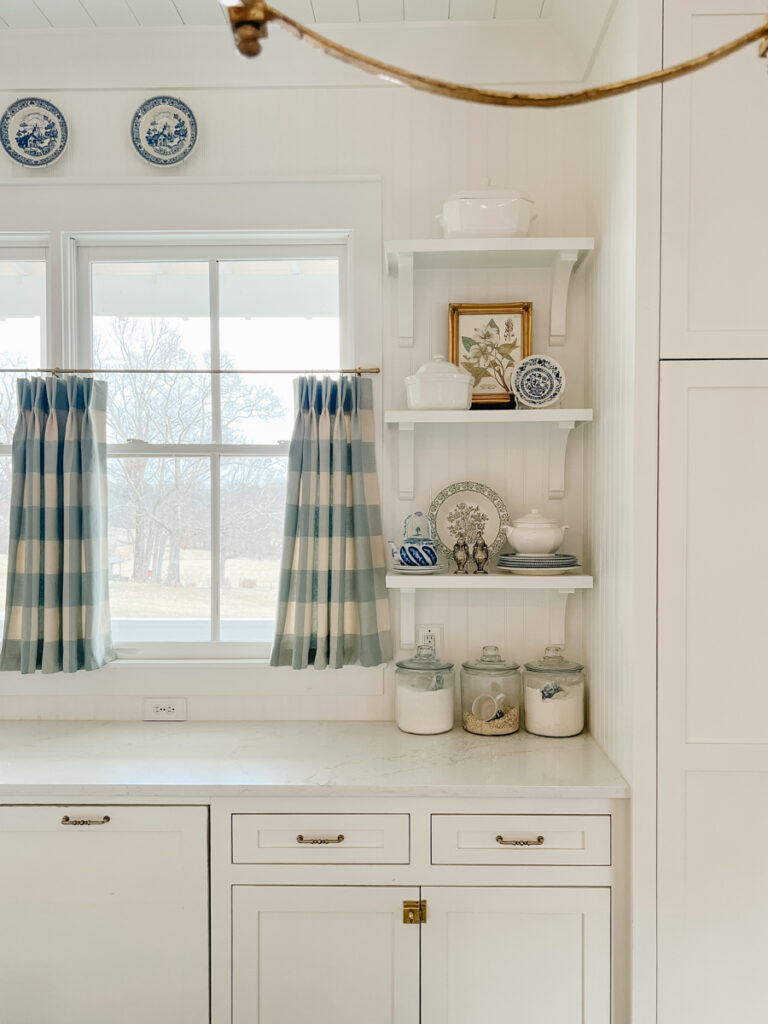
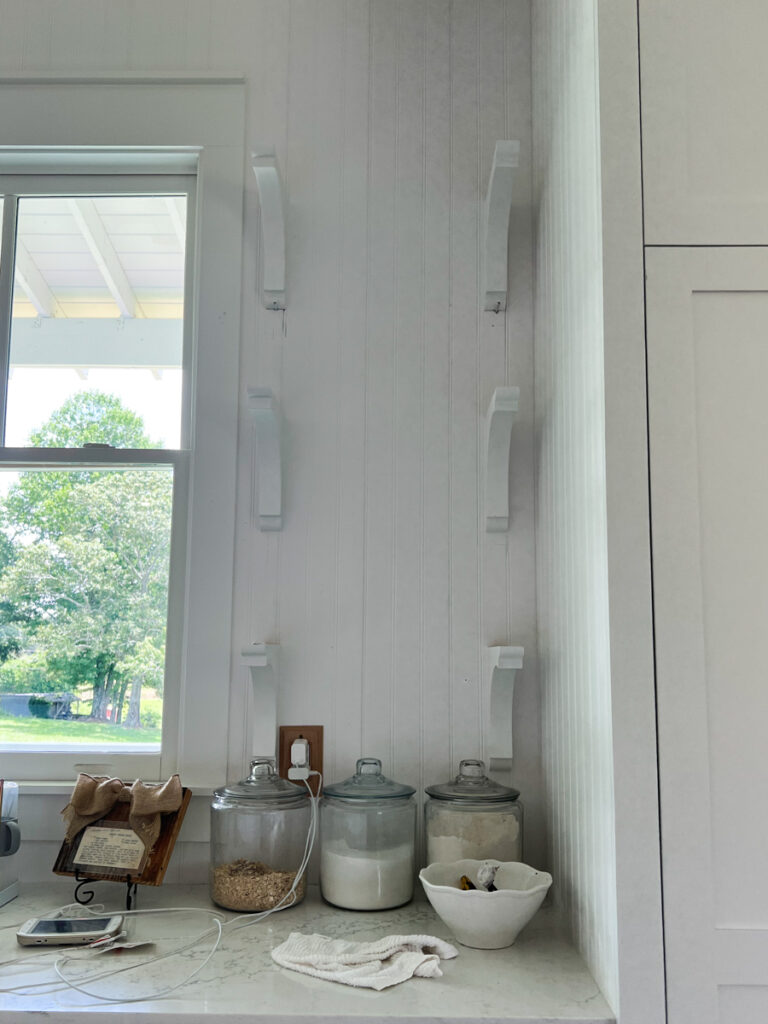
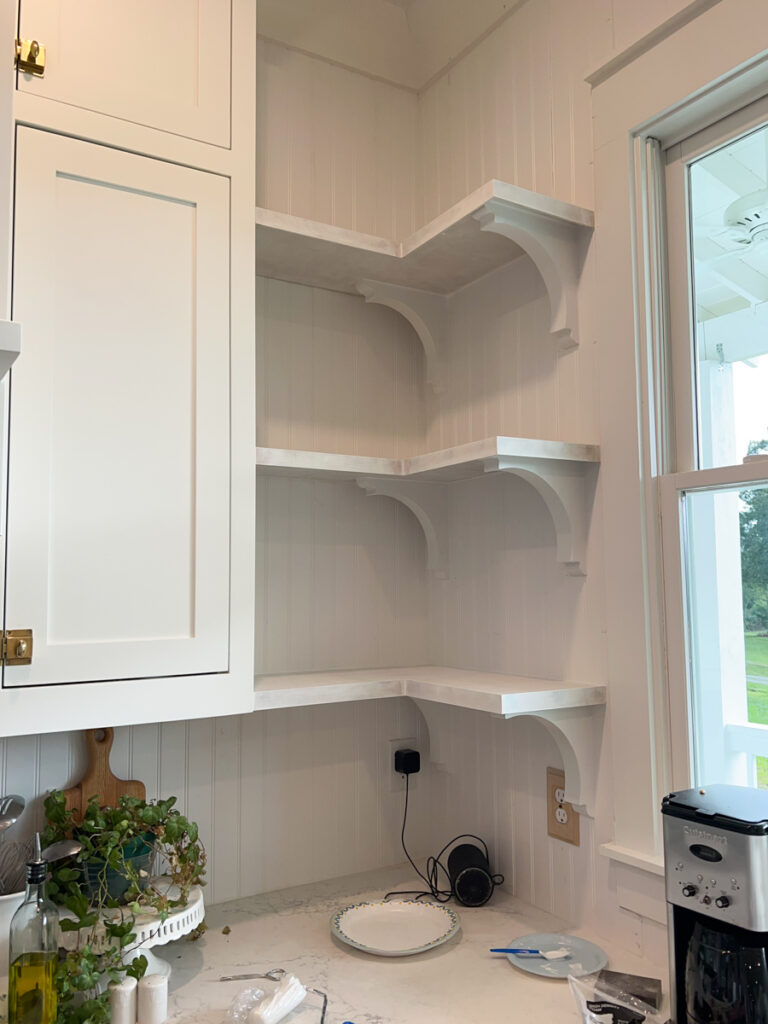
How to Build Open Shelves in a Corner
When I first got to this corner of our kitchen I was a little stumped about how to build open shelves in a corner.
The first option for open corner shelves is to place one corbel on each corner wall, as pictured below.
I decided against this option because when looking straight on at the window, the corbels would have appeared different on the left side of the window versus the right. I wanted the corbels to look symmetrical when looking at the kitchen head on.
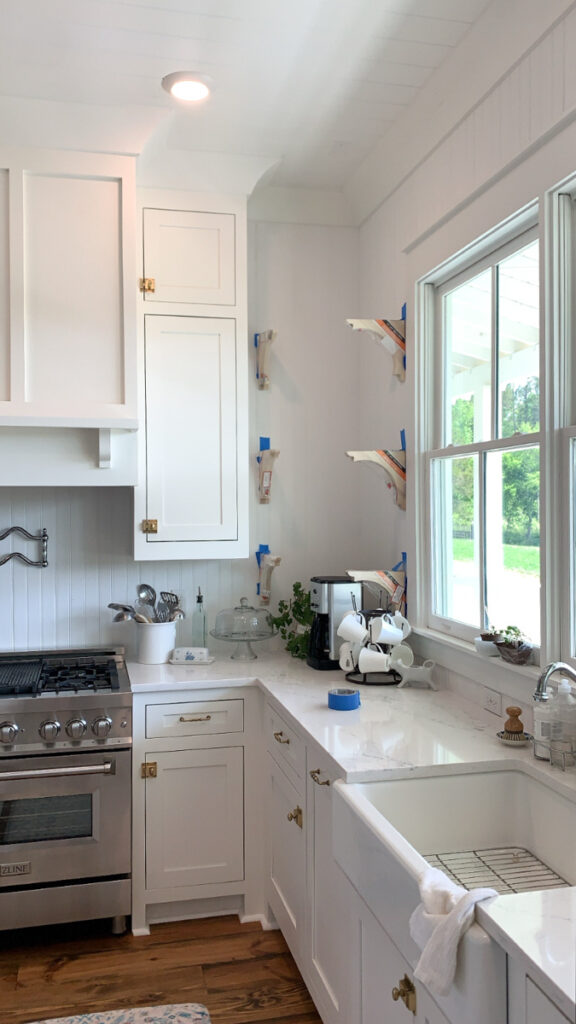
I ultimately decided to mimic the corbel placement in the corner to match the corbel placement on the other side of the window, as pictured below. This gave me the symmetry I was envisioning!

Because I chose this layout for the corner, the side of the shelf that butts up against the upper cabinet does not have a corbel to support it. I used pocket holes in the shelf itself to attach the shelf directly into the side of the cabinet.
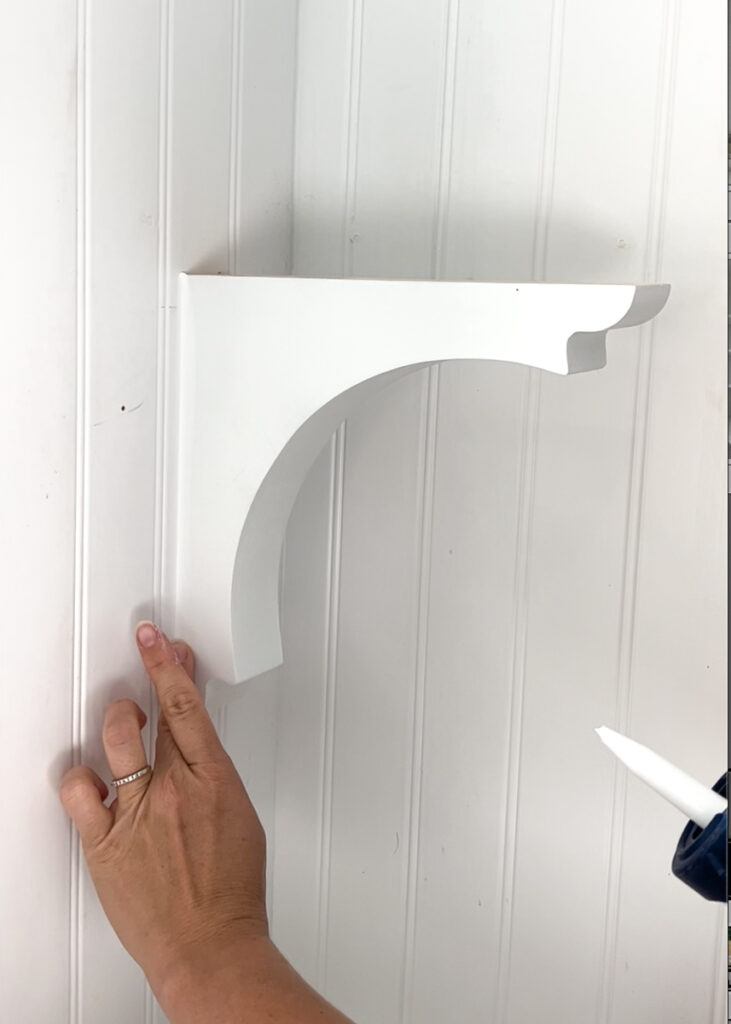
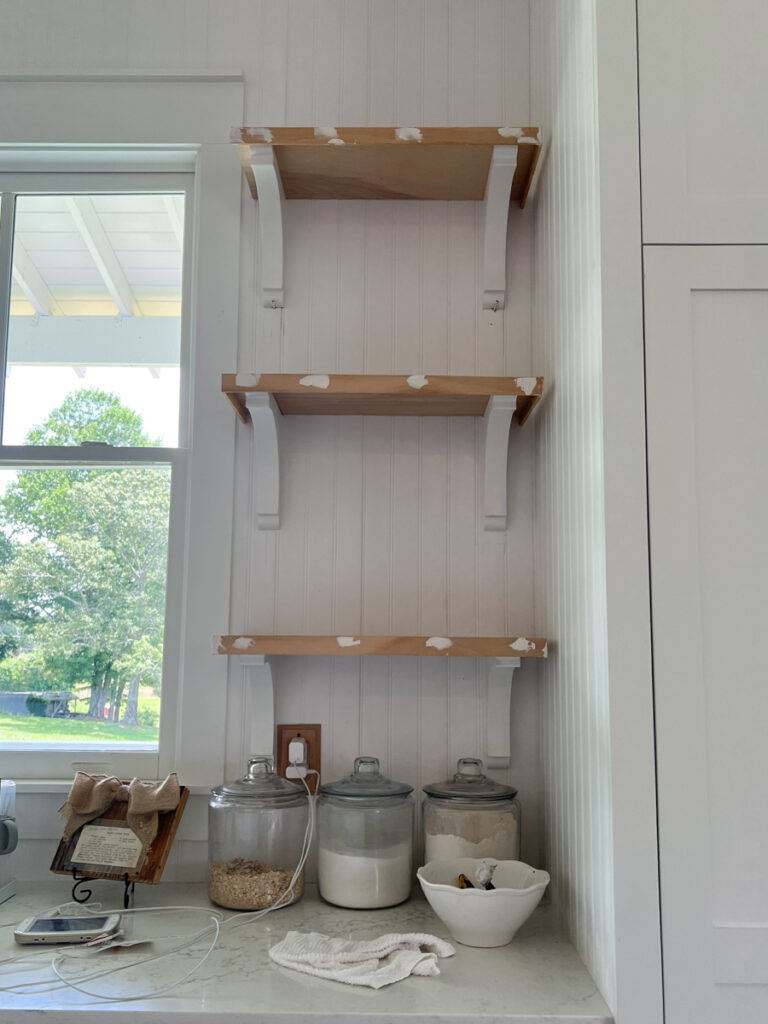
Sand, Prime and Paint Corbels
The next step is to use 220 grit sandpaper to lightly sand your wood corbels. Be sure to wipe corbels completely clean after sanding with a damp cloth or tack cloth to remove all dust.
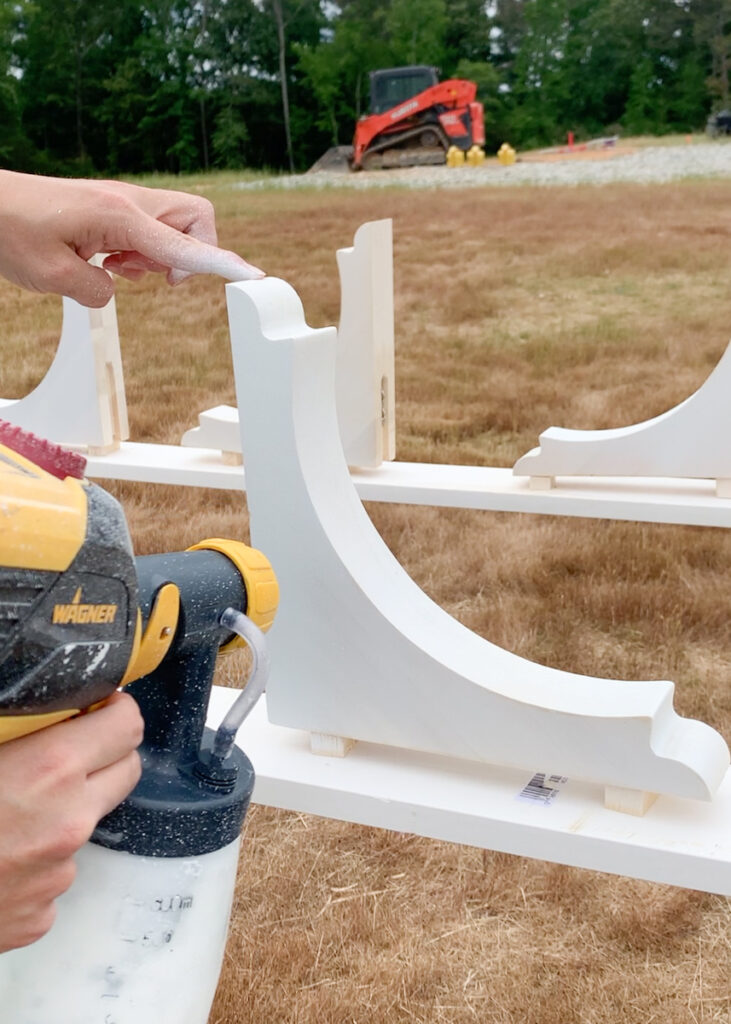
Next, use either a paint sprayer or brush and/or foam roller to prime the wood corbels. Let dry per primer instructions.
Once completely dry, sand again very lightly with 220 grit sandpaper. Again wipe completely clean with tack cloth or a damp rag.
Now it’s time to paint the corbels! Paint the corbels with either a paint sprayer or a foam roller specifically designed for cabinets for the smoothest finish.
What is the best paint for open kitchen shelves?
The very best paint for open kitchen shelves is Sherwin Williams Urethane Trim Enamel. It has a self leveling component that gives it the most beautiful finish. It dries perfectly smooth and cures to become extremely durable.
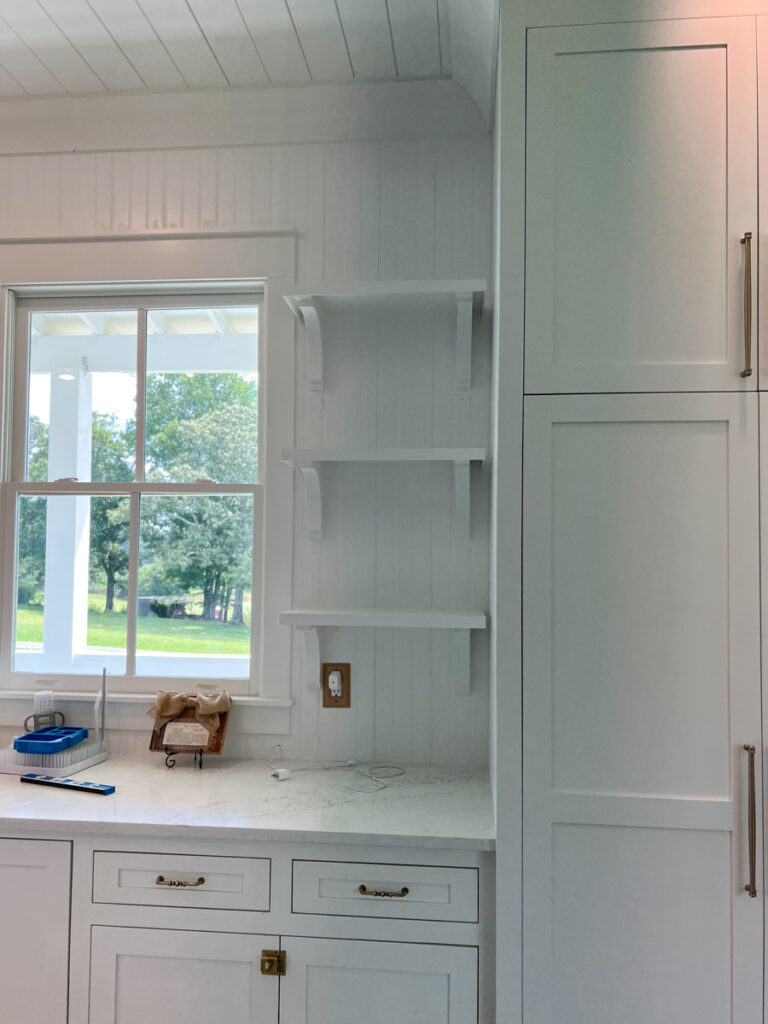
Hang Corbels on Wall
Next hang your corbels on the wall.
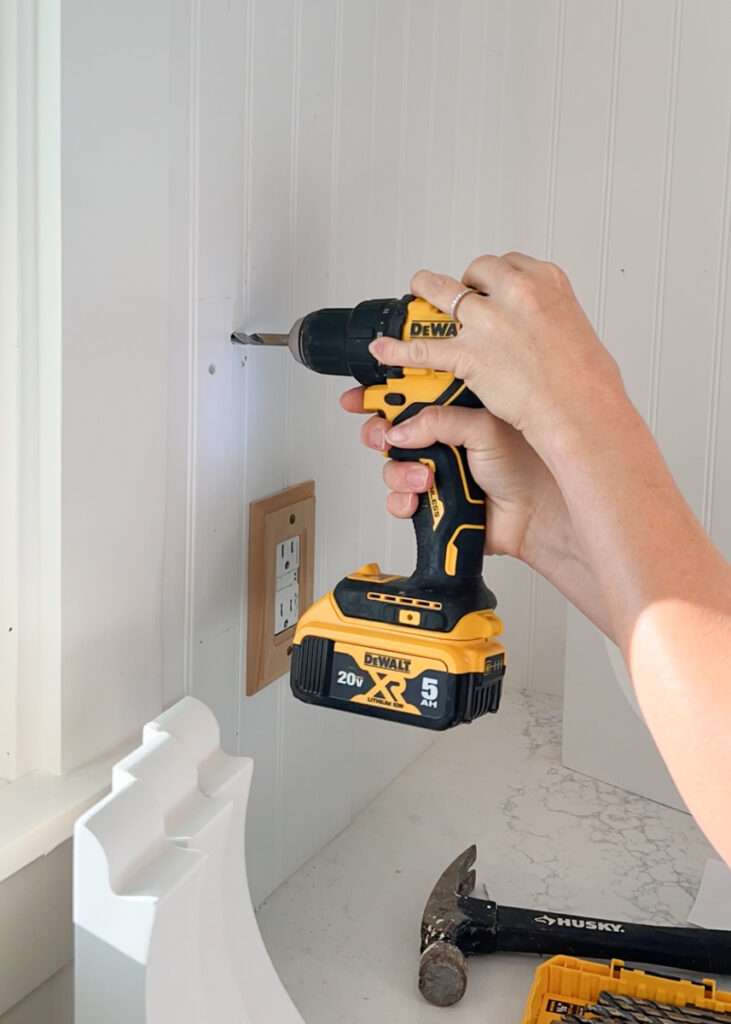
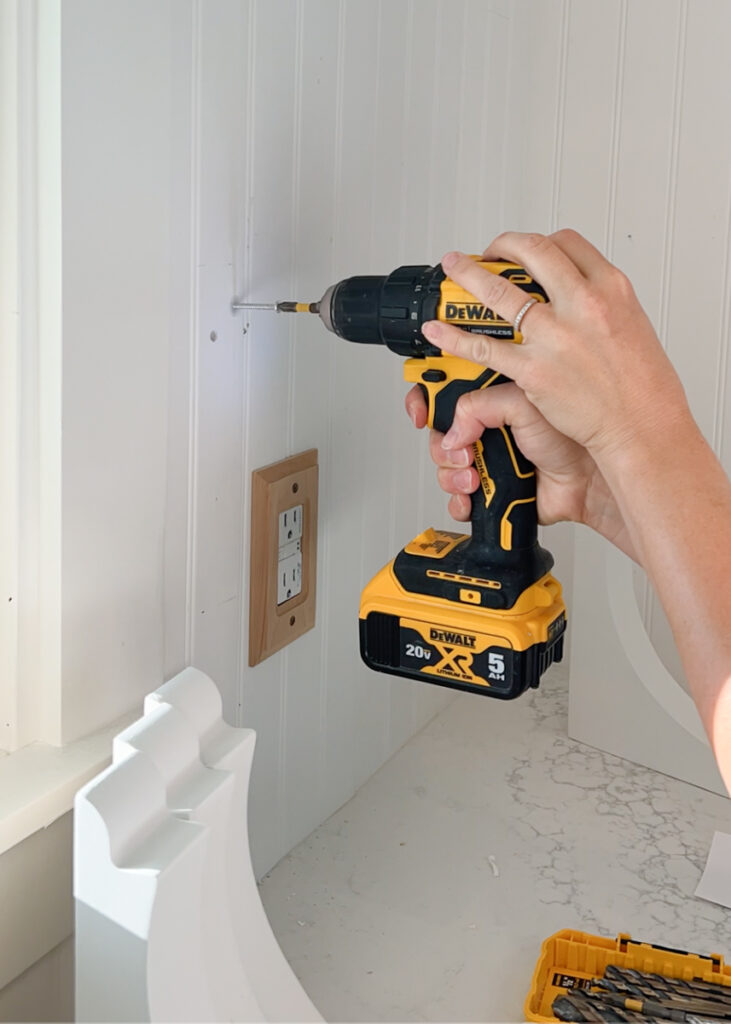
If your corbels do not line up with a stud you will need to use heavy duty anchors to secure them to the wall.
Ensure Corbels are Even and Level
After the corbels are secured to the wall, use a level to make sure each pair of corbels is perfectly level.
Next use a level to ensure that the corbels are in line with one another vertically.
Make any adjustments as necessary before proceeding to the next step.
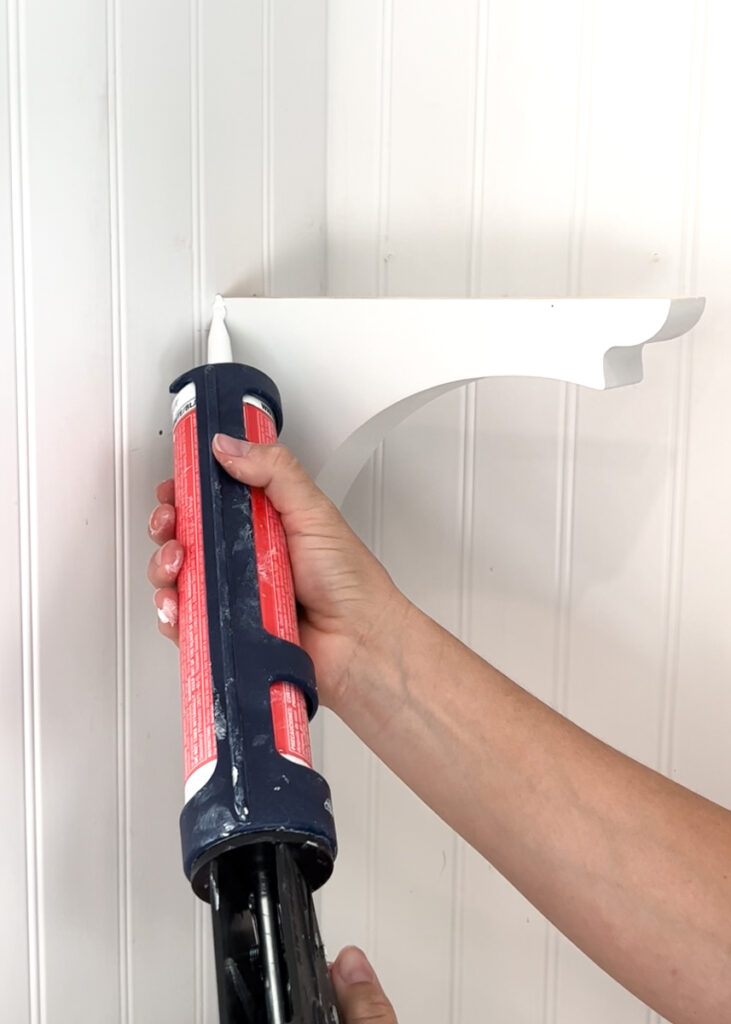
Caulk Corbels
Caulk all the seams around the corbel where it meets the wall.
Pro tip: Baby wipes make the perfect companion during caulking! Use baby wipes to easily clean up your caulk line as well as your hands.
Cut Shelves and Trim
Now it is time to cut the plywood that will serve as the actual shelf. The size of your shelf will be specific to your kitchen and the sizing and spacing of your corbels.
My open shelves overhang about 1 inch on the front of the corbels and about 2 inches on each side. Once again, this can be customized to your specific needs.
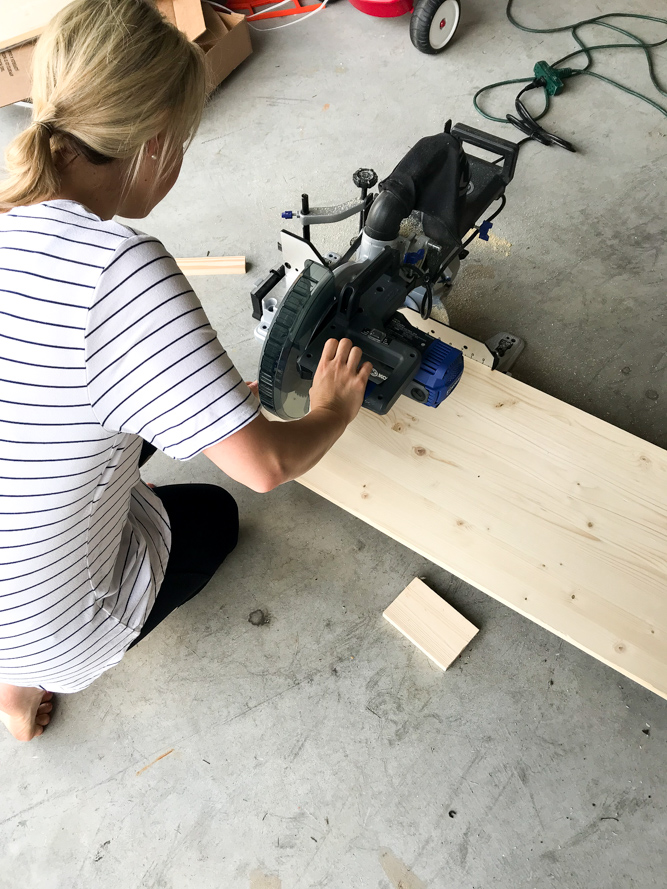
It is also now time to determine if you want a piece of trim to go around the edge of your shelf. I highly recommend a piece of trim to finish the edge of the plywood.
I chose a very understated and thin piece of lattice moulding to finish my edges but you can choose any style of trim to fit your style.
Use a brad nailer to attach the trim to the shelf.
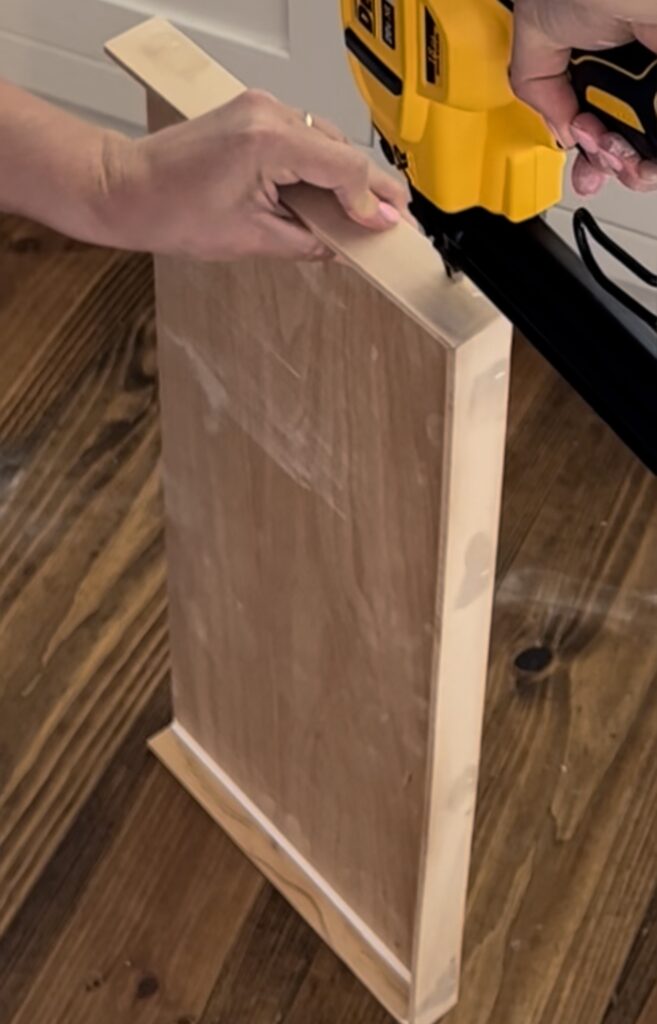
Attach Shelf to Corbels
To attach the shelf to top of the corbels, I used heavy duty construction adhesive as well as a brad nailer.
It was fun to stand back and watch the open shelves start to take shape!
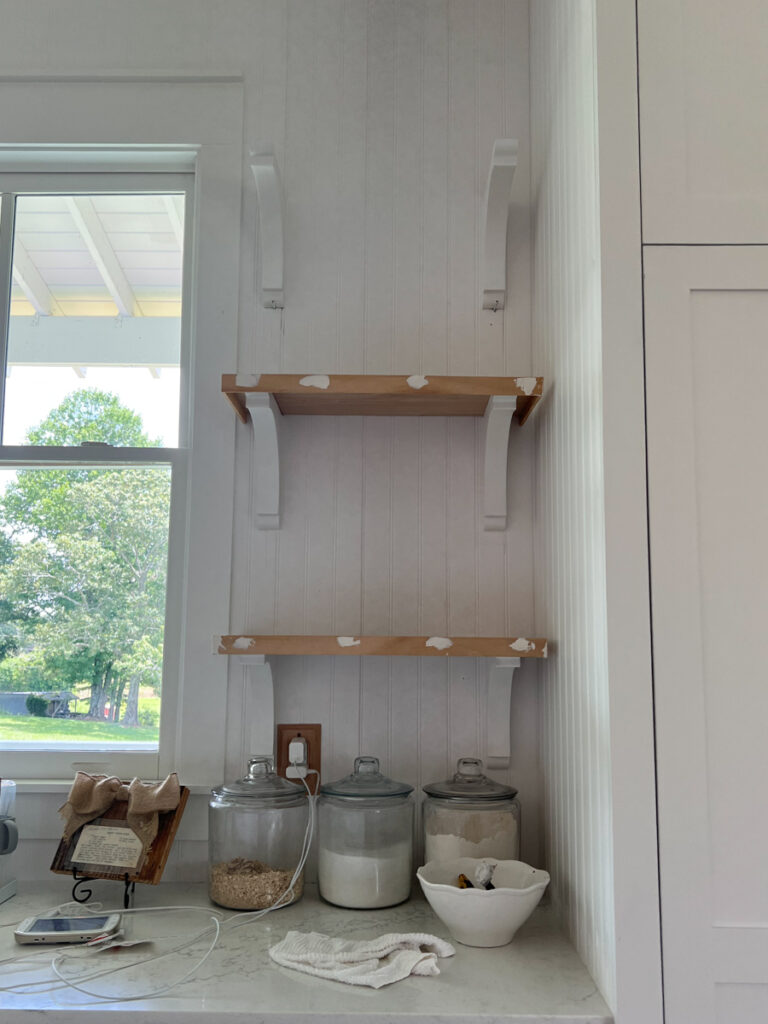
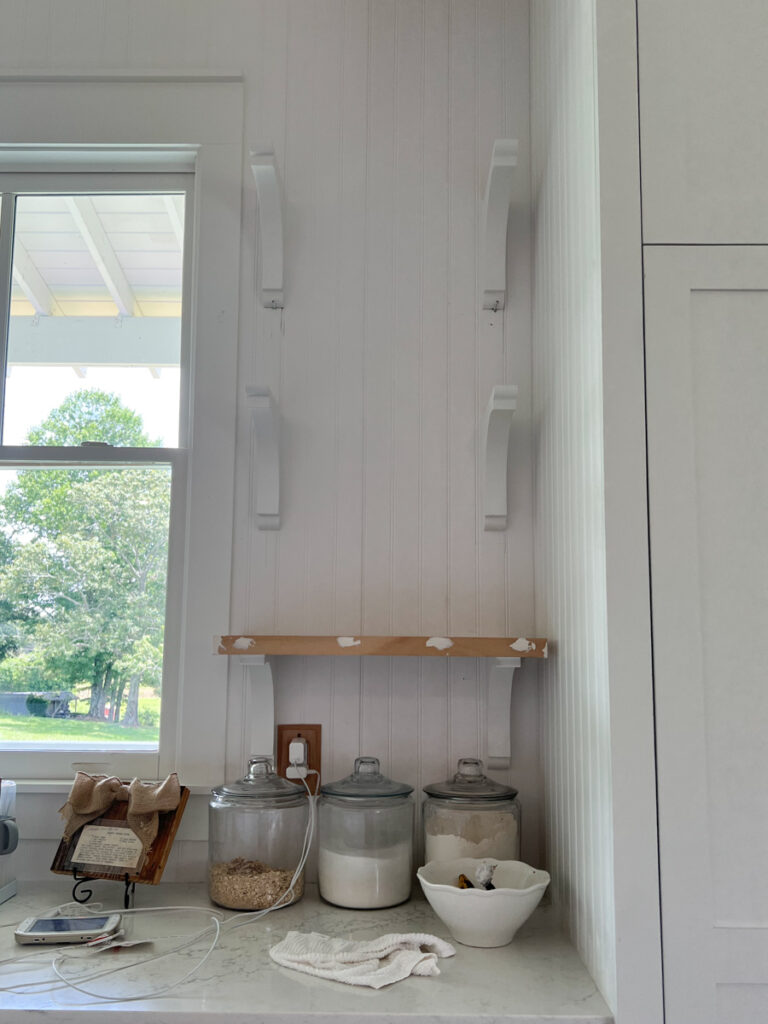
Caulk, Prime and Paint Shelves
You know the drill. Now it is time to repeat the same caulk, prime, sand and paint steps that you used on the corbels for the shelves.
Be sure to sand in between coats and use a foam roller to ensure the smoothest finish.

DIY Open Shelves with Corbels Finished!
Now comes the fun part. Once you finish painting, your DIY Kitchen Open Shelves with Corbels are officially done and ready to be styled!
Shop Our Kitchen