Beadboard Backsplash: Easy DIY Kitchen Upgrade on a Budget
If you’re looking to add vintage charm and character to your kitchen without breaking the bank, a beadboard backsplash might just be the perfect choice for you! This easy DIY beadboard backsplash guide includes step-by-step installation instructions, design ideas, FAQ’s, and expert tips to completely transform your kitchen space—no tile required!

Loved for its vintage appeal, affordability, and ease of installation, a beadboard backsplash brings cozy cottage vibes into any space.
Choosing Beadboard for Our Kitchen Backsplash
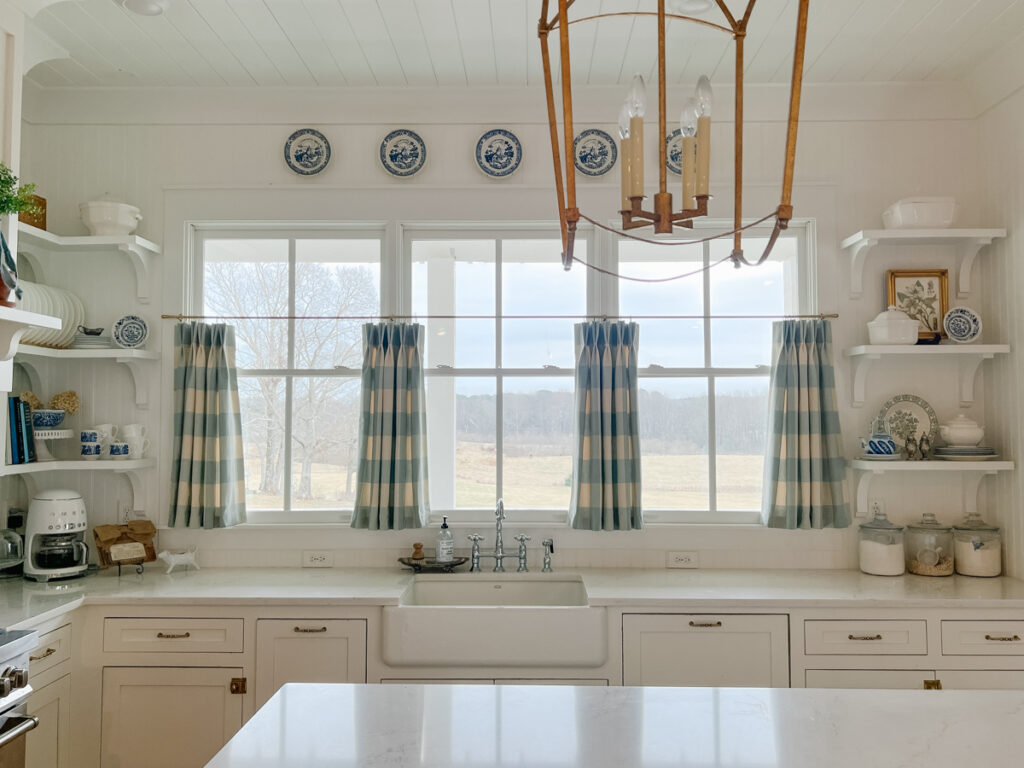
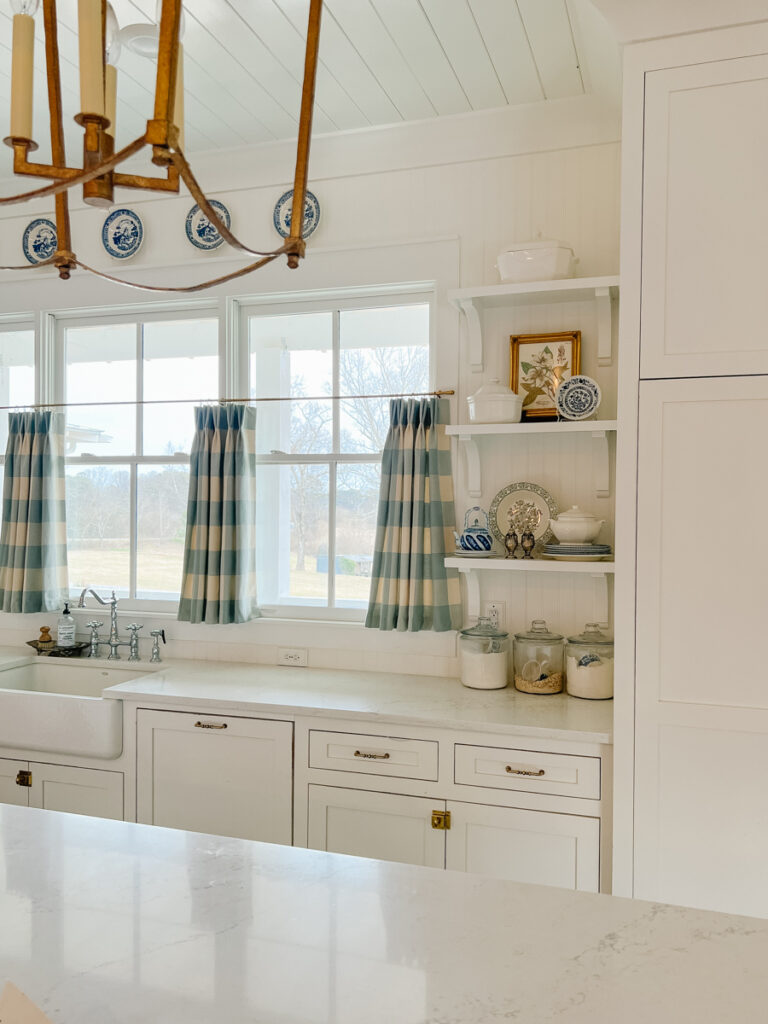
When it came time to choose a backsplash for our kitchen, I immediately knew I wanted to forgo the traditional tile backsplash. While a tile backsplash is beautiful, the idea of tile in our farmhouse kitchen felt a little too “new” and “shiny”.
Even though our house was new construction, we wanted it to have the feel and charm of a historic farmhouse. Lived-in, cozy, charming, and vintage were just a few of the words that came to mind when I envisioned our kitchen.
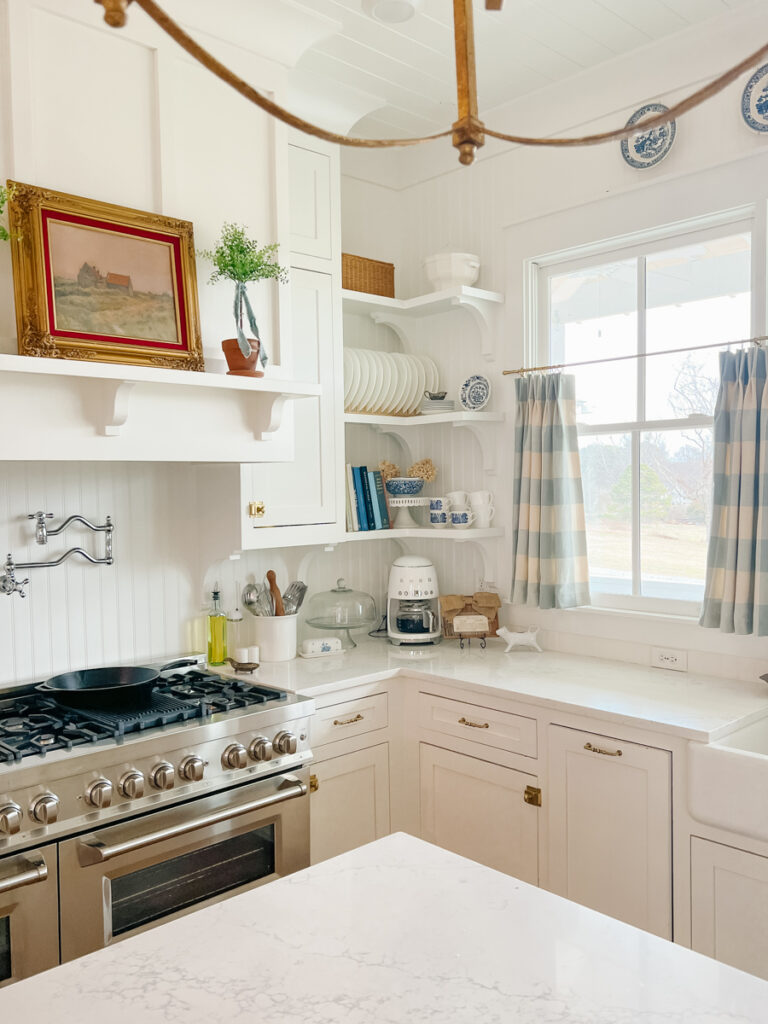
To accomplish this look in the kitchen, we chose design elements that would have been common in a kitchen many years ago: inset cabinetry with (reproduction) cupboard latches , wide plank pine flooring, a cast iron apron front sink, and open shelving. We even disguised some of our modern day appliances with cabinet fronts to make them look like cabinetry.
To put a shiny, new tile backsplash up against these “old” finishes would have just felt wrong!
I began looking for historic kitchen inspiration online and completely fell in love with the look and feel of a beadboard backsplash. And as they say, the rest is history!
What Is Beadboard?
Before we go any further, let’s define exactly what beadboard is.
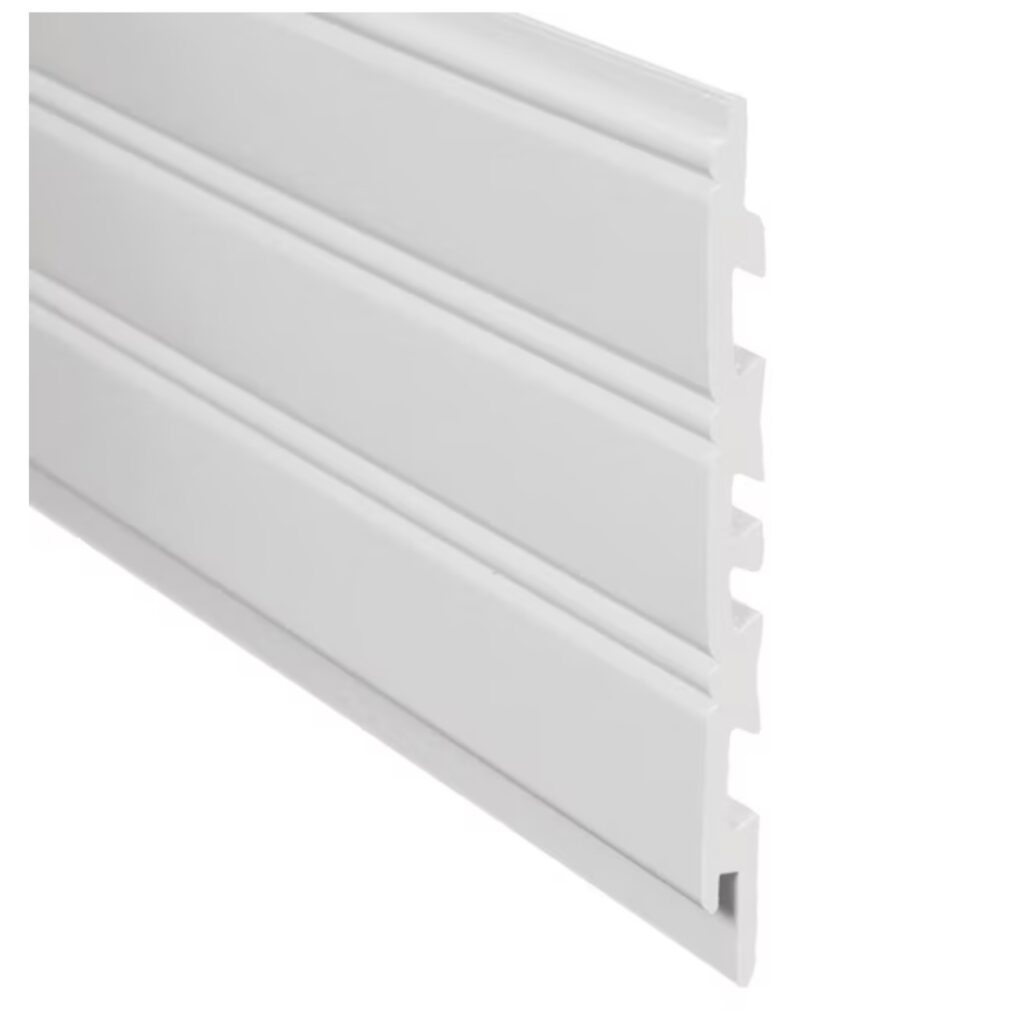
Beadboard is a type of wall paneling that dates back to the 1800s. It is made up of narrow vertical planks, separated by a small ridge or “bead” between each plank.
Traditionally made from wood, modern versions of beadboard are now available in MDF, PVC, and pre-primed materials. This makes beadboard a more versatile and durable choice for a wide range of styles and spaces. Beadboard is now a popular choice for modern day kitchens, bathrooms, hallways, bedrooms and mudrooms.
Why choose a Beadboard Backsplash?
There are many reasons to choose a beadboard backplash. Choosing beadboard as your backsplah offers a unique mix of style, afforadability, and ease of installation.
- Style: Beadboard works well in a variety of decor styles including farmhouse, coastal, cottage, and shabby chic.
- Timeless: Beadboard will never go out of style. It has been around since the 1800’s and it is till just as beautiful today.
- Affordability: Beadboard is a cost-effective alternative to tile and stone.
- Easy Installation: Beadboard is easy to install with basic tools and beginner DIY skills.
- Instant Character: Beadboard adds instant warmth and texture to plain walls.
- Historic Charm: Beadboard gives a nod to the historic kitchens of the past.
Pros and Cons of a Beadboard Backsplash
Wondering if a beadboard backsplash may be right for you? Consider the pros and cons.
Beadboard Backplash Pros:
- Affordability
- DIY-friendly
- Paintable
- Visual interest, texture and charm
- Vintage/historic character
- Readily available at local hardware stores
- Available in durable material such as PVC
- Timeless, will never go out of style
Beadboard Backsplah Cons:
- Wood can warp or swell if it gets wet or is not sealed properly
- Beadboard is less heat and water resistant than tile
- May require more maintenance in high-use areas, i.e. repainting
Shop Our Beadboard
We used this moisture resistant PVC tongue and groove beadboard product.
Step-by-Step Tutorial: How to Install a DIY Beadboard Backsplash
Materials Needed:
- Beadboard panels
- Construction adhesive
- Nailer
- Caulk + Caulk Gun
- Wood Filler + Putty Knife
- Paint
- Paint Brush
- Measuring tape
- Level
- Miter saw

Instructions:
- Measure your wall cut the beadboard panels to size using a miter saw.
- Apply construction adhesive to the back of the panel.
- Fit panels together snugly on the wall and ensure vertical alignment with a level. Use nailer for extra reinforcement.
- Fill exposed nail holes with wood filler and sand smooth.
- Caulk the seam where the beadboard meets the countertop.
- Use Urethane Enamel to paint.
Beadboard Backsplash Maintenance & Durability
Beadboard is relatively easy to maintain when you use the correct materials and paint.
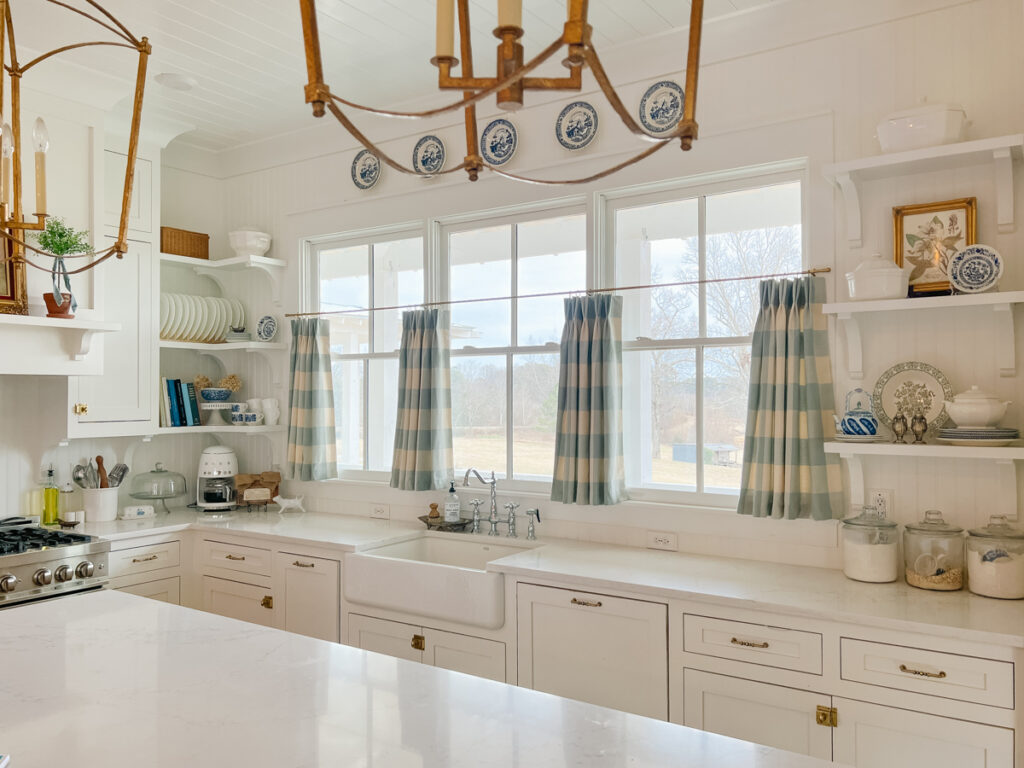
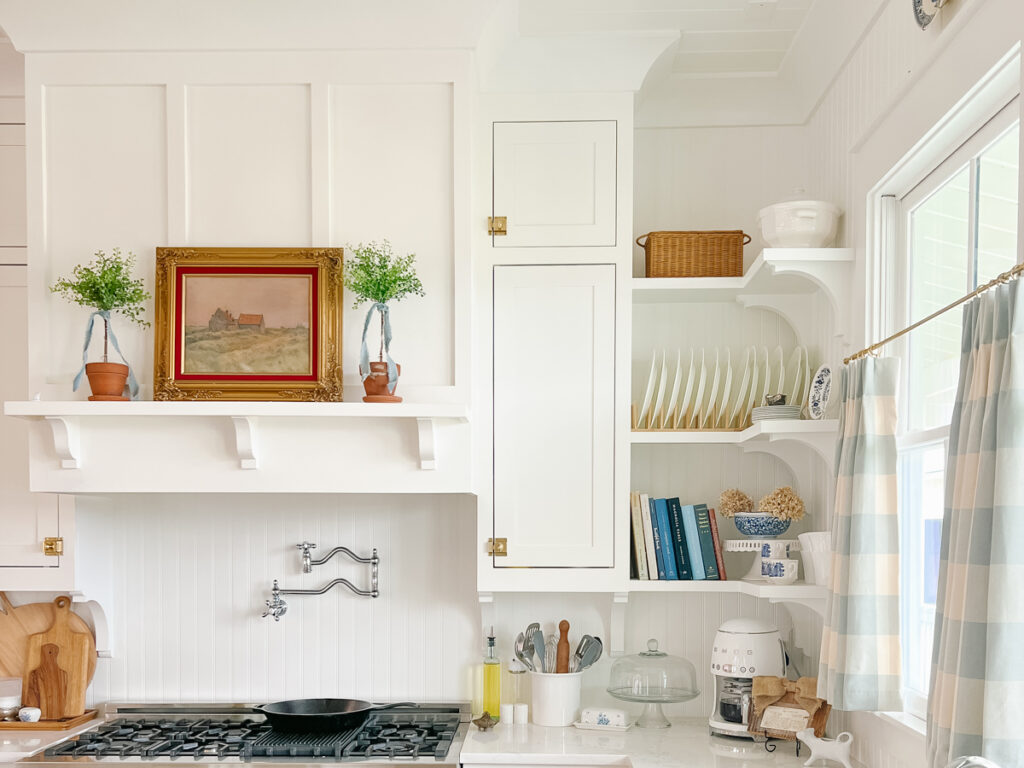
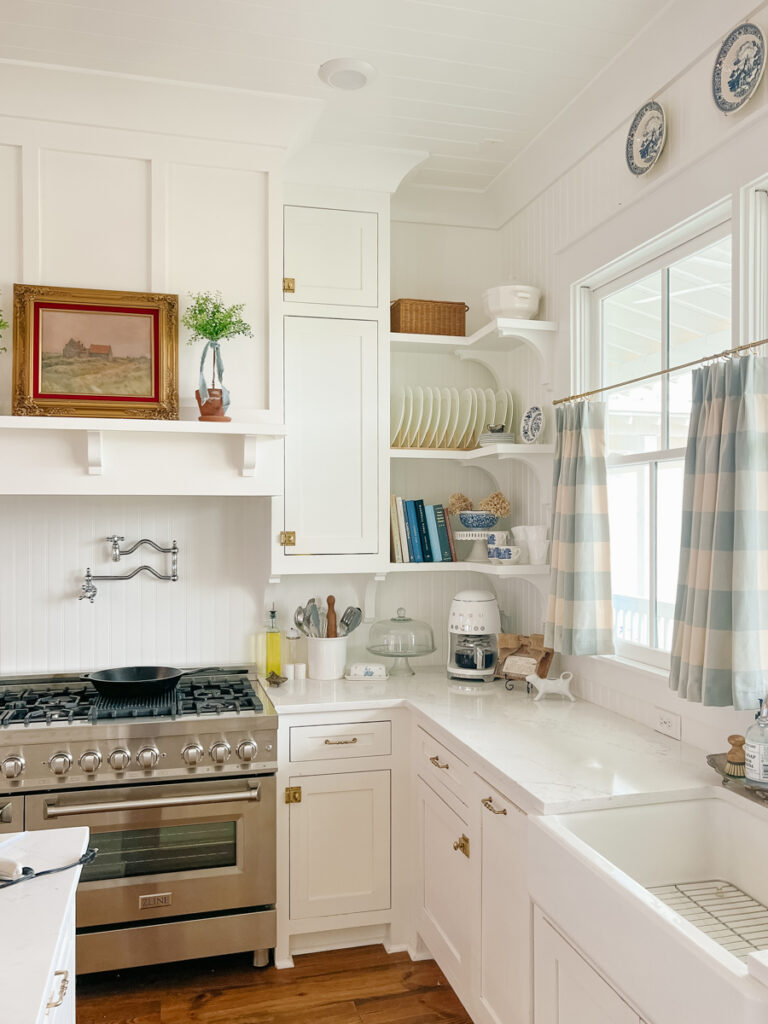
First off, consider your material. We chose a beadboard product made from PVC. Once painted you cannot tell that it is not wood! We don’t have to worry about warping or swelling if it gets exposed to water.
Secondly, be sure to use a high-quality, durable paint that is made to withstand moisture and splatters. We chose to paint our beadboard backsplash using Sherwin Williams Emerald Urethane Enamel paint line in the color Pure White. This paint is unique in that it cures to create a hard, durable finish that withstands the wear and tear of frequently cleaned and used areas. I have used this paint line for many projects and can personally attest to its strength and durability. Be sure to choose at least a semi-gloss paint sheen for added durability and ease of cleaning.
Is a Beadboard Backsplash Hard to Clean?
The most frequently asked question about our beadboard backplash is overwhelmingly, “How do you clean it? Is it hard to keep clean?”
We have lived with our beadboard backsplash for over four years now and I can confirm that it is so easy to clean. Because we used the Emerald Urethane Enamel paint that is specifically made to withstand frequently cleaning, the backplash is a breeze to wipe down. I simply wipe away any splatters with a soft cloth and mild dish soap such as Dawn.
Where to Buy Beadboard
You can buy beadboard panels at most big box home improvement stores like Home Depot and Lowe’s.
We selected a tongue and groove beadboard plank made from PVC. This product is moiture-proof, durable and paintable, and the finished product looks just like traditional wood beadboard. It comes in planks that are 5 1/2 inches wide by 8 ft tall.
Be sure to choose a moisture-resistant beadboard material such as PVC if you’re installing it in a kitchen or bathroom.
Beadboard Backsplash Frequently Asked Questions
When I shared that we chose to intall a beadboard backsplash on our kitchen, I received so many questions! Here are some of the most common questions I receive over and over again.
Can you use beadboard behind a stove? Yes, we installed a PVC beadboard backsplash behind our gas range.
Is beadboard backsplash waterproof? This depends on the beadboard material. A wood beadboard product is not inherently waterproof. A beadboard product made from PVC is waterproof and moisture resistant.
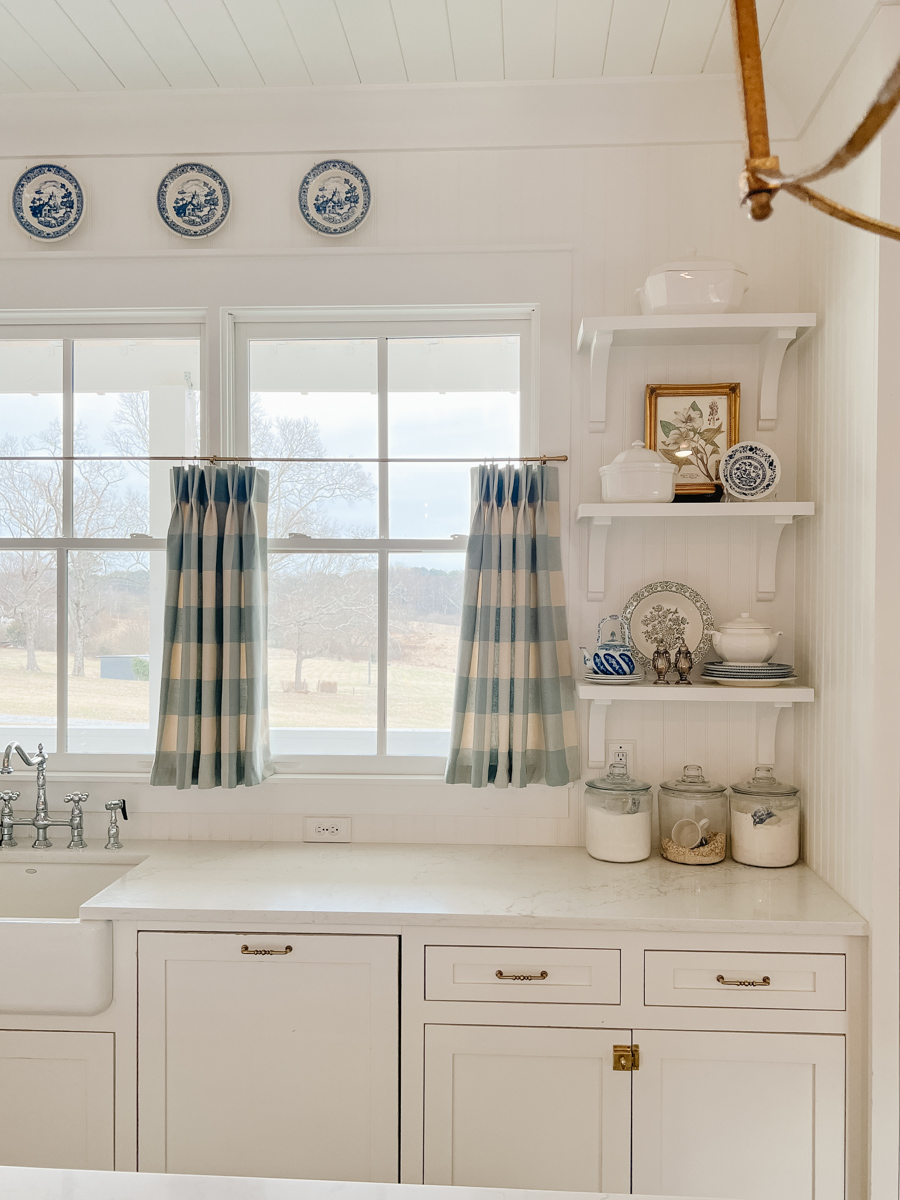
Should beadboard go all the way to the upper cabinets? This is a personal style choice and depends on your preferences. We chose to run our beadboard backsplash from the countertop all the way to the ceiling, covering the entire wall.
Can you DIY a beadboard backsplash? Yes, a beadboard backsplash is a beginner friendly DIY project. It can be completed in a short time frame with basic tools.
Is Beadboard backsplash cheaper than tile? Of course this depends, but generally speaking, a beadboard backplash is less expenive than a tile or stone backsplash. Not only is the beadboard afforadable, but it can be a DIY installation which saves significantly on professional labor cost.
Is beadboard backsplash hard to clean? Not at all! Just be sure to choose a high-quality, durable paint that is made to withstand scrubbing. I highly recommend Sherwin Williams Emerald Urethane Enamel paint.
Pin It for Later!

Shop the Look