Easy DIY Custom Closet: Budget Ikea Hack
Do you dream of beautiful, organized closets but spending thousands of dollars on a custom closet just isn’t in your budget? Then this Easy DIY Custom Closet: Budget Ikea Hack is just for you! Keep reading to learn how to take your closet from builder-grade wire shelving to a beautiful, organized and functional custom closet for $120 using an Ikea Billy Bookcase hack and inexpensive supplies from your local hardware store.
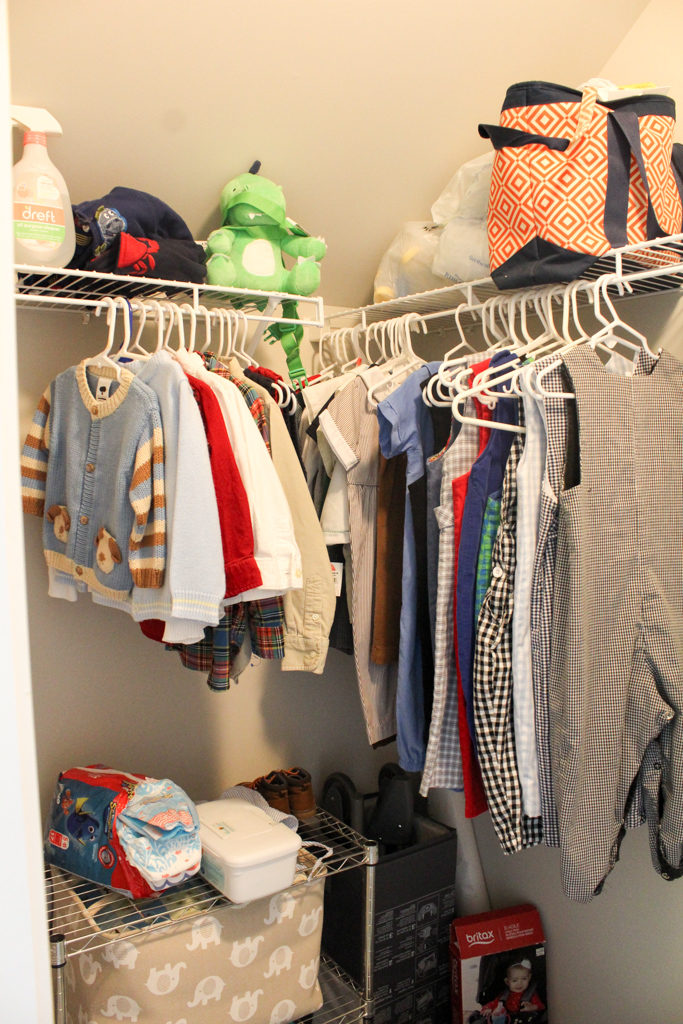
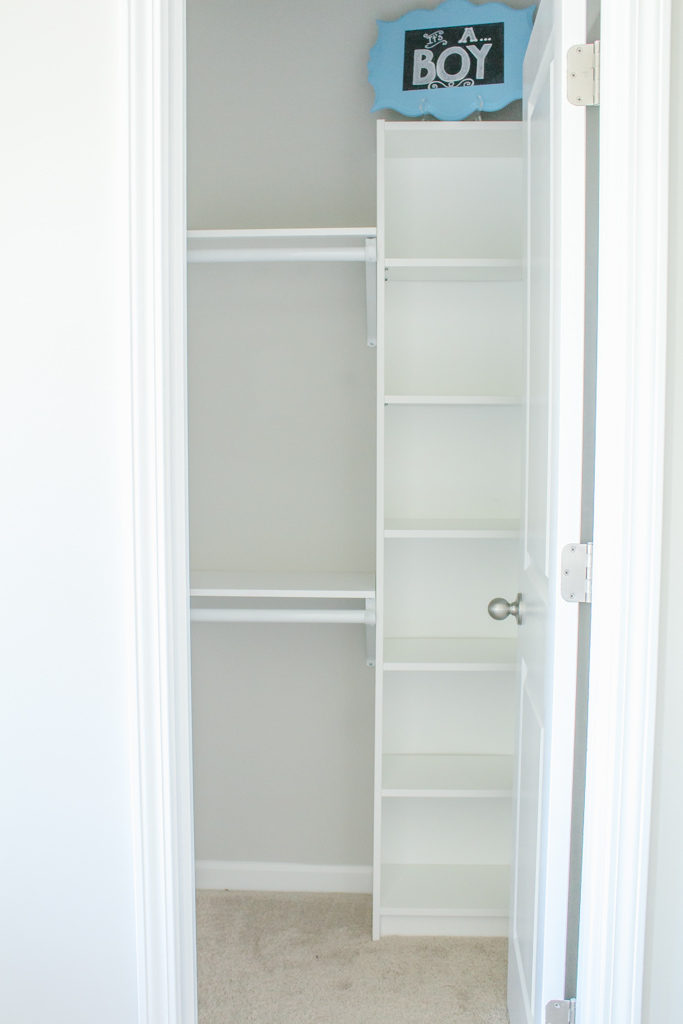
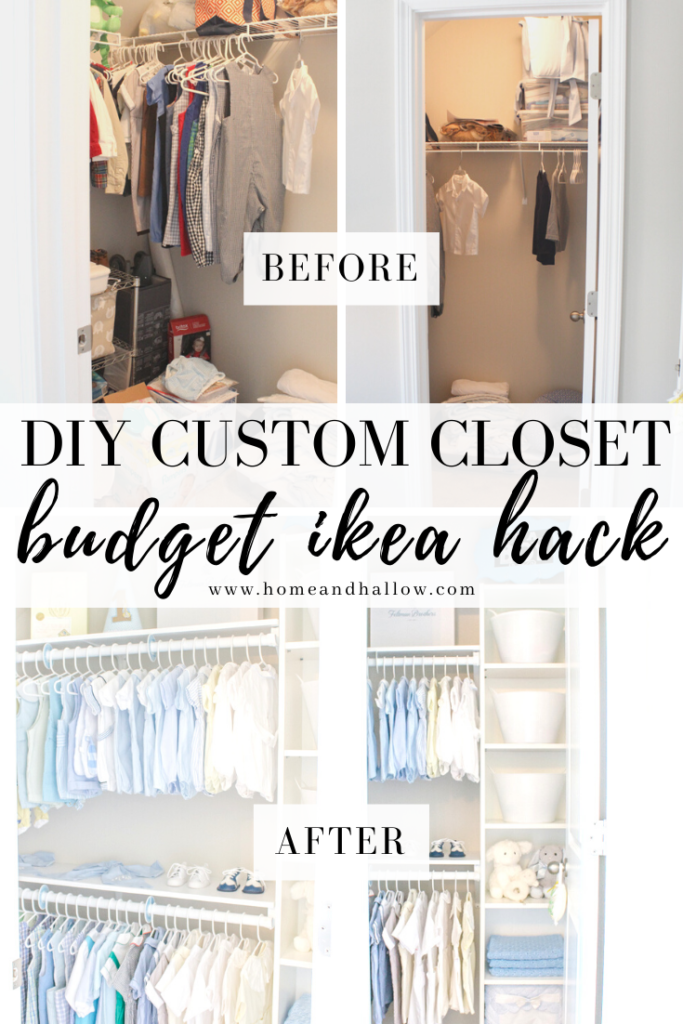
DIY Custom Closet: The Before

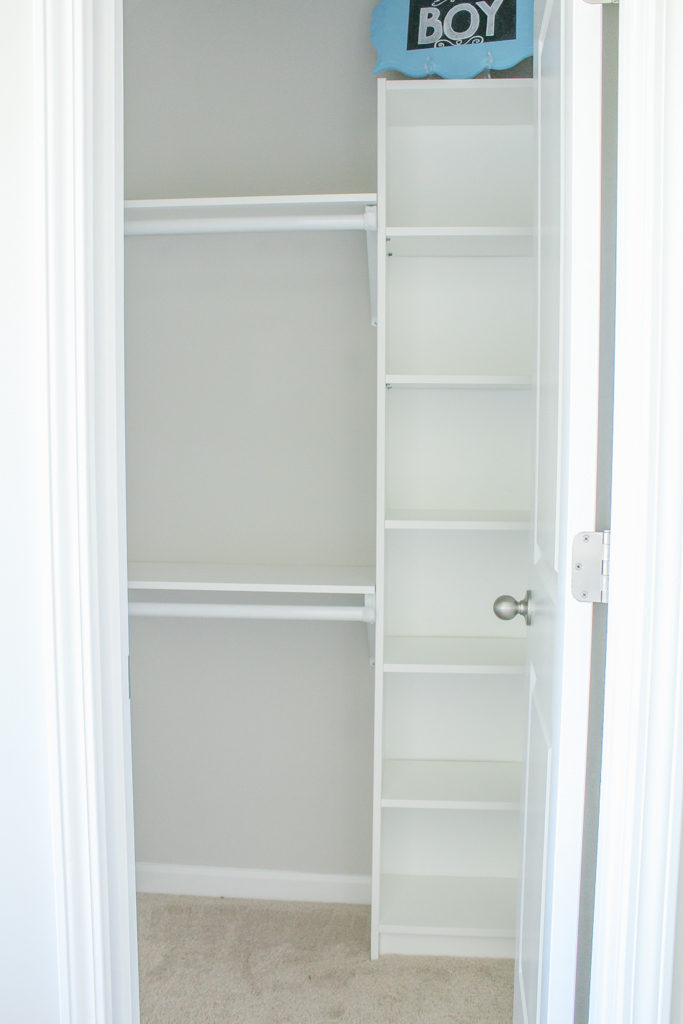
Here is what the nursery closet looked like before we transformed it into a “custom closet” in just one weekend!

The size of the closet was great to start with, especially for a secondary bedroom.
However, the space was completely underutilized. Our builder slapped up one row of wire shelving in the large closet and called it a day.
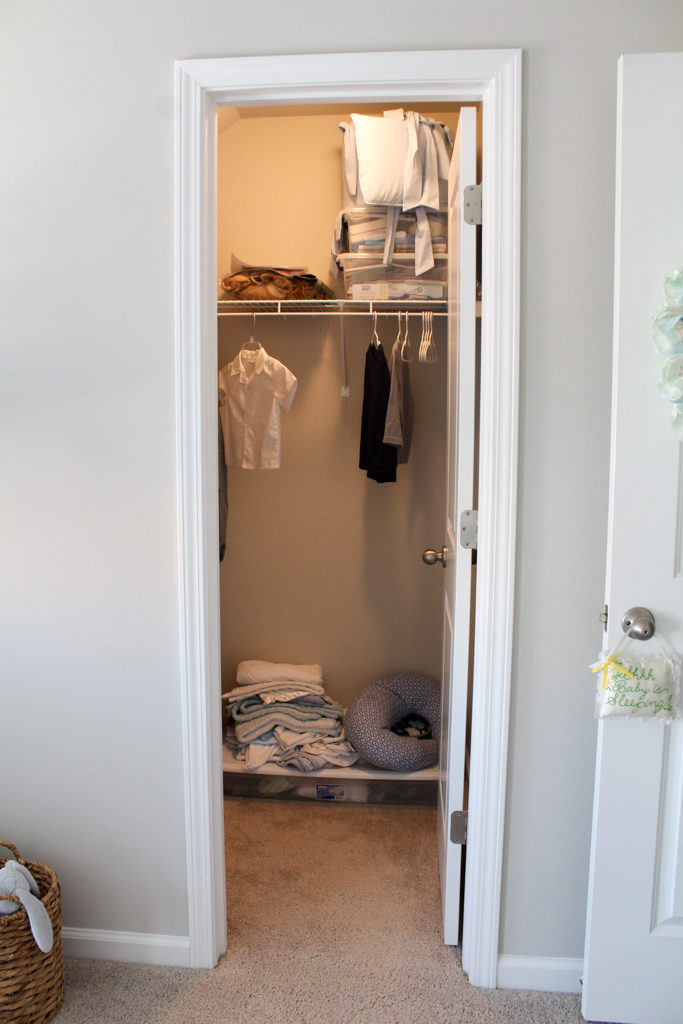
The large closet was mostly wasted space and everything ended up piled on the floor.
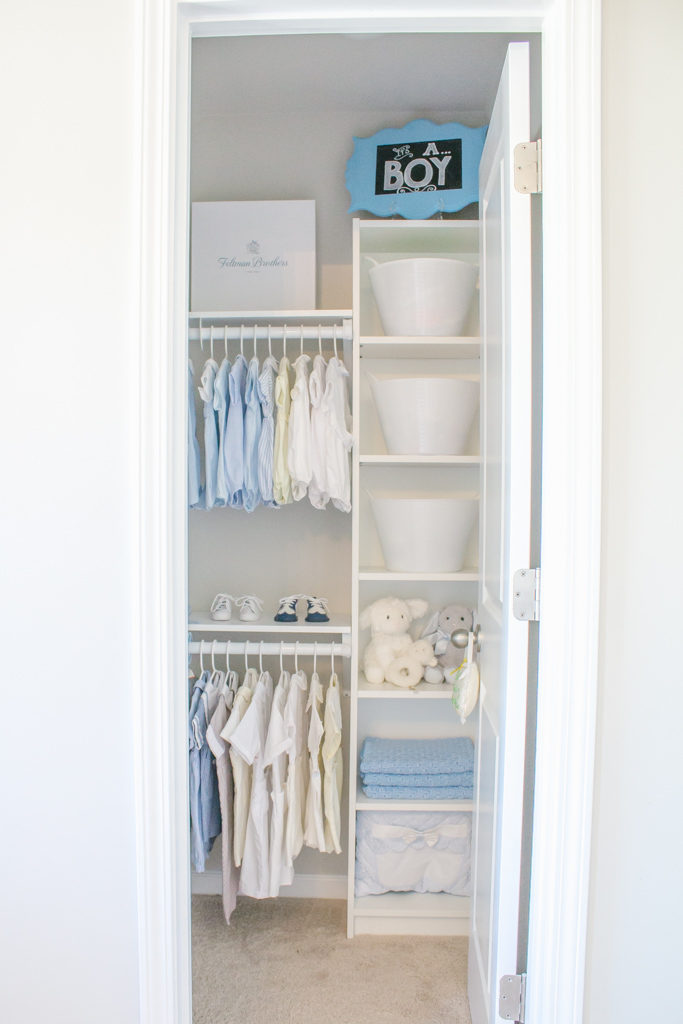
Our goal? Add a second clothes rod for double the amount of hanging space, and add shelves for extra storage of items that cannot hang on hangers.
Having shelf storage was especially important in a nursery closet. There needs to be room to store blankets, diapers, wipes, hats, socks and shoes, baby gear, etc.

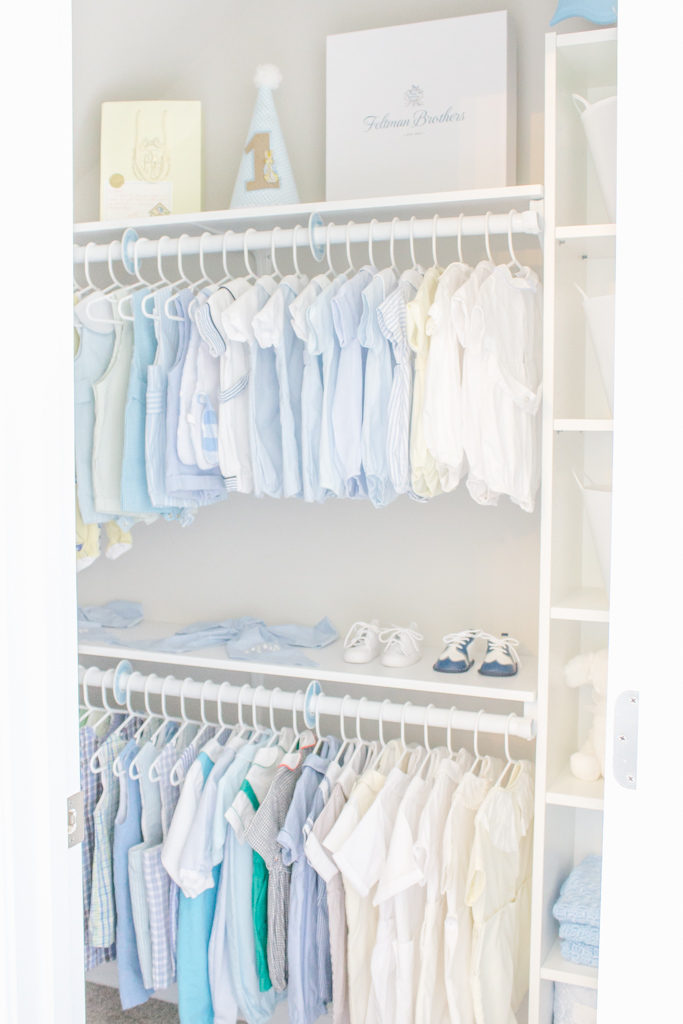
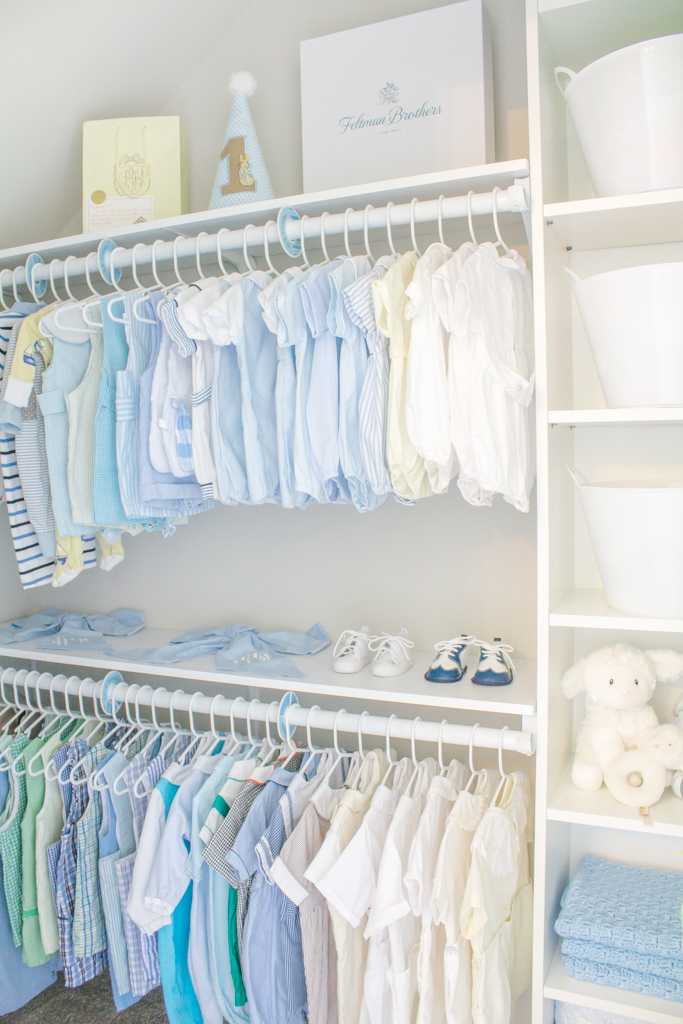
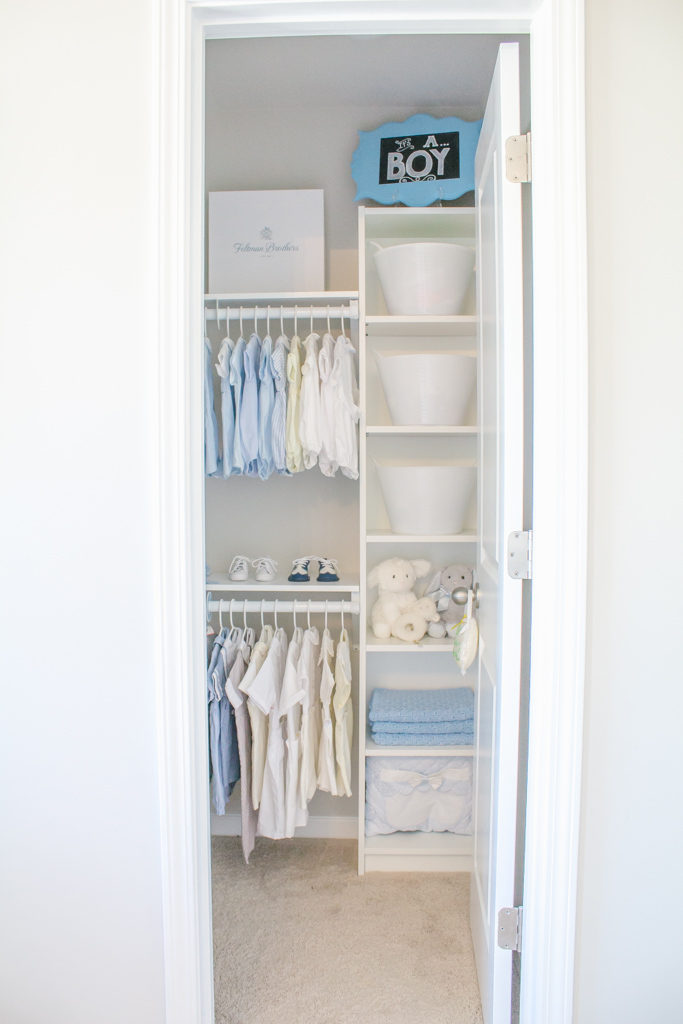
I absolutely love the way this DIY custom closet turned out.
Not only is it pretty 🙂 , but now the nursery closet is so organized and functional. Everything has it’s own space and that makes things easy to find (and makes this type A Mama very happy!).

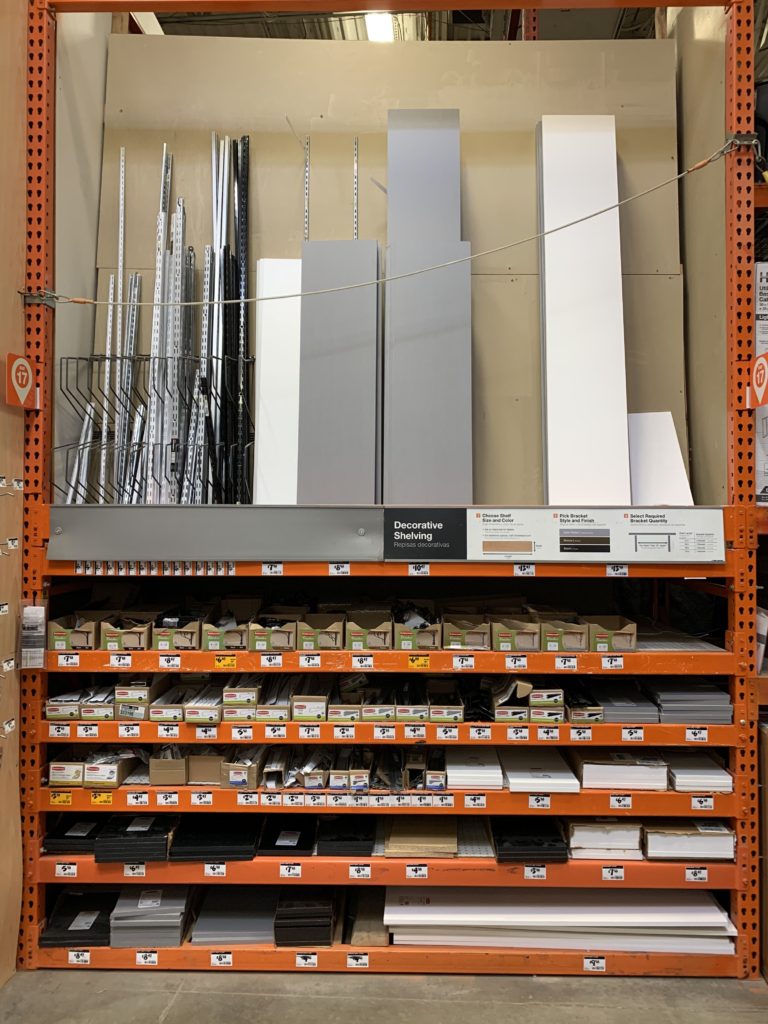
Supply List + Cost Breakdown:

Other than the Ikea Billy Bookcase, all of the following supplies can be found in the Closet Hardware section at Home Depot:
- Ikea Billy Bookcase : $49.00
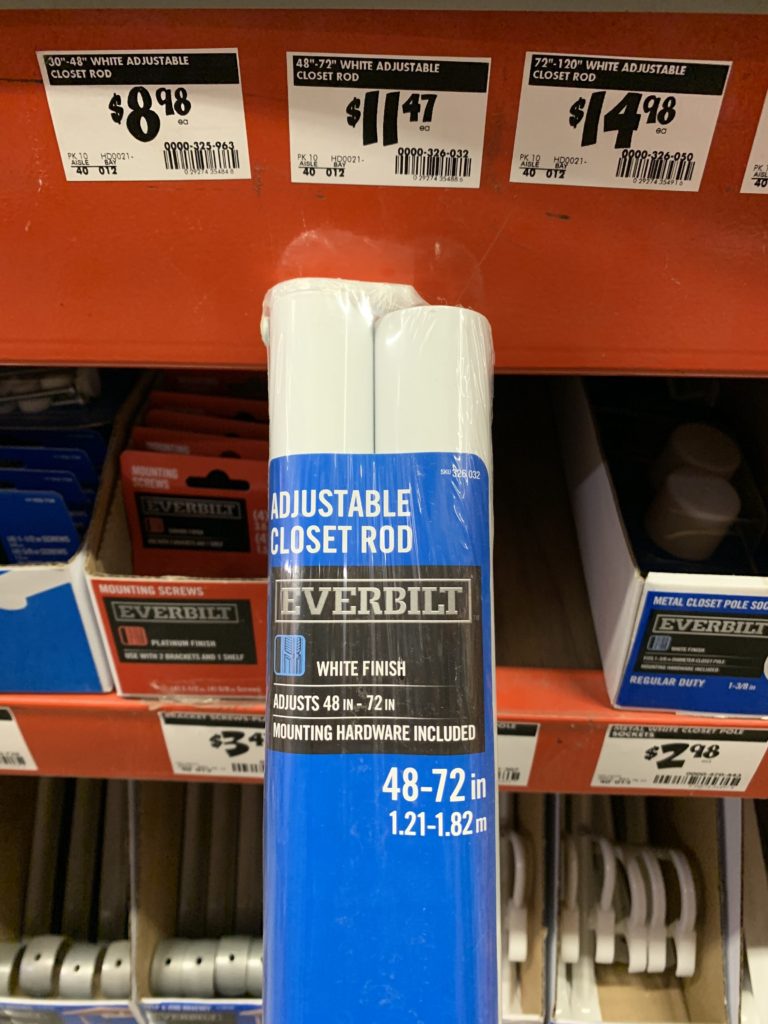
- Closet Rods : 2 @ $8.98 = $17.96
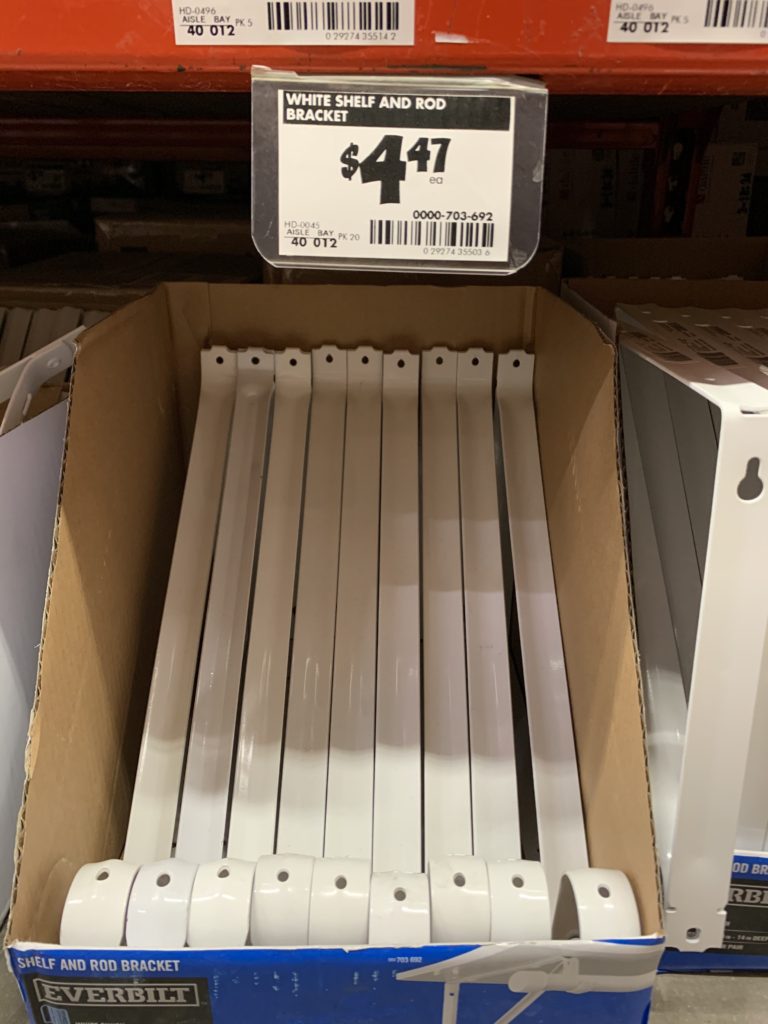
- Shelf and Rod Brackets : 4 @ $4.47 = $17.88
- Shelf Bracket : 2 @ $2.20 = $4.40
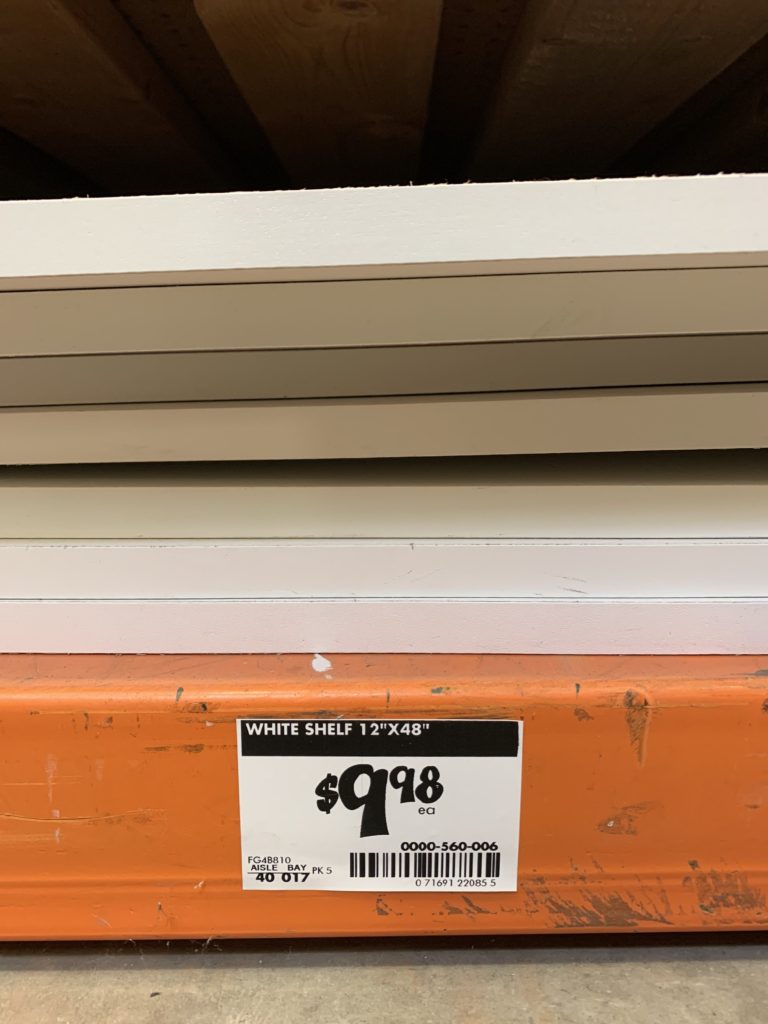
- White Shelf: 2 @ $8.98 = $17.96
Total Cost: $119.16

Easily shop the supplies you need here:

Tools Needed:
- Hammer
- Electric Screwdriver
- Miter Saw
- Laser Level
- Spackle
- Putty Knife
- 6 in 1 Painter’s Tool
- Heavy Duty Drywall Anchors
- Sandpaper
- Paint Brush
- Touch Up Paint
1. Empty Closet and Remove Existing Wire Shelving
Empty out everything in the closet and remove the existing wire shelving.
The nails that hold the brackets and shelves in place can easily be pried out using a hammer and/or our favorite 6-in-1 painter’s tool.
Patch the holes with spackle, sand them smooth, and cover with touch up paint.
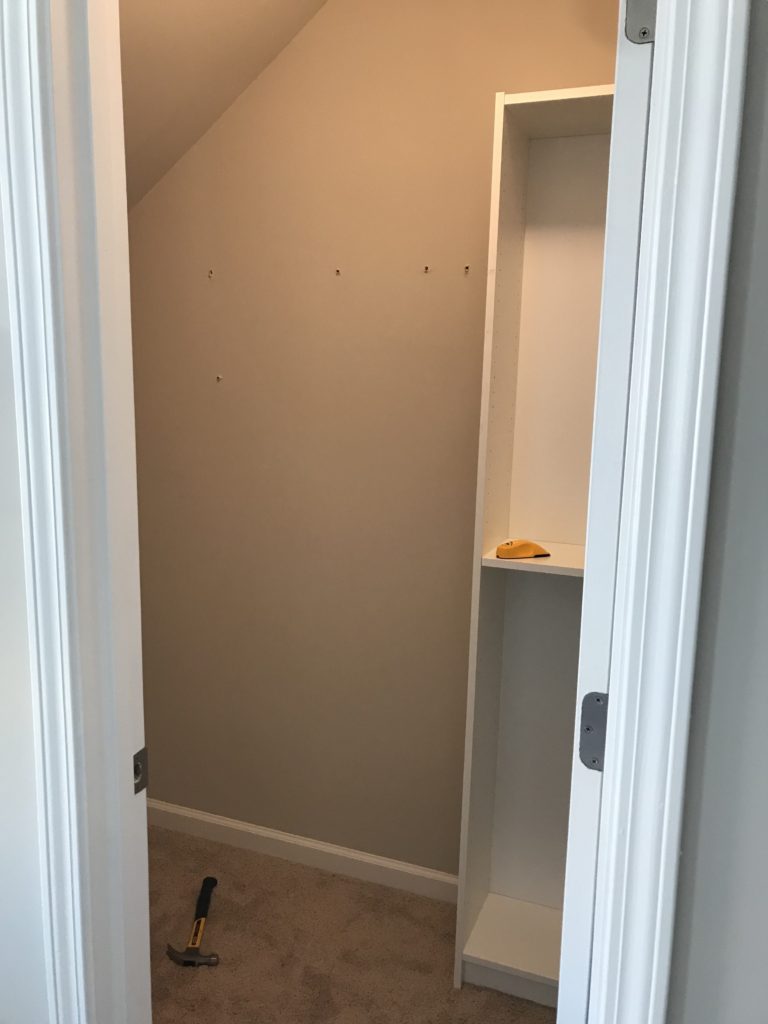
2. Remove Baseboard
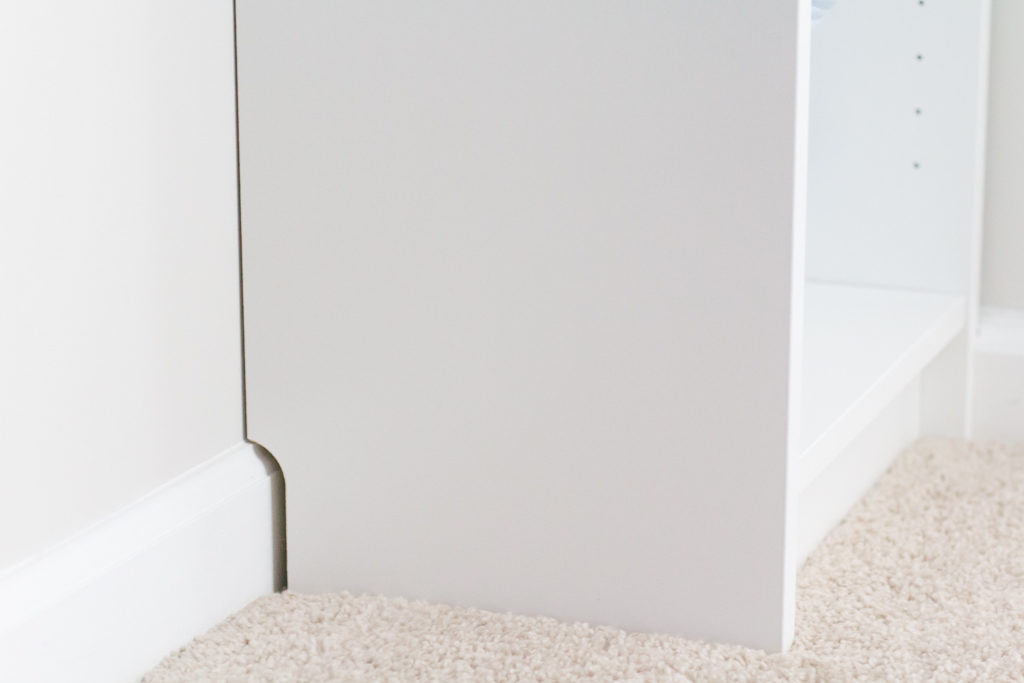
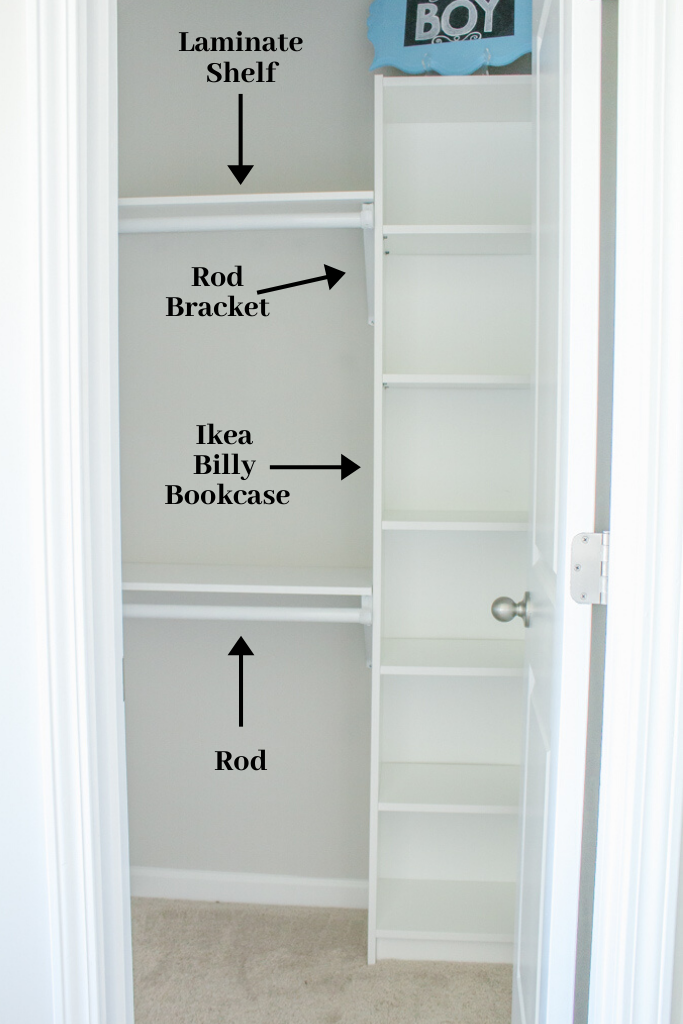
Remove the baseboard as needed to allow for the Ikea Billy Bookcase to sit flush against the wall.
The nice thing about the Billy Bookcase is that it already has a notch in the back to allow for the backside of the bookcase to sit flush against the wall without removing the back baseboard (see photo above).
However, since once side of our Billy Bookcase was going to be sitting directly against the wall, I had to remove the baseboard on the right side. This allowed me to push the bookcase flush against the wall. (Later on I will trim the original baseboard to size and reinstall it – see photo above for reference).
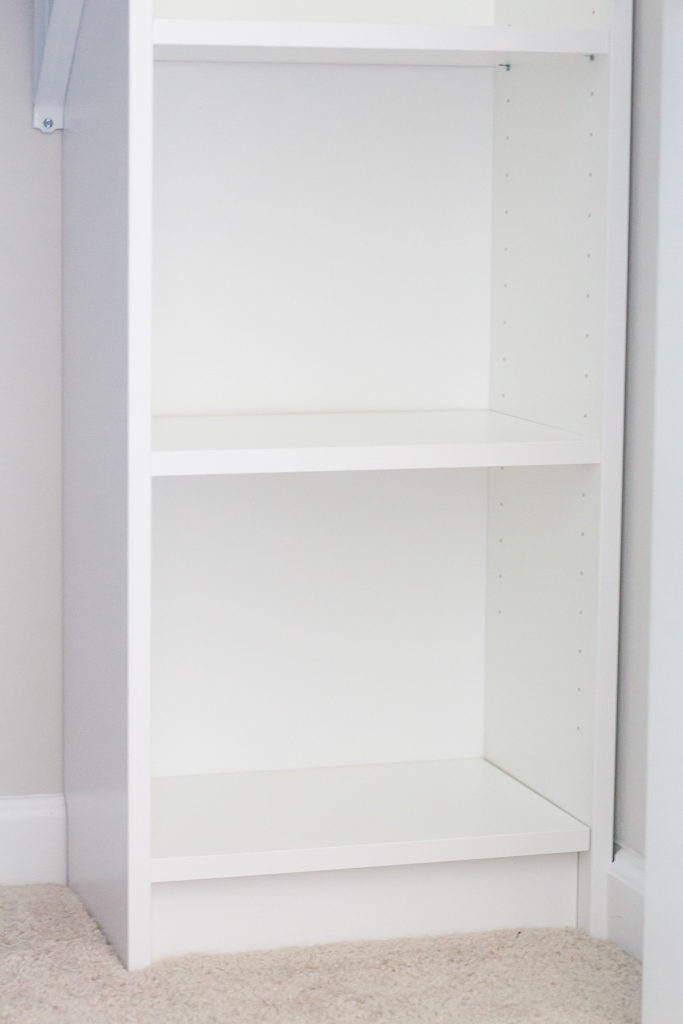
3. Assemble and Install Billy Bookcase
Assemble the Billy Bookcase according to the Ikea instructions.
Once your bookcase is assembled, move it into the desired location in the closet.
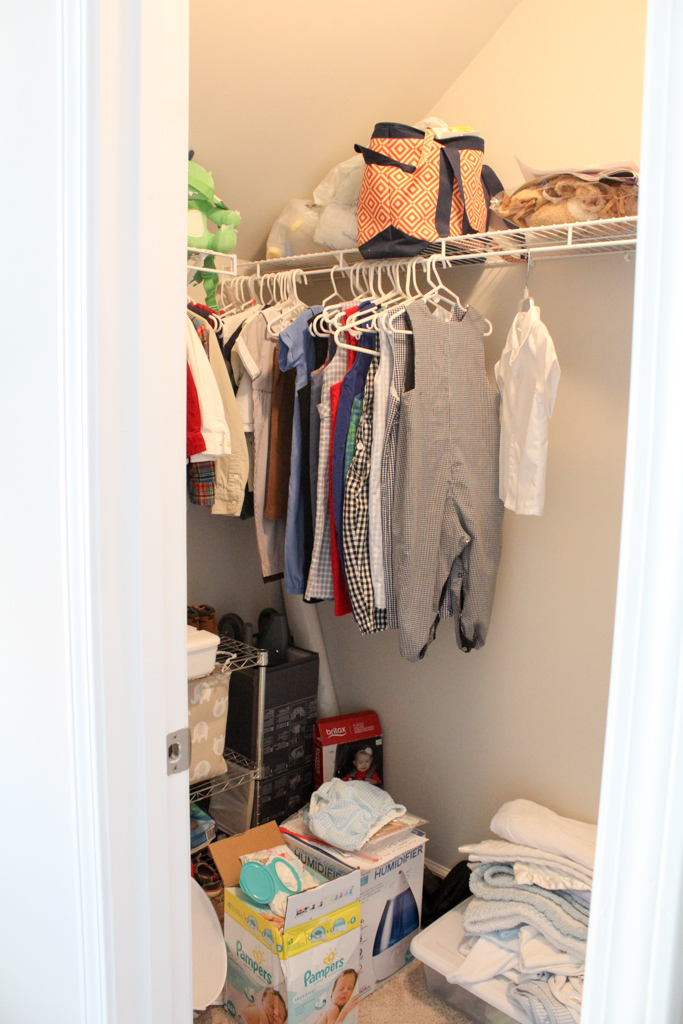
If you look at the “Before” photos above, you can see that the left side of this closet has a slanted ceiling. To maximize space most efficiently I placed my Billy Bookcase on the far right side of the closet.
4. Secure Billy Bookcase to Wall
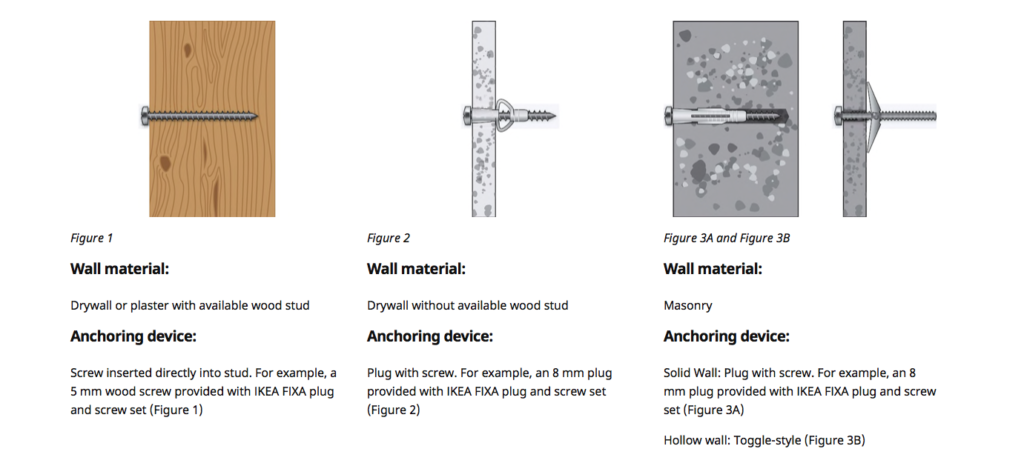
Photo via Ikea.com
The Billy Bookcase comes with a an anchoring device to secure your bookcase to the wall. Ikea also provides the above image and instructions to ensure you secure your furniture properly depending on what type of wall material you are anchoring into. Follow the Ikea instructions to ensure that your bookcase is firmly secured.
5. Mark Height for Shelves and Brackets
Using a tape measure and level, mark the height for your closet rods and shelves.
You can customize the number of shelves and rods, as well as the height of the shelves and rods, according to the size of your closet as well as your personal needs.
When installing double rods for a “standard” closet, consider these general guidelines:
- Hand the top rod 80″ from the floor
- Hang the bottom rod 40″ from the floor
- Leave at least 3 feet of spaces between the two rods
To be perfectly honest, because of the slant in the ceiling I was not able to follow these guidelines exactly. The top rod is less than 80″ from the floor and there is not quite 3 feet of space in between the rods. (But that’s okay! I believe in customizing a house that works for you and your family.)
6. Install Brackets
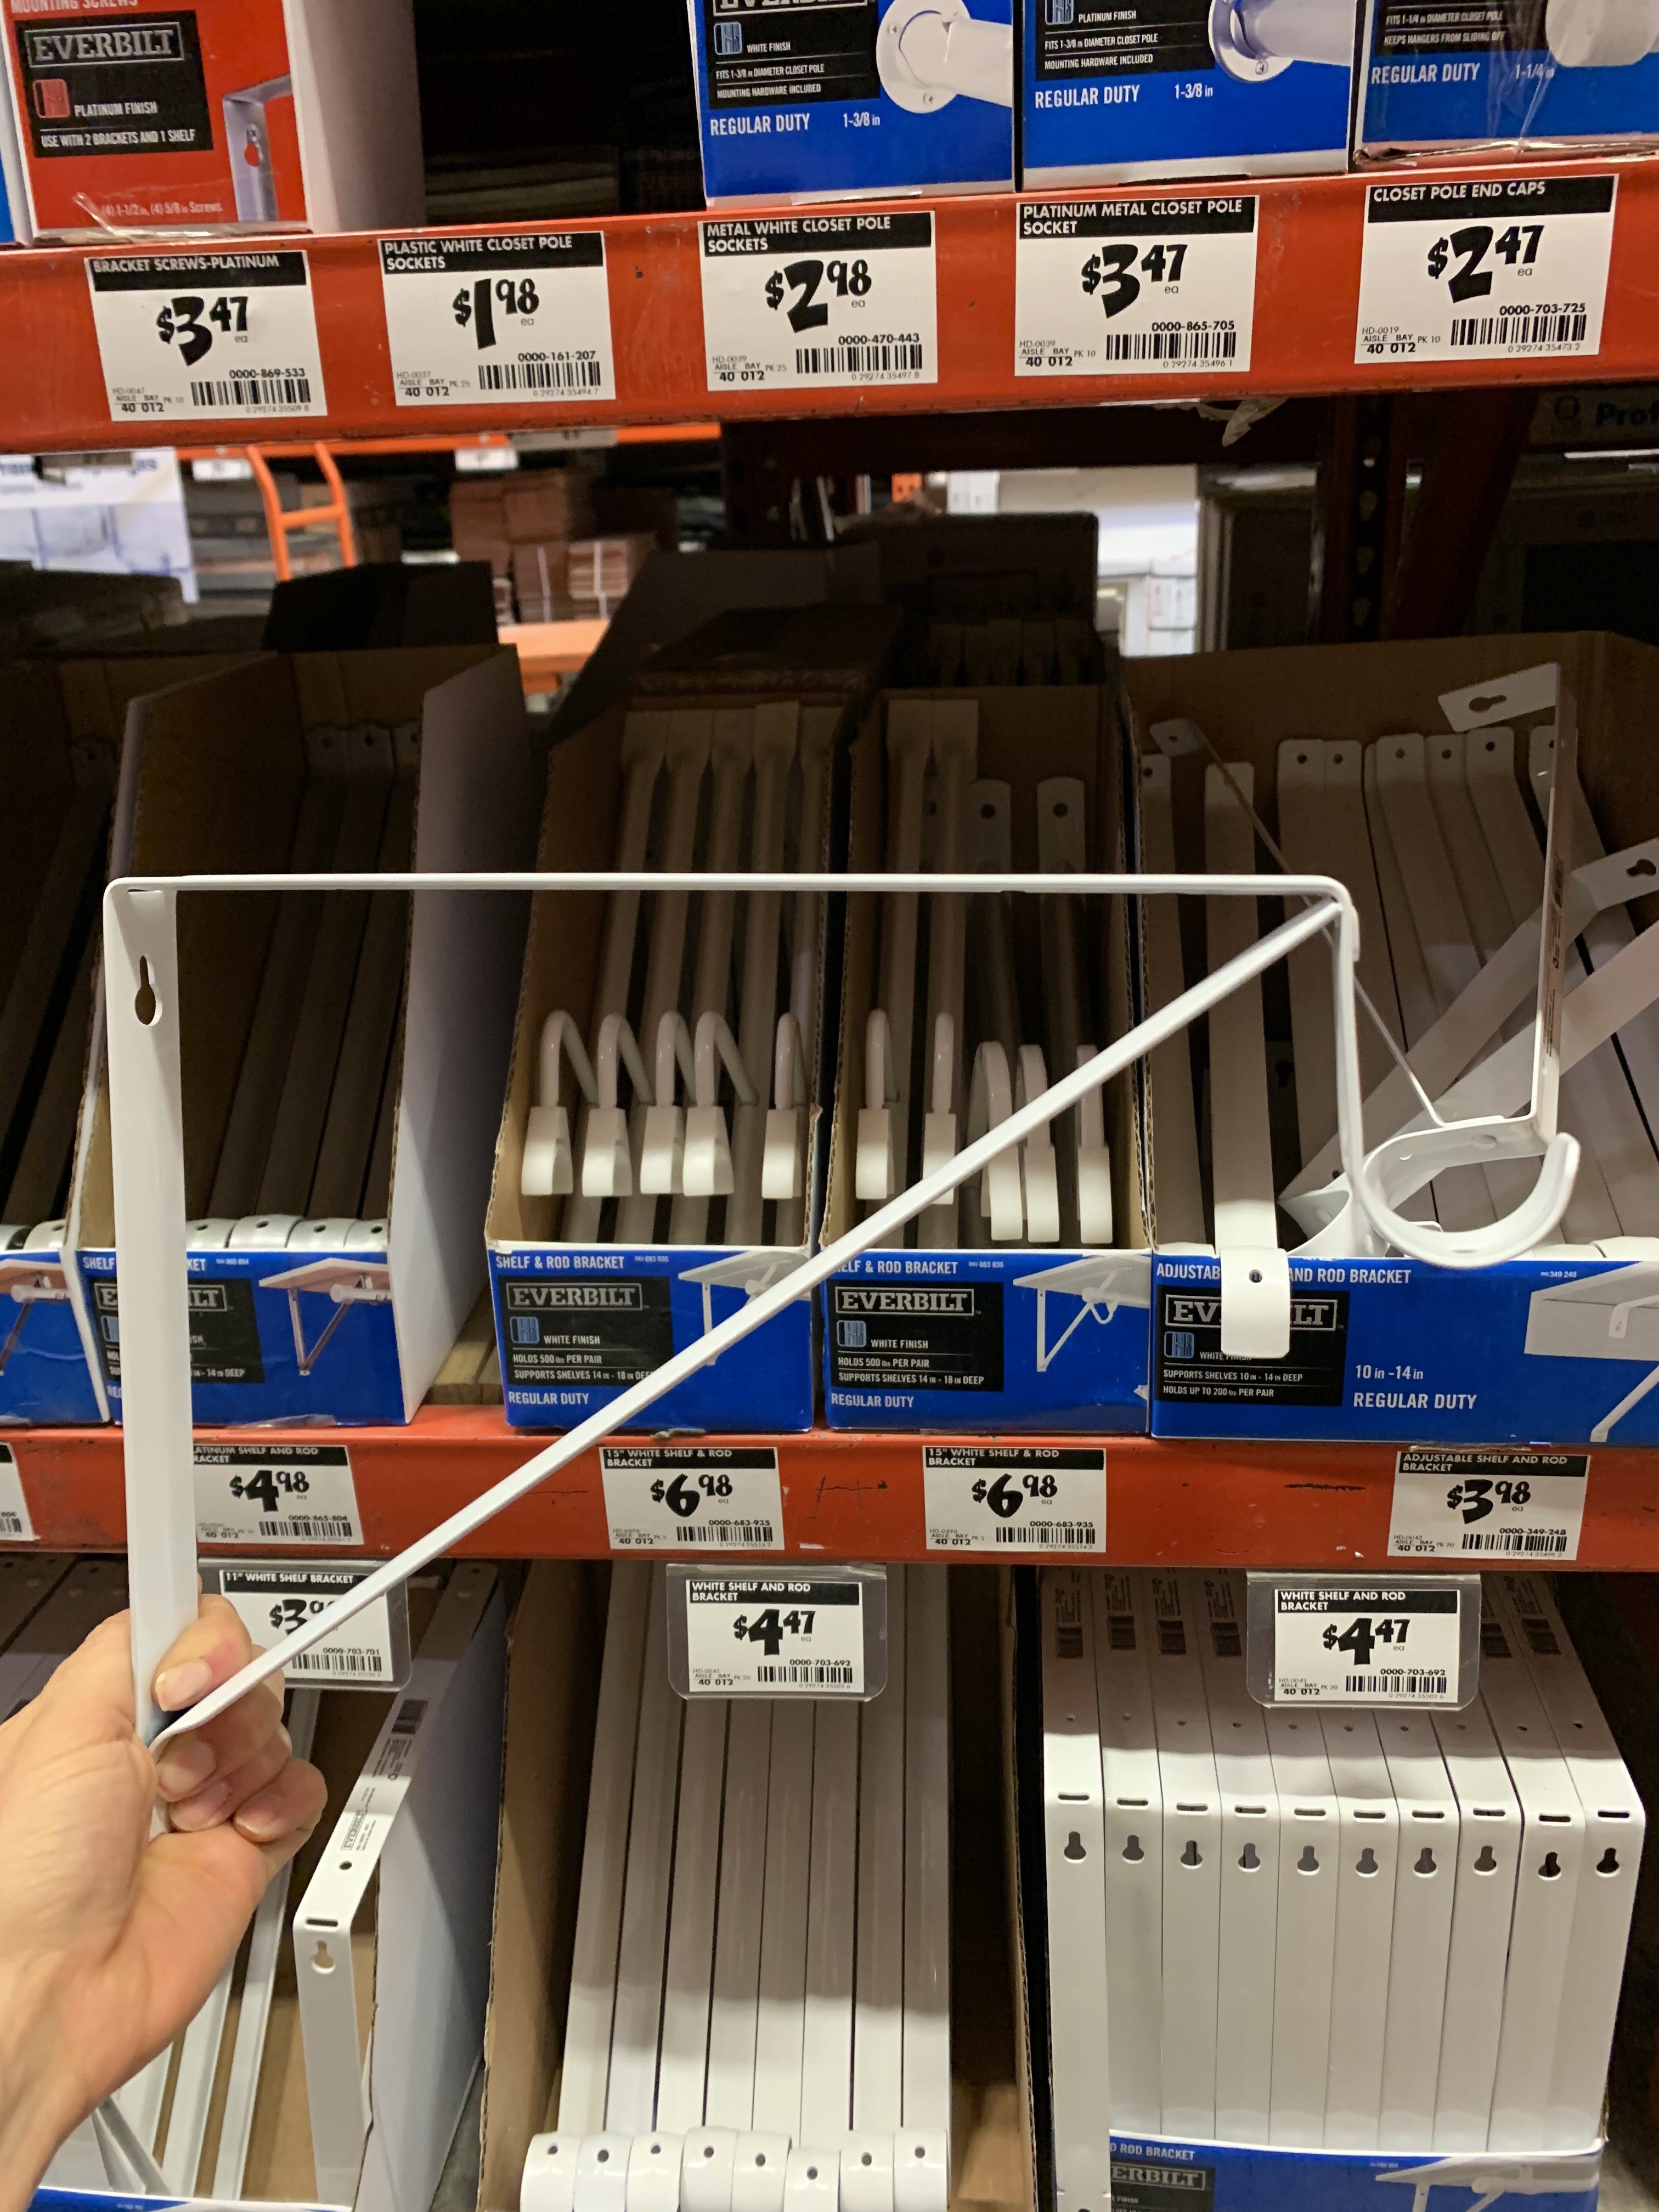

The length of your shelf will determine how many brackets you will need: support brackets for shelves should be spaced no more than 24 inches apart.
We used three brackets for each shelf: one in the middle, and one on each end.
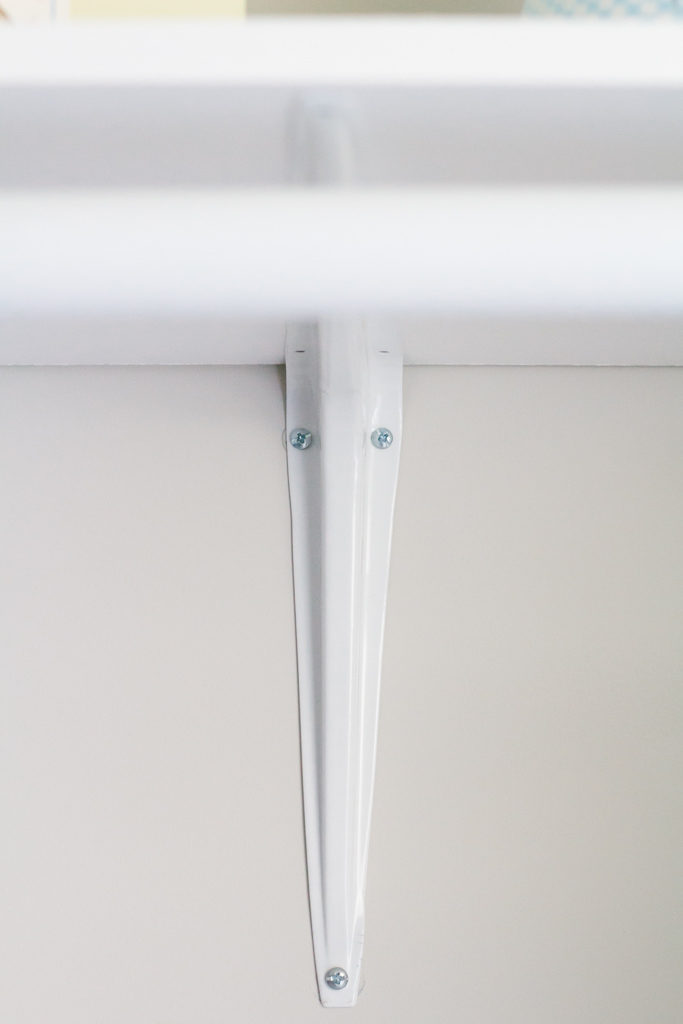
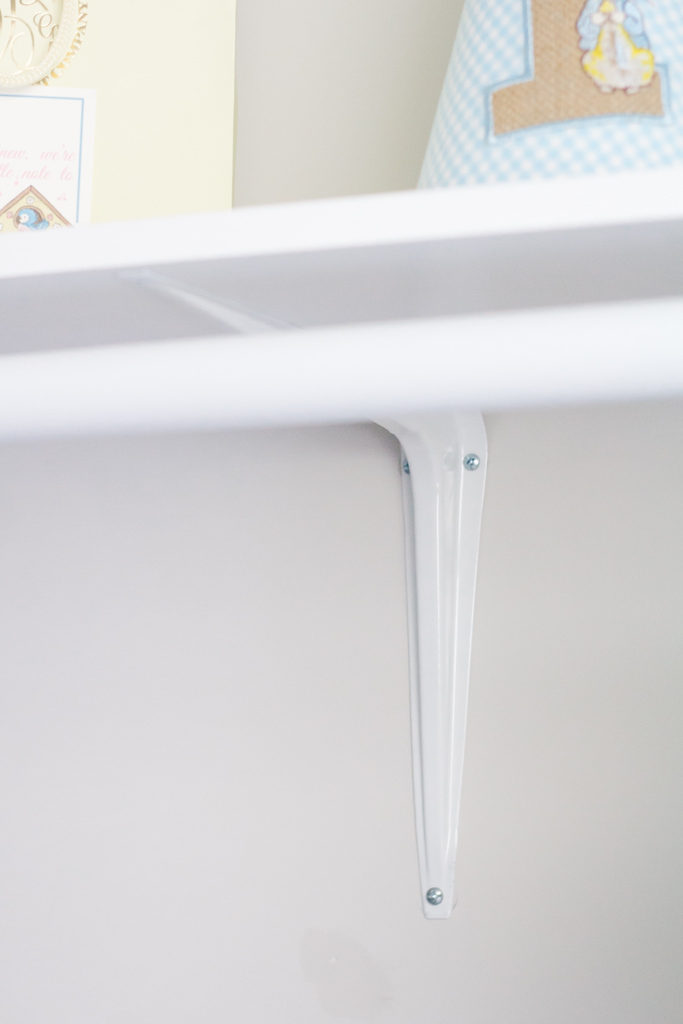
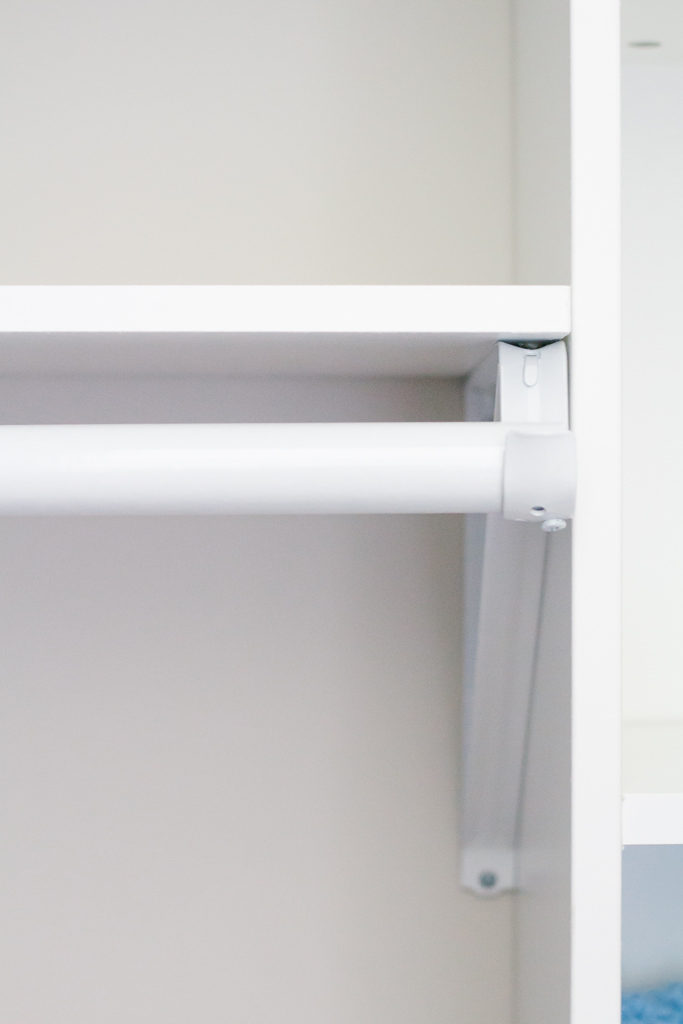
Photo above shows the middle shelf bracket supports.
We use two types of brackets for this project:
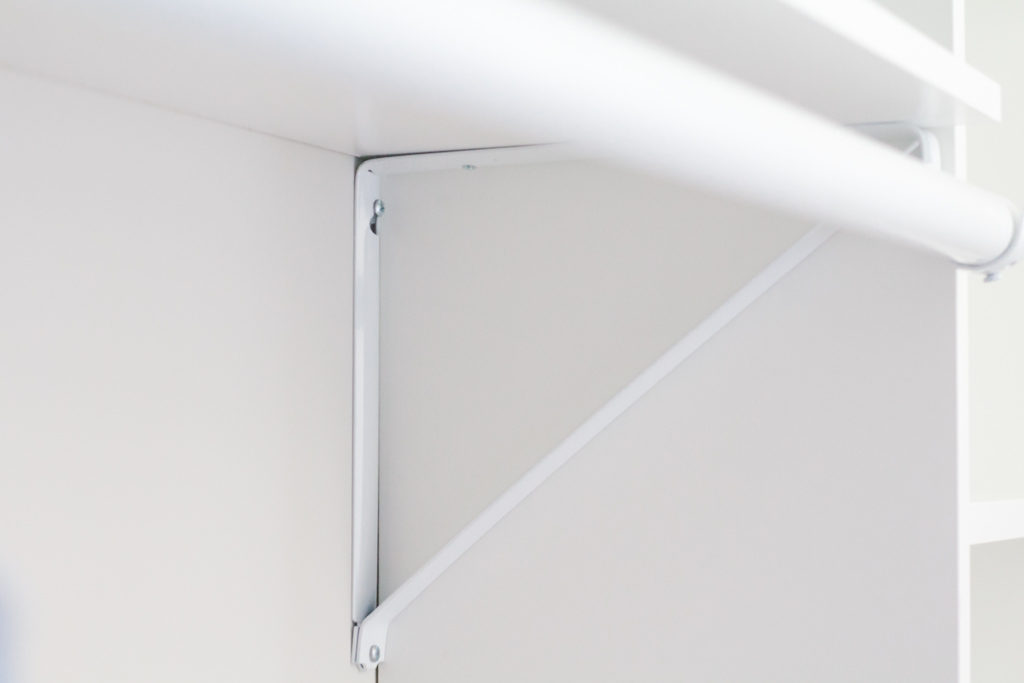
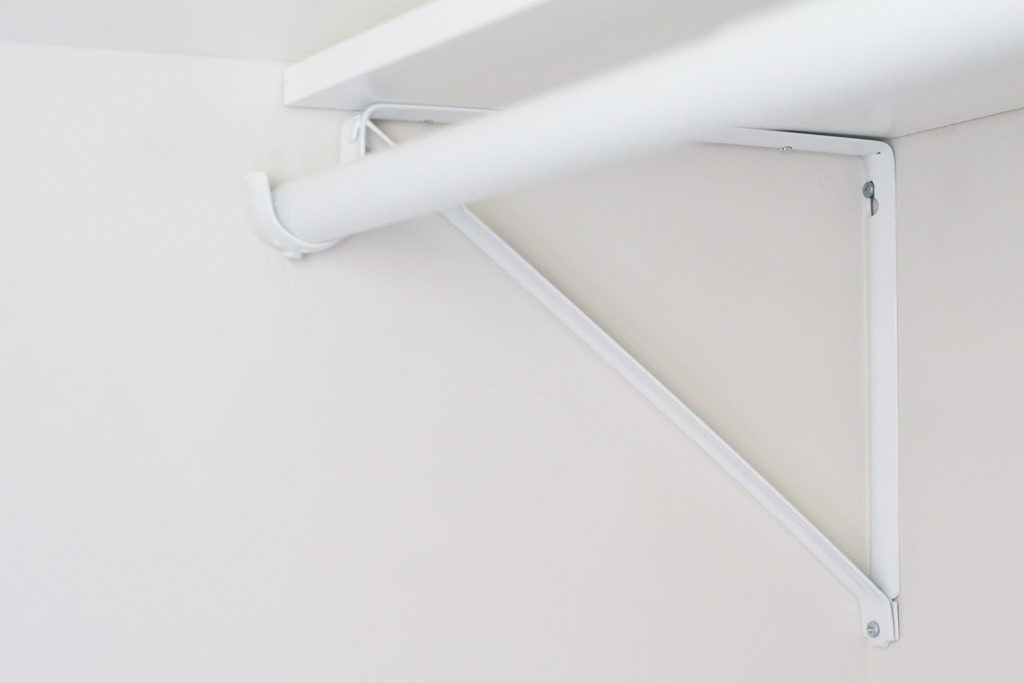
- Shelf and Rod Brackets: We used on of these on each end of the shelf. In addition to the bracket to hold the shelf, it also has a curved hook to hold the rod. (See photo below).
- Shelf Brackets: We used these basic shelf brackets in the middle to provide additional support (remember, you need a bracket at least every 24 inches!)
Photos above shows the shelf and rod bracket supports on each end of the shelf.
Install brackets either directly into the studs (using a stud finder), or with heavy duty dry wall anchors (I like these the best).
7. Install Rod and Closet Shelves
Place your closet rod in the installed rod brackets and secure with the screws provided.
Install the shelves on top of the metal brackets with screws.
You will likely need to cut your shelf to size using a miter saw. (When cutting laminate material, I like to put a piece of painter’s tape over the line where I will be cutting. This helps prevent the edges from splitting).
8. All Done!
Here’s a side by side look at the before, during, and after!
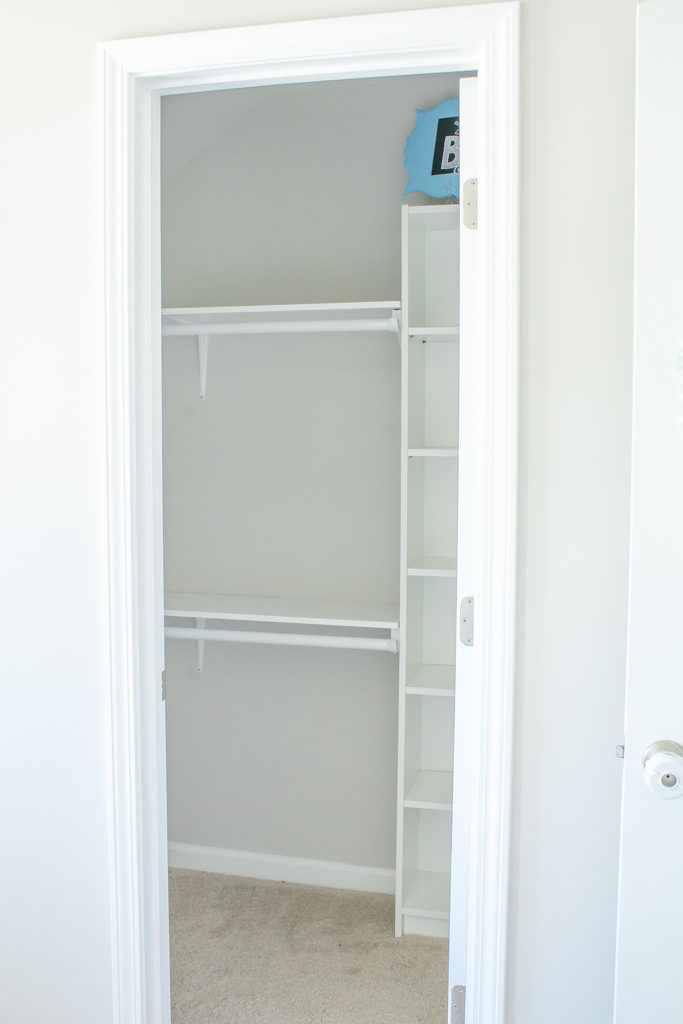
Before | After | After with Organized Clothes
This simple DIY and “Ikea Hack” completely changes the layout and function of this closet, and it will add resale value to our home in the future.
Here are a few sneak peeks of the closet all organized and looking pretty with the sweetest baby clothes : ) (Don’t worry, although functional and organized, it rarely looks like this in real life!)

Check back later this week: I will be sharing so many more photos of the nursery closet, as well as my favorite tips and products for a perfectly organized nursery closet!

Save Easy DIY Custom Closet: Budget Ikea Hack to your favorite Pinterest board!
“But everything should be done in a fitting and orderly way” 1 Corinthians 14:40


Love this! We’re using it to customize our nursery closet this weekend. Can you point me to where you purchased the white buckets in the Billy Bookcase? Thank you!!
Thank you! And yay!! The white buckets are from the DollarTree 🙂