DIY Banquette Bench: Thrifty Furniture Makeover
Learn how to turn a bench into a custom upholstered DIY banquette bench in this thrifty furniture makeover.
Flipping furniture has been a hobby of mine since the day we bought our very first fixer upper home as newlyweds. There is just something so satisfying about taking an old, outdated and worn out piece of furniture and giving it new life to make it beautiful again. It never gets old!
DIY Banquette Bench: Thrifty Furniture Makeover
Today I am sharing one of my favorite thrifty furniture makeovers to date: a reimagined, custom upholstered DIY banquette bench. Learn how I took an old, outdated bench I found on Facebook Marketplace and turned it into a beautiful, custom upholstered dining banquette!
Space-Saving Seating: The Need for a Banquette
The configuration of the eat-in breakfast area in our kitchen gave me trouble since the moment we moved in. It is a narrow space that doesn’t leave much room for a large table and chairs. This is particularly problematic since it is our main and only eating area in our home. (We currently utilize our formal dining room as a homeschool room.)
So not only does our breakfast nook need to comfortably seat our family of five for every meal, but if we have guests over for dinner this is currently the main dining spot in our home.
After moving in I tried different tables and furniture, and even rearranged and removed a china cabinet. But no matter what, I could not figure out how to properly configure the space to accommodate a large table as well as 6-8 dining chairs.
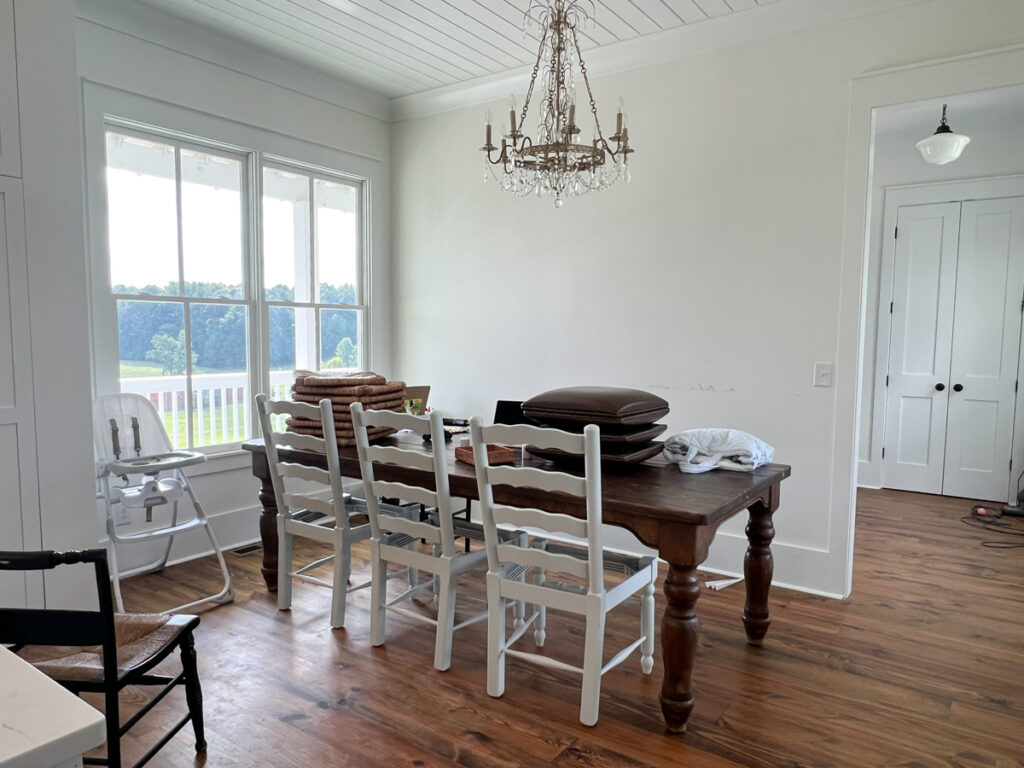
At some point over the course of this this (very frustrating) breakfast nook journey, I found a large farmhouse dining table and chairs on Facebook Marketplace. (You can see how I painted the chairs and kitchen barstools here).
I loved the table, and I loved the chairs. The only problem? The space was too narrow. The chairs near the wall did not have enough space. to be pulled out from under the table without hitting the wall behind them. Our wall had scratch marks and dings all over it!
At some point it finally dawned on me. Our breakfast nook needed a banquette-style bench!

Not only are upholstered banquettes beautiful, they are stationary objects and therefore do not need additional space like chairs to be pulled in and out from under the table!
DIY Banquette Bench: The Inspiration
It was love at first site when I spotted this beautiful, custom upholstered dining banquette bench (the ruffle skirt sold me immediately!). In fact, I have an entire Pinterest board dedicated solely to banquettes.
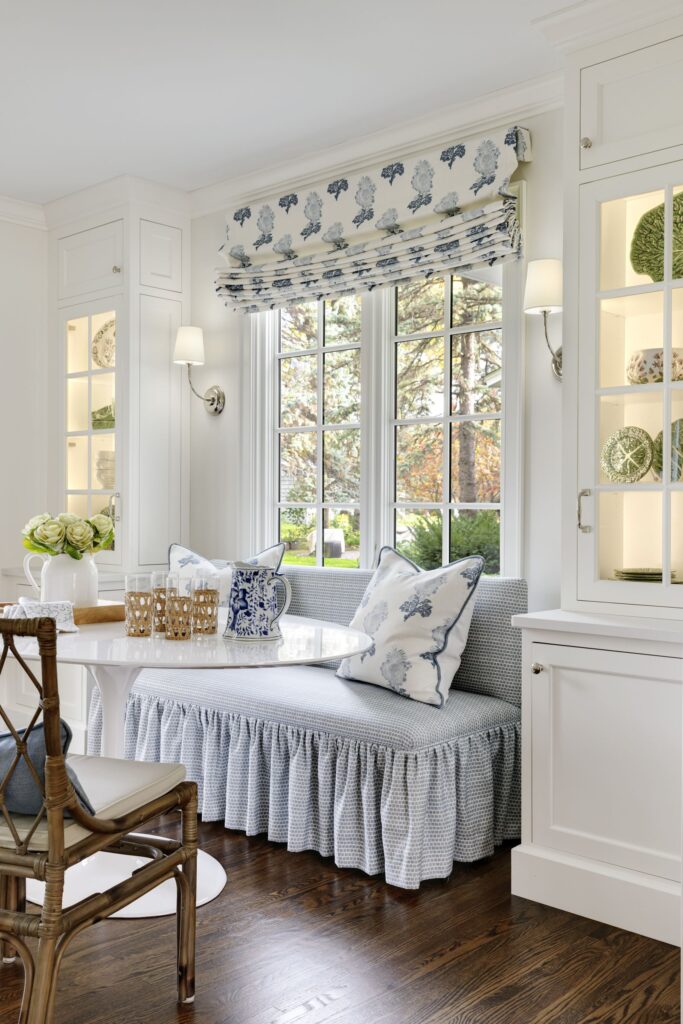
I especially loved the style of this upholstered ruffled dining banquette via Crystal Kitchen + Bath.
Having this exact upholstered dining banquette custom made would costs thousands. So as usual, I started thinking about how I could recreate this look on a DIY budget.
Facebook Marketplace Bench: The Before
I started searching my local Facebook Marketplace for dining banquettes. I did not find an actual banquette, but I did come across this old upholstered bench. It just happened to be the exact length I needed for our table!
At this point I wasn’t even sure how I would transform it into a DIY banquette bench, but I decided to get it anyways since it was the exact dimensions I needed.
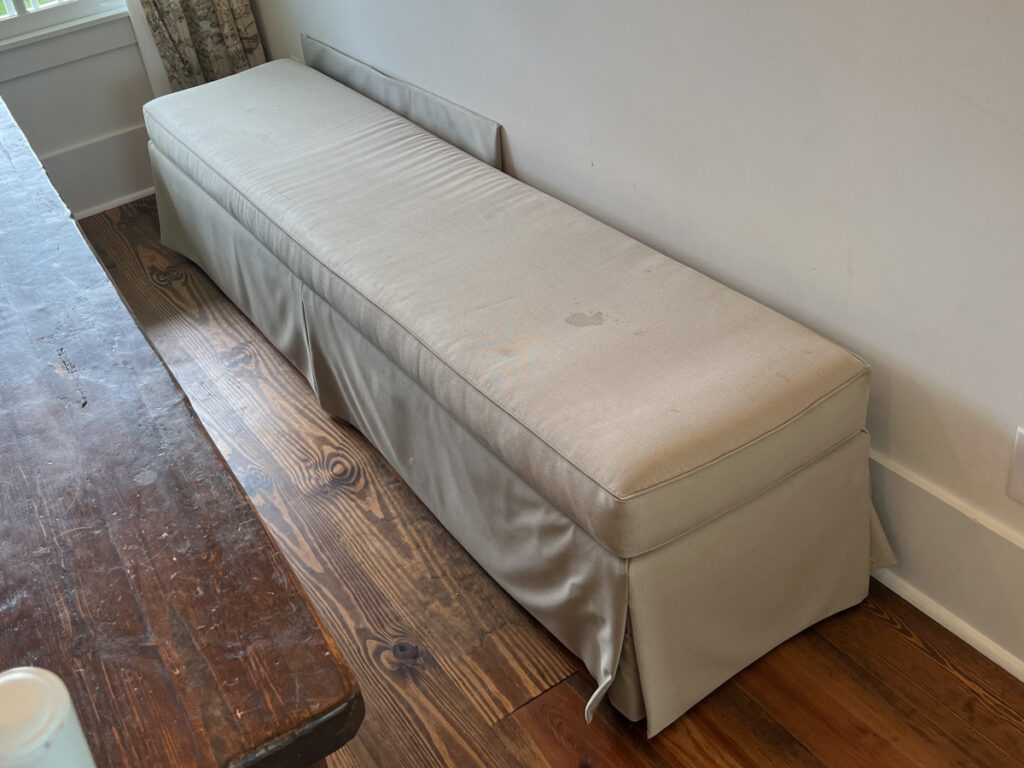
The bench itself was very nice at one time. I could tell it was custom made and upholstered with high-end fabric. However, it had been sitting outside in someone’s garage for quite some time so the fabric was pretty dirty and dingy. I didn’t plan to keep the fabric so it wasn’t a big deal. I was excited that it had good bones!
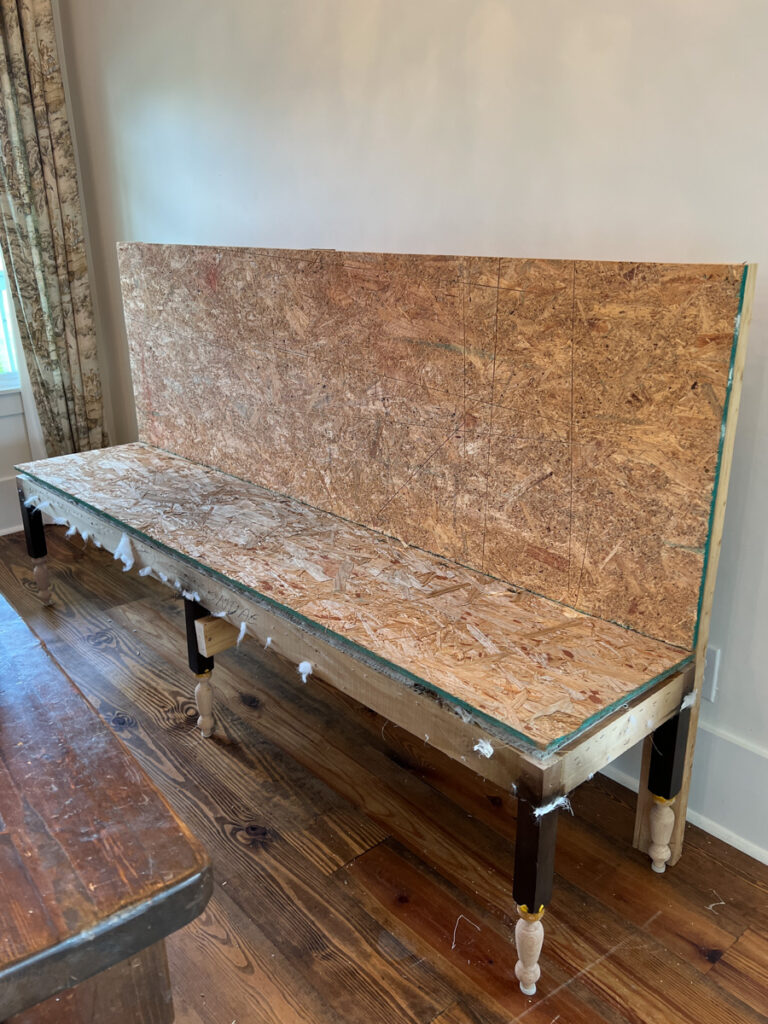
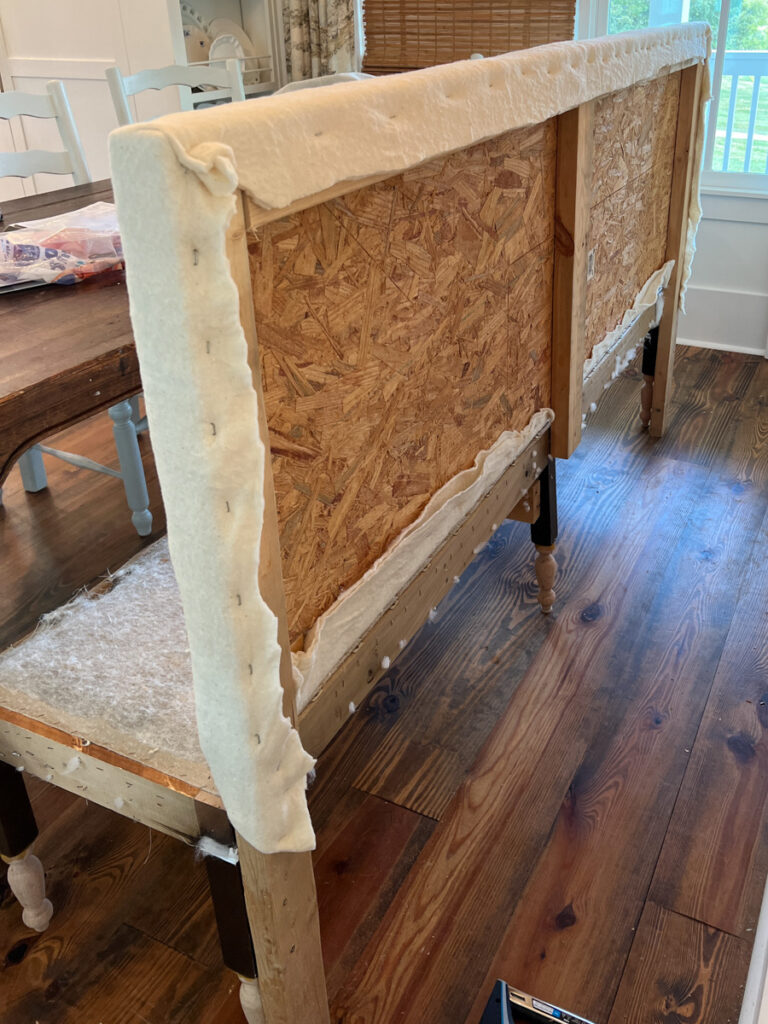
DIY Banquette Bench: Deconstructing The Bench
The first order of business to reimagine my new bench into a banquette was to deconstruct the entire thing! As you can see below I had a few helpers during this process.
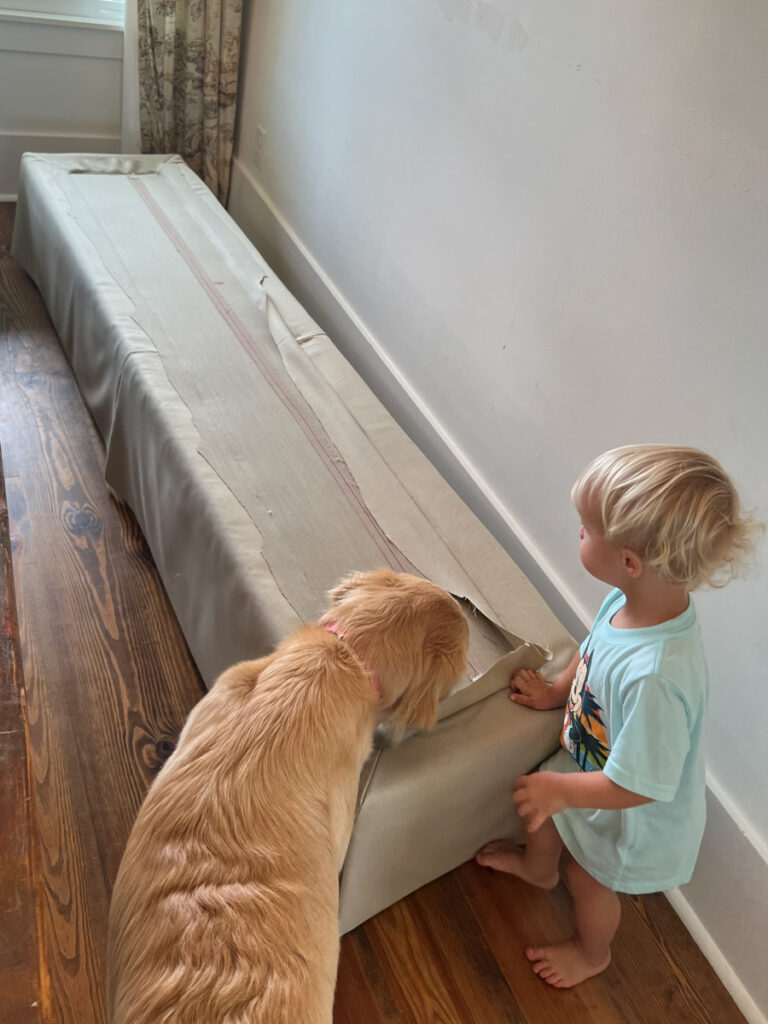
I started by removing the top cushion and all of the fabric with scissors.
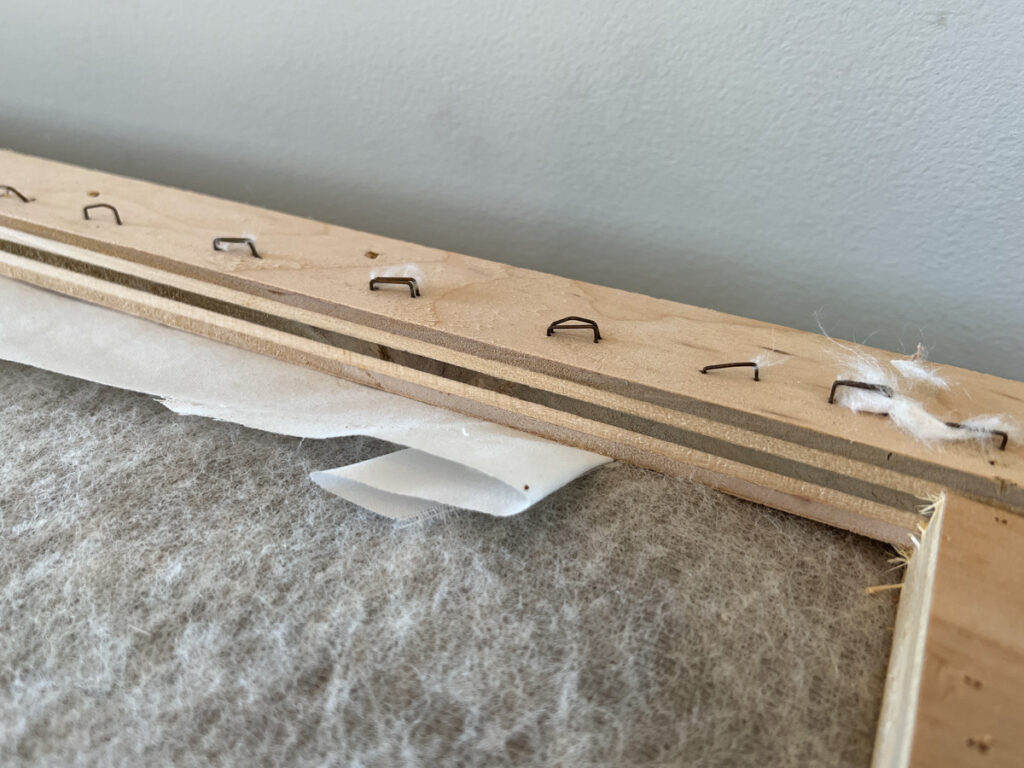
Next I removed all of the batting and the staples.
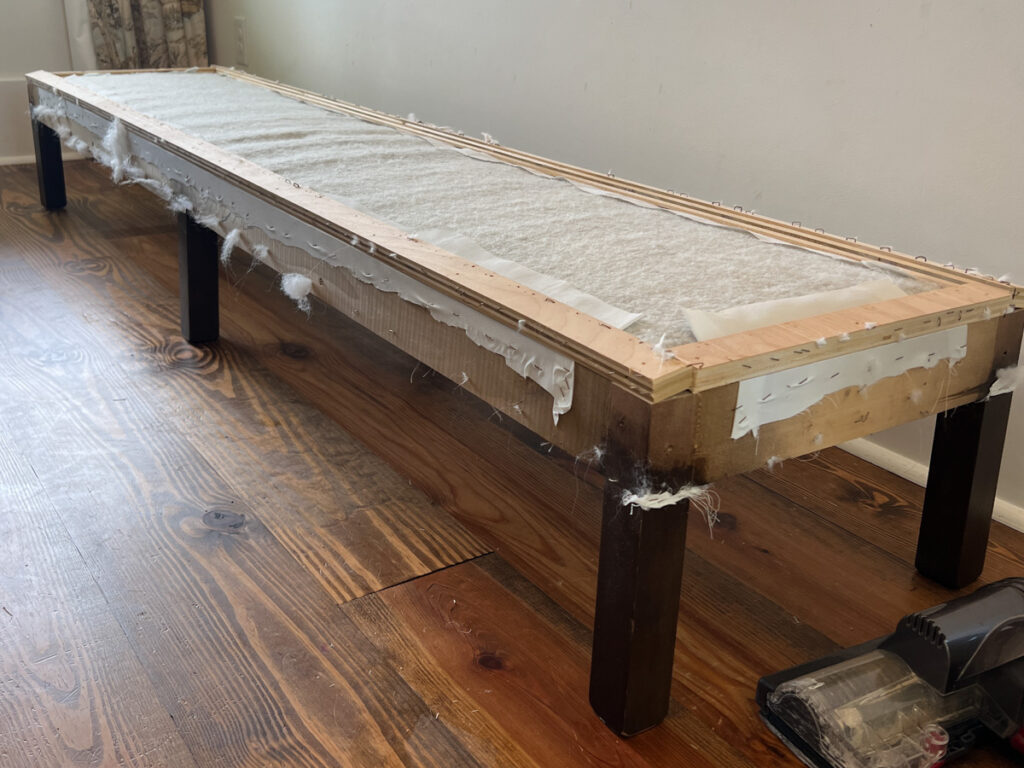
I used a staple pulled tool to quickly remove all of the staples. You could use needle-nose pliers but the staple remover tool makes this task much easier and quicker.
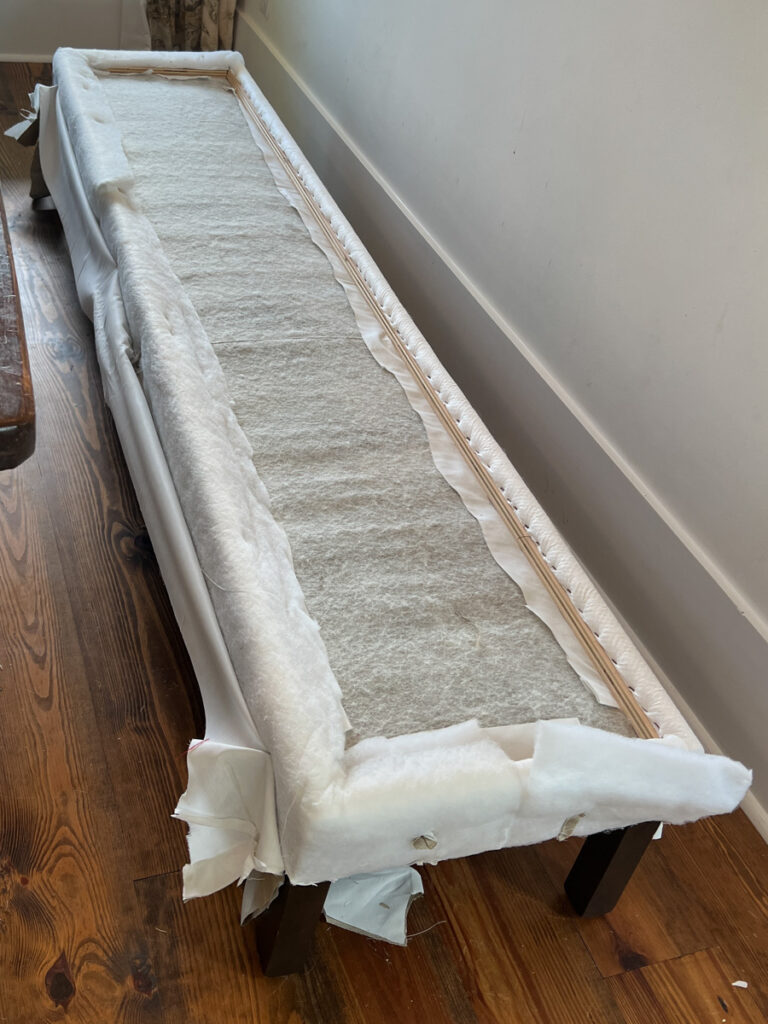
DIY Banquette Bench: Adding Legs for Height
Next I needed to add a little bit of height to the bench to make it the correct height when someone sits down at our table.
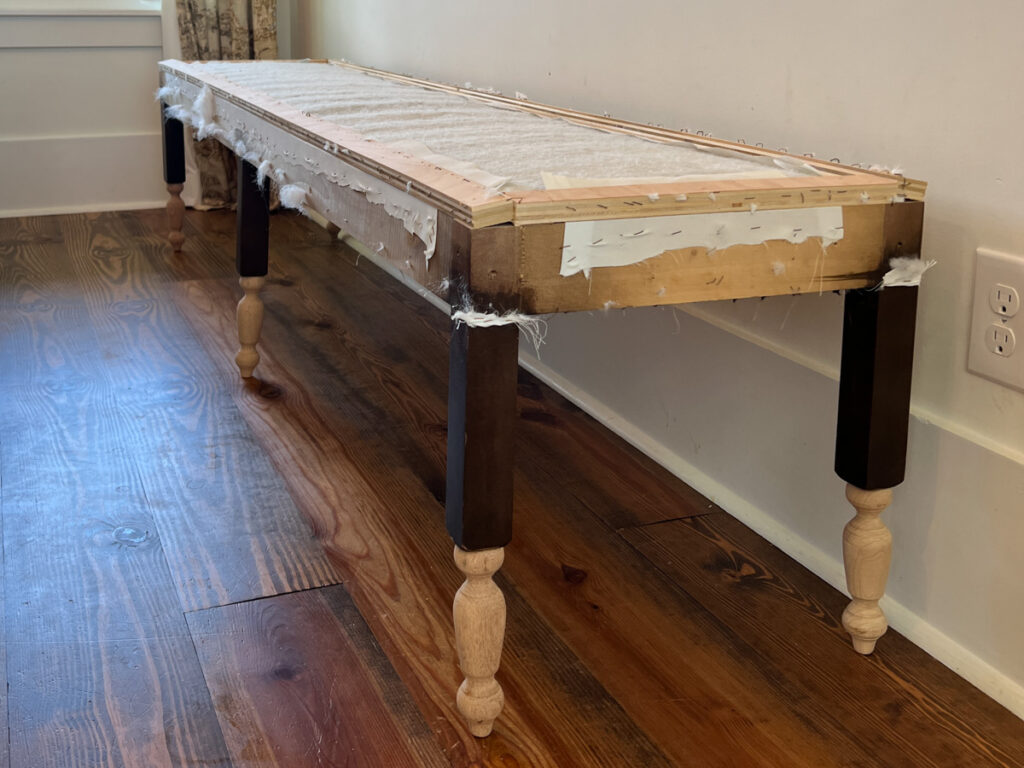
I used these inexpensive furniture legs that easily screwed right into the bottom of the existing bench legs.

Converting the Bench to a Banquette
I used materials that we already had in our garage to convert the bench into a banquette.
I screwed 2×4’s into both ends as well as the middle of the bench to provide an upright support for the back of the banquette.
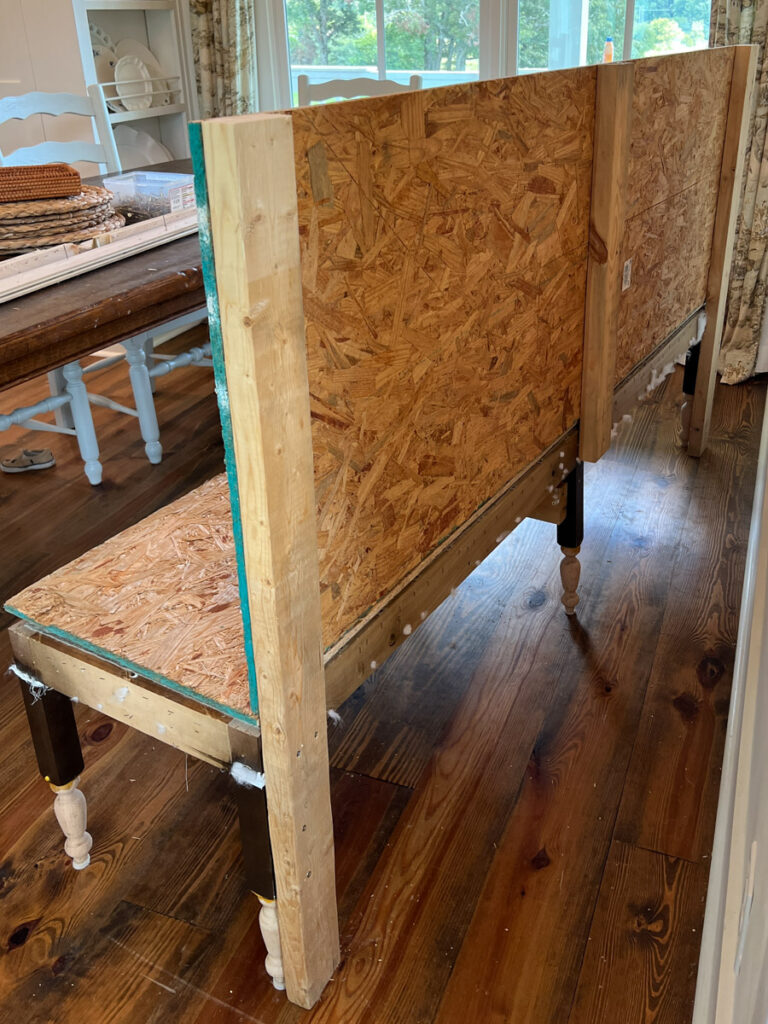
After that I cut two pieces of plywood: one for the back, and one for the seat. (I used a piece of OSB because we had it sitting in the garage and needed to get rid of it anyways.)
The back (upright) piece of plywood was screwed into the 2×4’s to secure it.
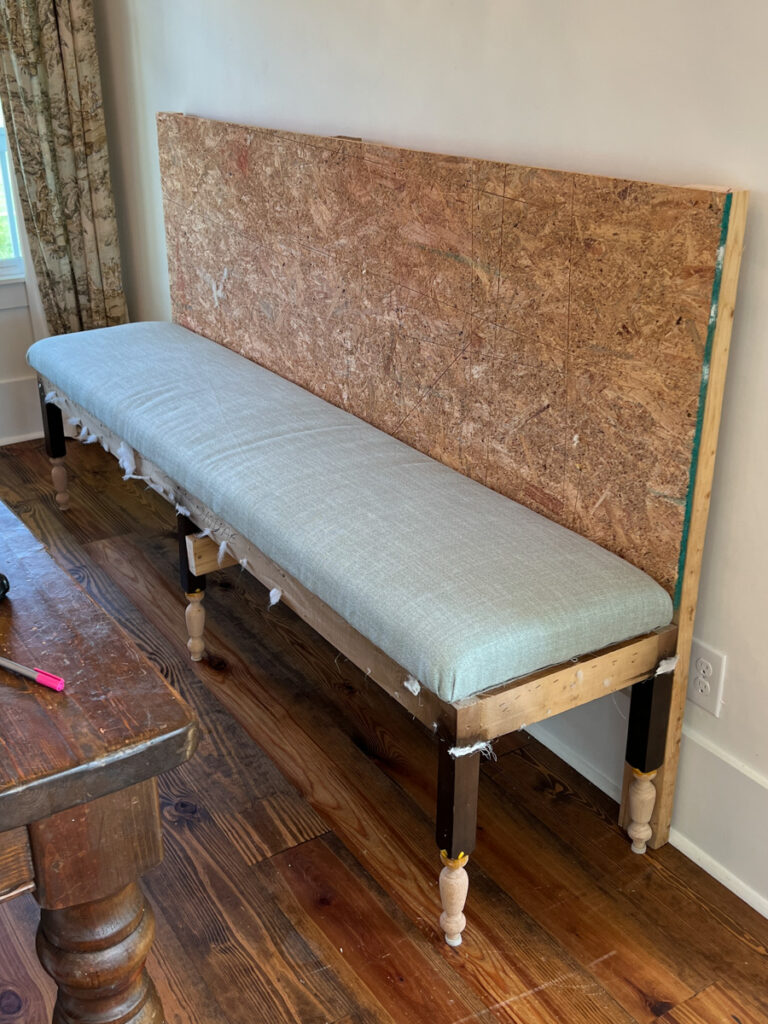
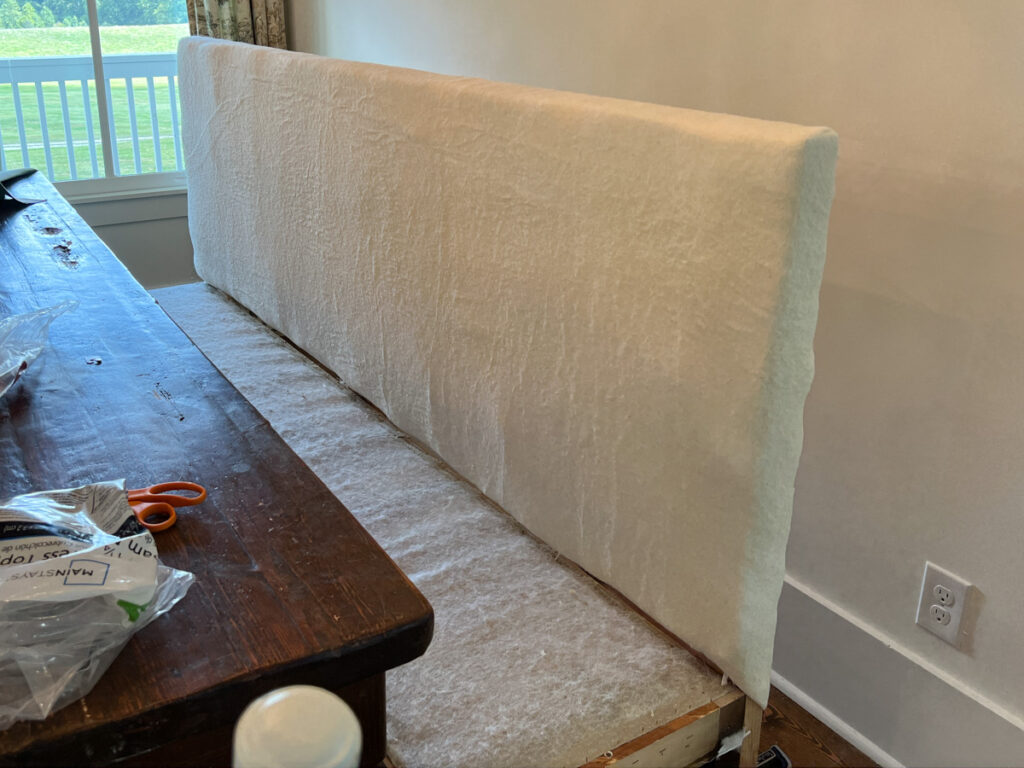
DIY Banquette Bench: Making The Seat Cushion
With the back piece of wood attached, now it was time to make the seat cushion.
I salvaged the original foam and re-used it for the seat cushion on the new bench.
You will want to cut your foam piece the same exact size as the seat.
Next, layer everything from bottom to top in this order:
- Wood
- Foam
- Batting
- Fabric
Place your piece of foam on top of the piece of wood. Be sure to line up all of the edges of the foam with the wood.
Next cut a piece of batting that is slightly larger (about 3-4 inches on every side) than your foam and wood. Wrap the batting around the foam to the back of the piece of wood and use a stapler to attach it. Pull the batting taut, but not too tight.
Next repeat the same process but this time with the fabric.
Place the fabric on top of the batting and wrap it around to the back. Use a stapler to secure the fabric in place. Just like the batting, make sure the fabric is pulled taut, but not too tight.
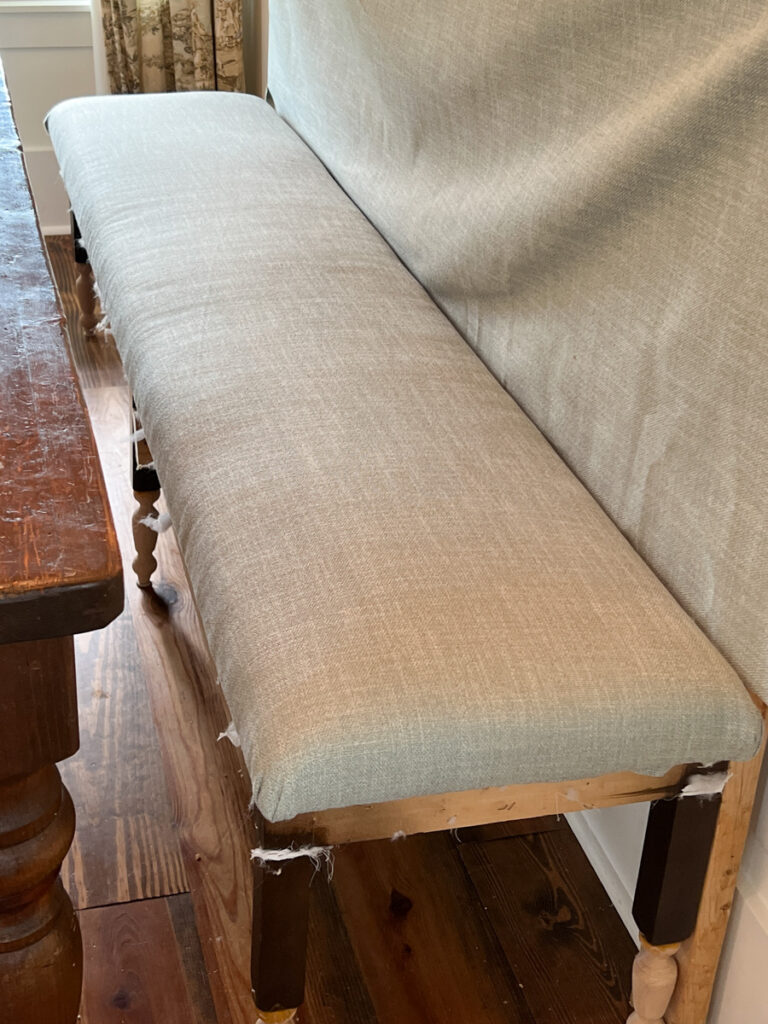
DIY Banquette Bench: Seat Cushion Piping
I wanted the banquette seat cushion to have piping along the edge where it meets the ruffle skirting.
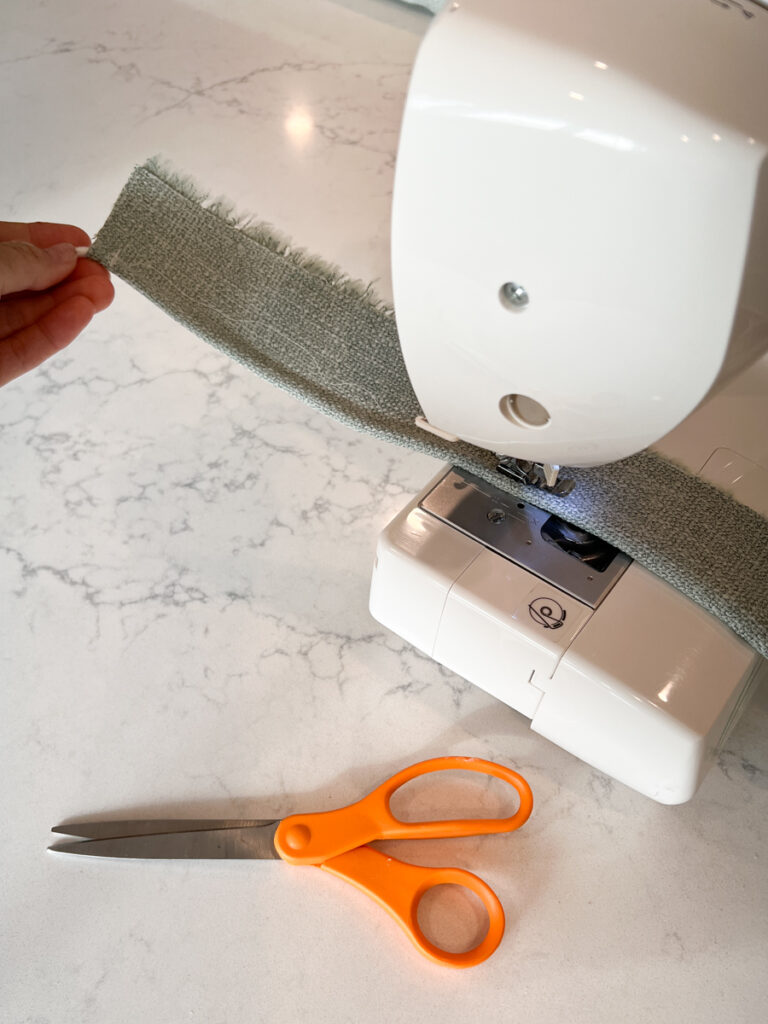
I used cording and my sewing machine to sew a piece of fabric around a piece of cording to make piping.
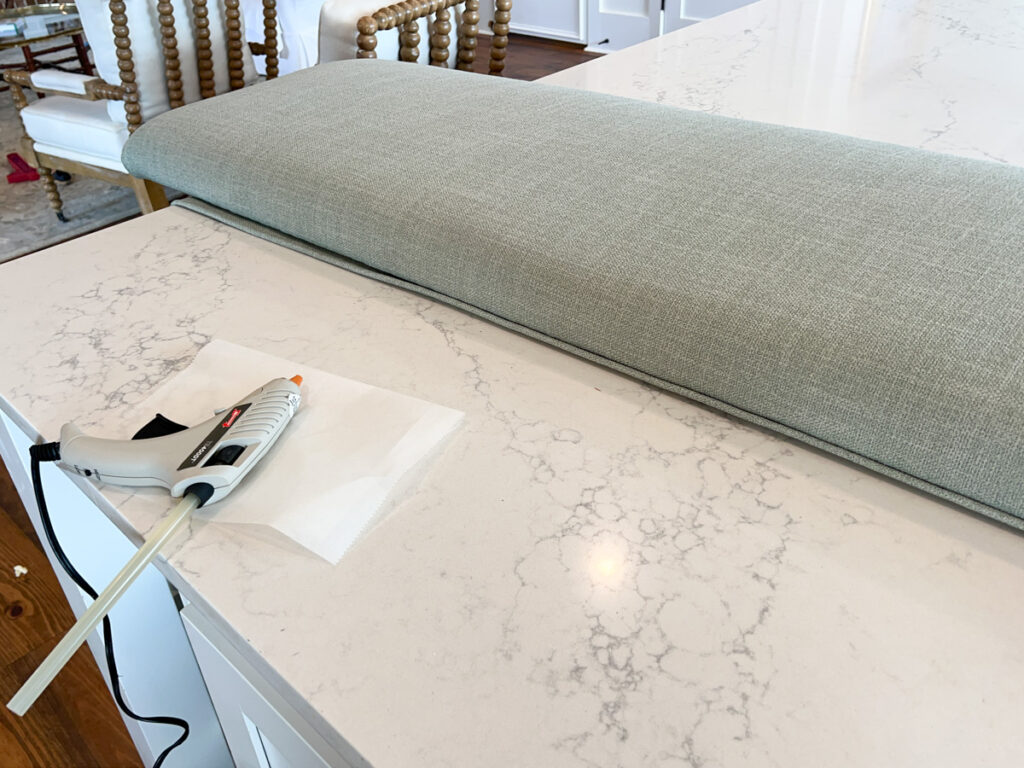
Next I used my hot glue gun to glue the piping on the edge of the seat cushion.
I sat the finished seat cushion on the bench temporarily to make sure it was a good fit. After this I set it aside to finish the rest of the DIY banquette bench.
DIY Banquette Bench: The Back
Next I repeated the same steps on the upright back portion of the banquette bench as I did on the seat cushion. I used my staple gun to attach the foam to the wood.
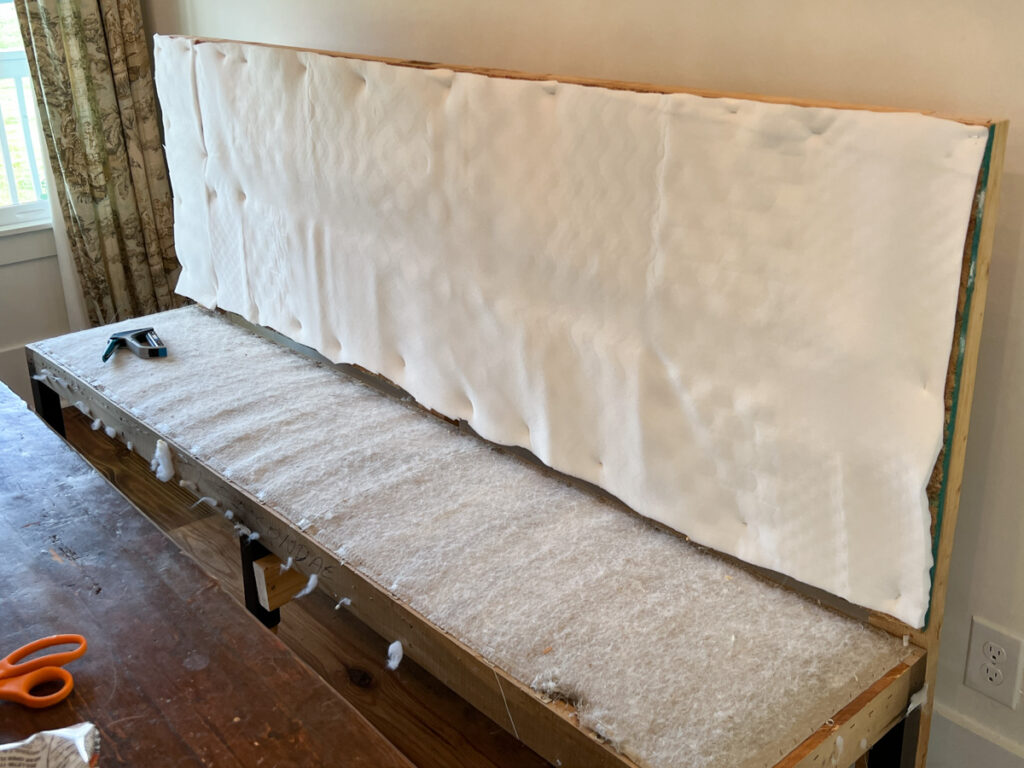
Next I wrapped the batting around the back and stapled it to the wood.
Here you can see a look at the back of the bench with the batting stapled in place.
Now it was time to attach the fabric! Just like with the seat cushion, you will want to pull your fabric evenly, making sure it is taut but not too tight.
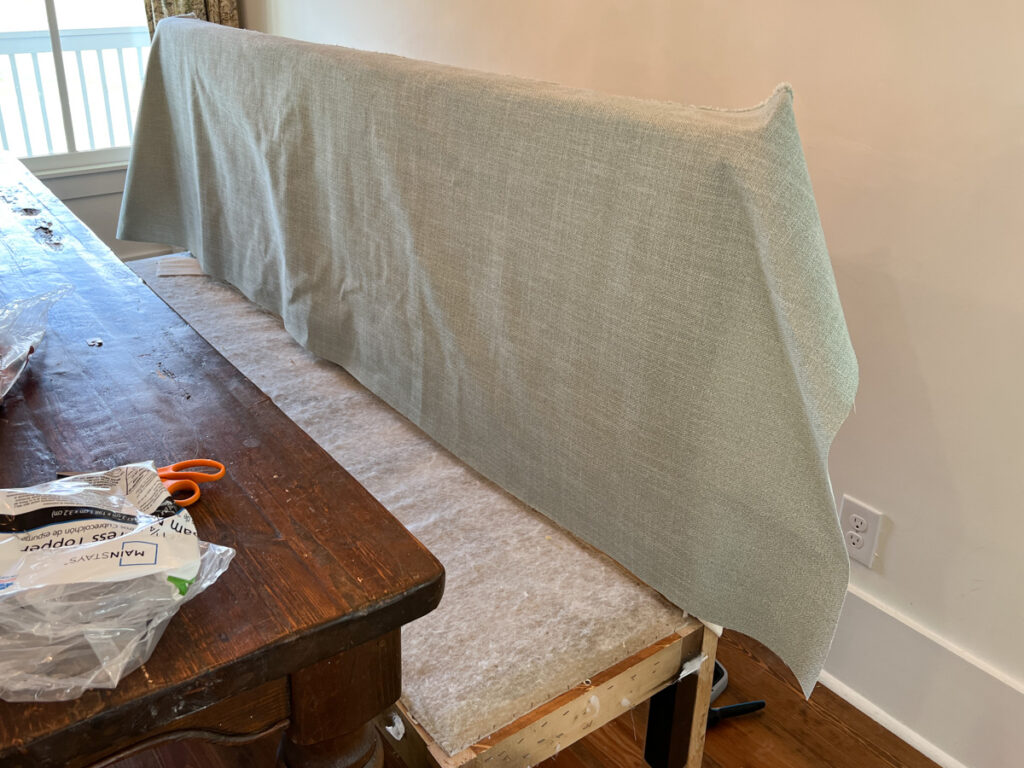
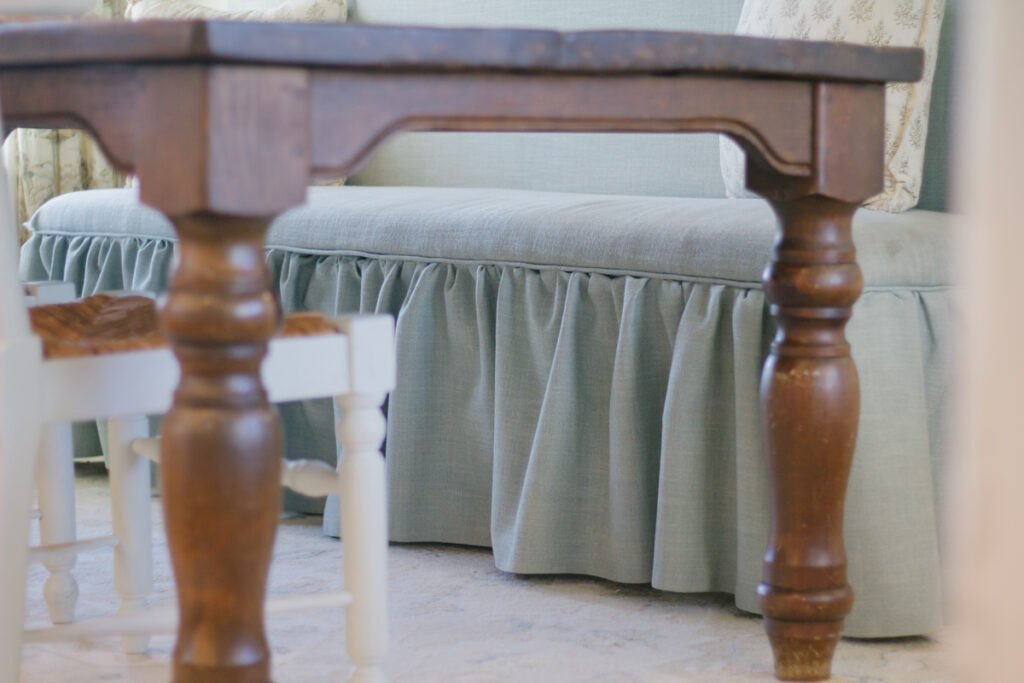
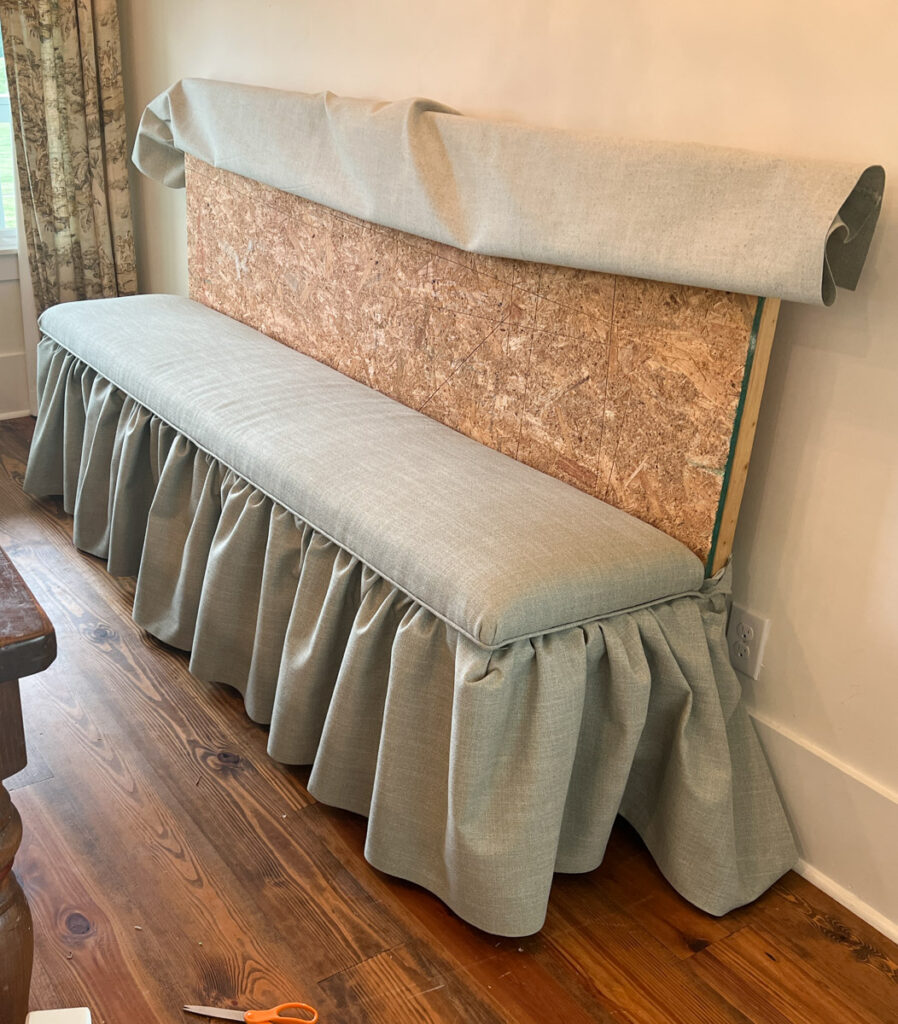
Adding The Ruffled Bench Skirt
The last part of “upholstering” the DIY banquette bench was to attach the ruffled skirting.
After cutting the piece of fabric to length, I used HeatnBond Hem Tape to “hem” the raw edge of the fabric.
With the seat cushion removed, I used my stapler to attach the fabric directly to the wood frame. I created the “ruffle” simply by gathering the fabric as I went and then stapling it directly into place.
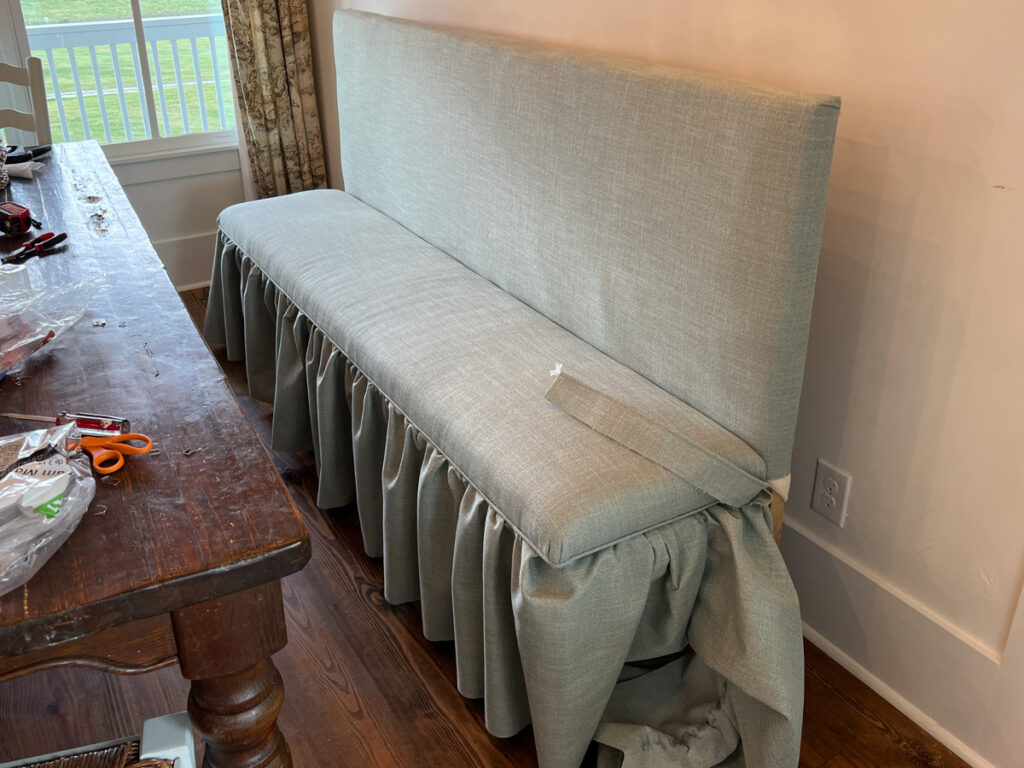
Once I got to the edges I simply continued the ruffle and the piping along to the back side of the banquette bench and stapled it into place. No big deal since the back side is against the wall and will not be seen.
After the ruffle and piping was secured into place, I put the seat cushion back onto the bench and used screws from underneath the bench frame to screw it into place.
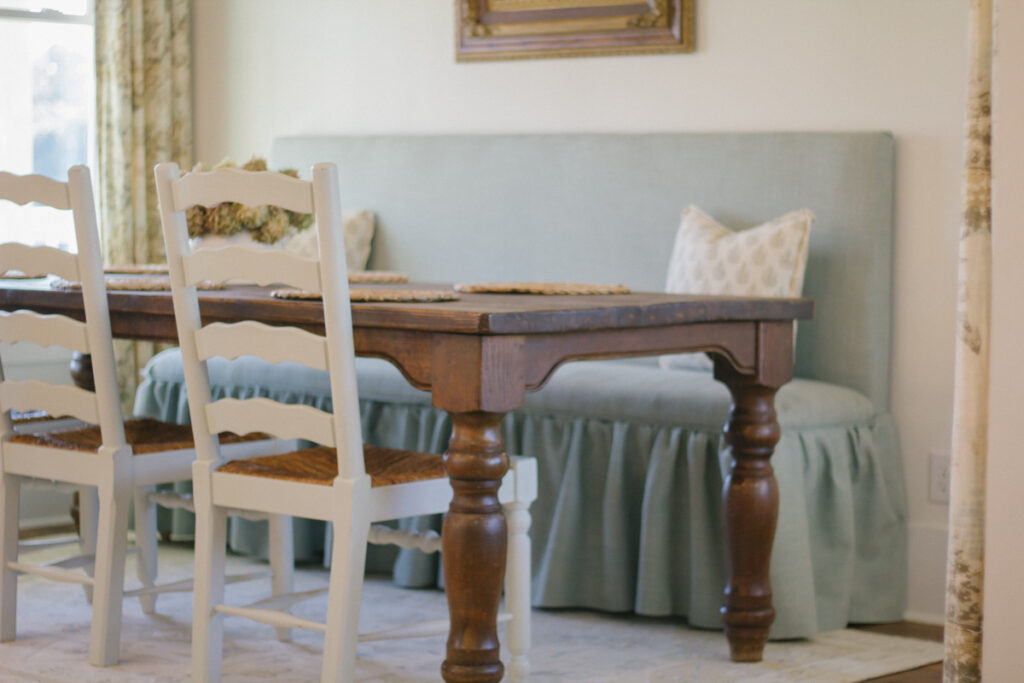
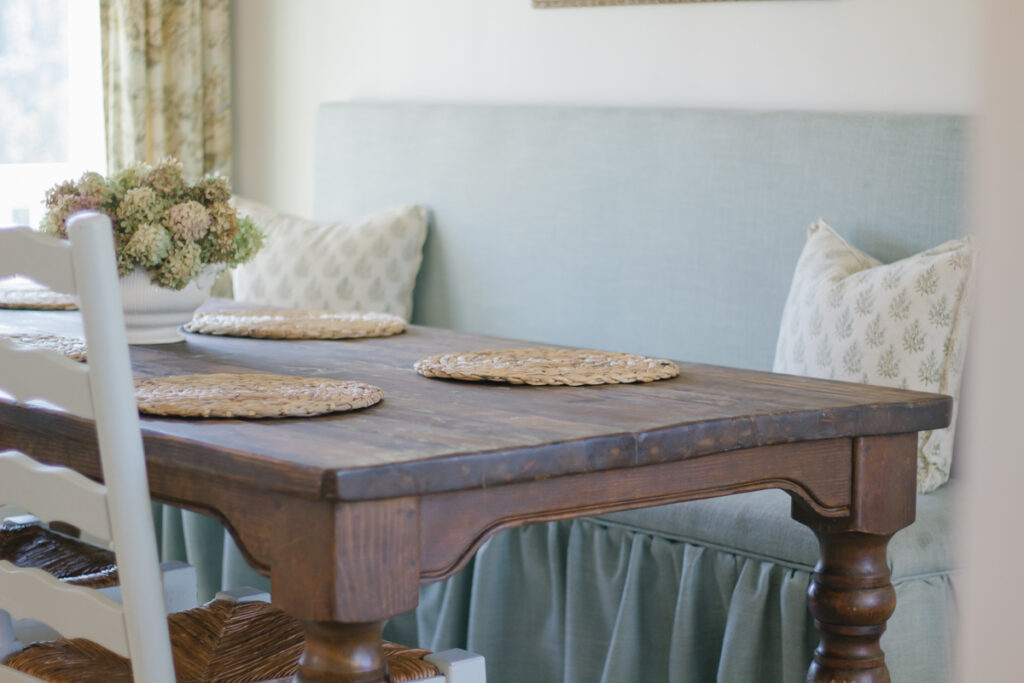
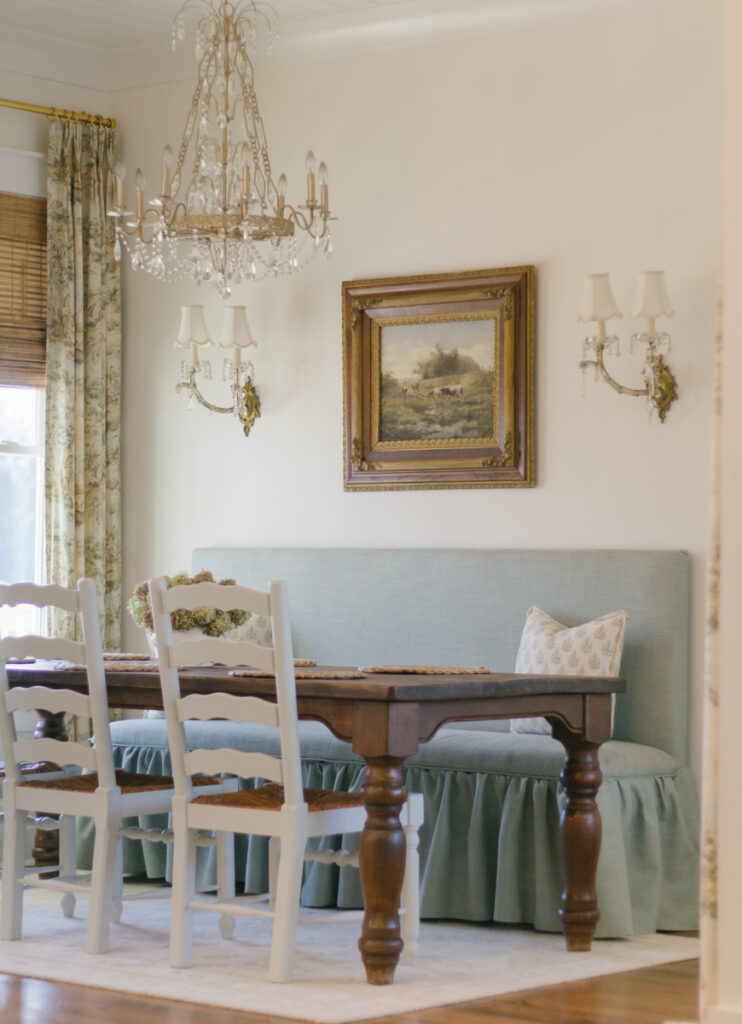
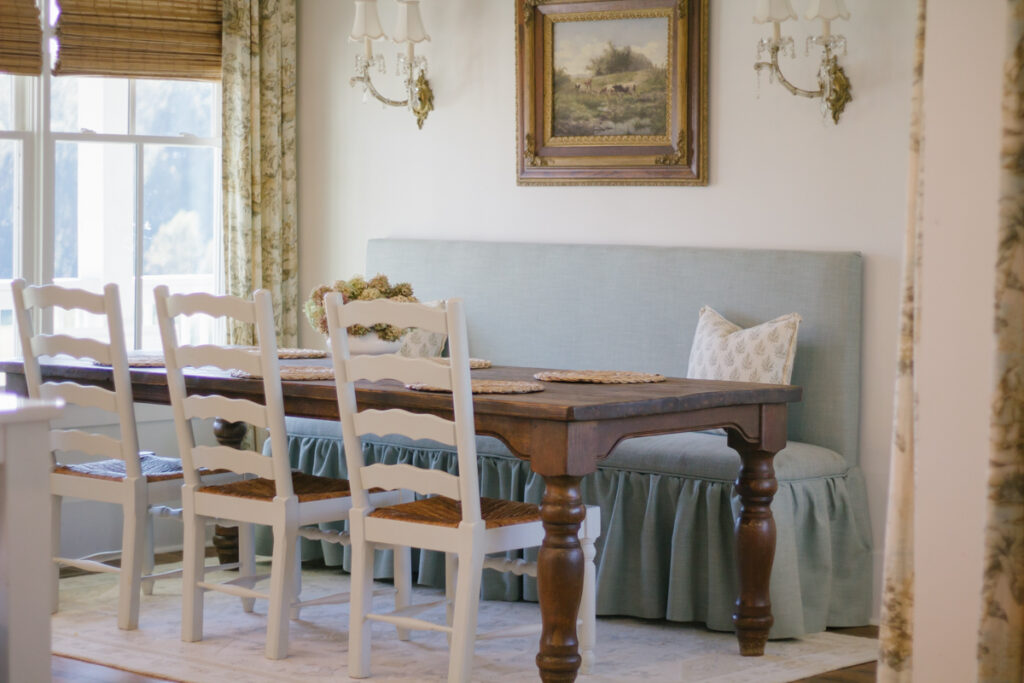
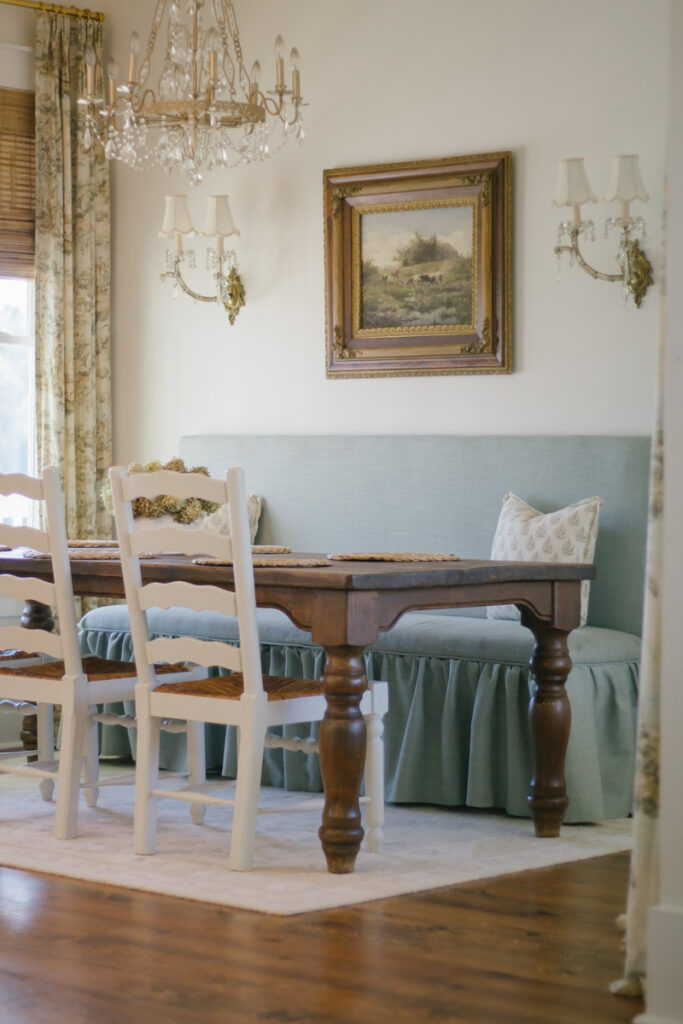
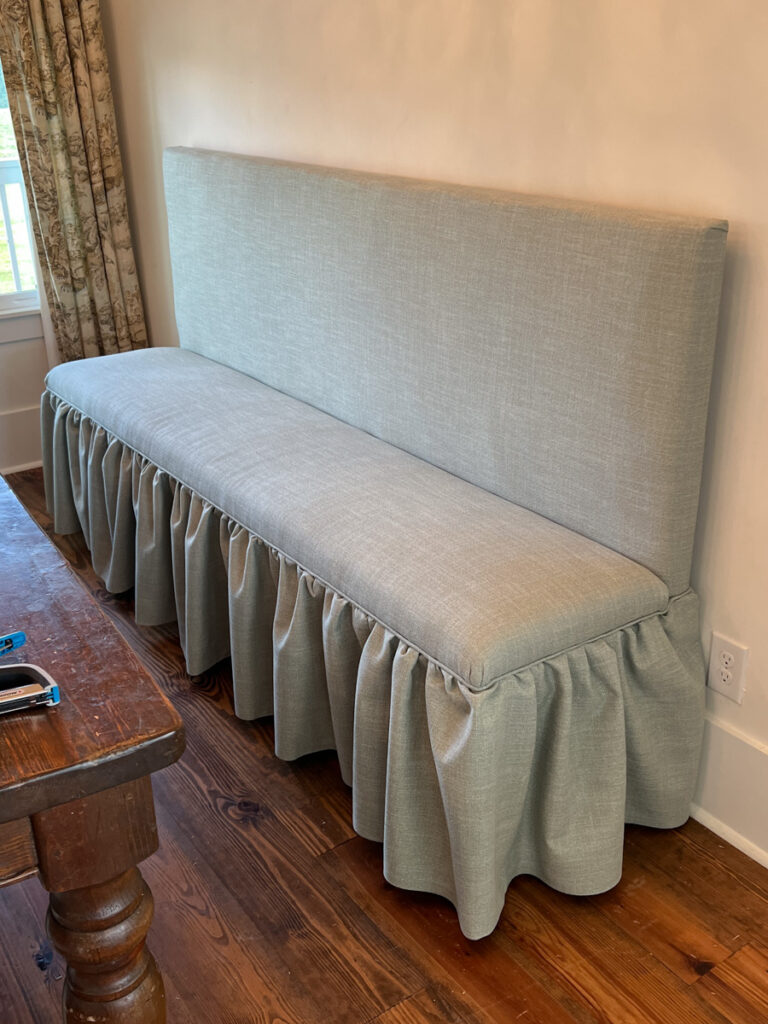
DIY Banquette Bench: The Finished Product!
And here is what my DIY Banquette Bench looked like once I was done! She’s not perfect but I sure do love her!
Our Breakfast Room with DIY Banquette Bench
I’ve still got a few more things to do before this room feels completely “finished”, but this DIY banquette is the perfect start!