How to Install Picture Frame Molding on Your Walls
Learn how to install picture frame molding on your walls in this DIY step by step guide with pictures.
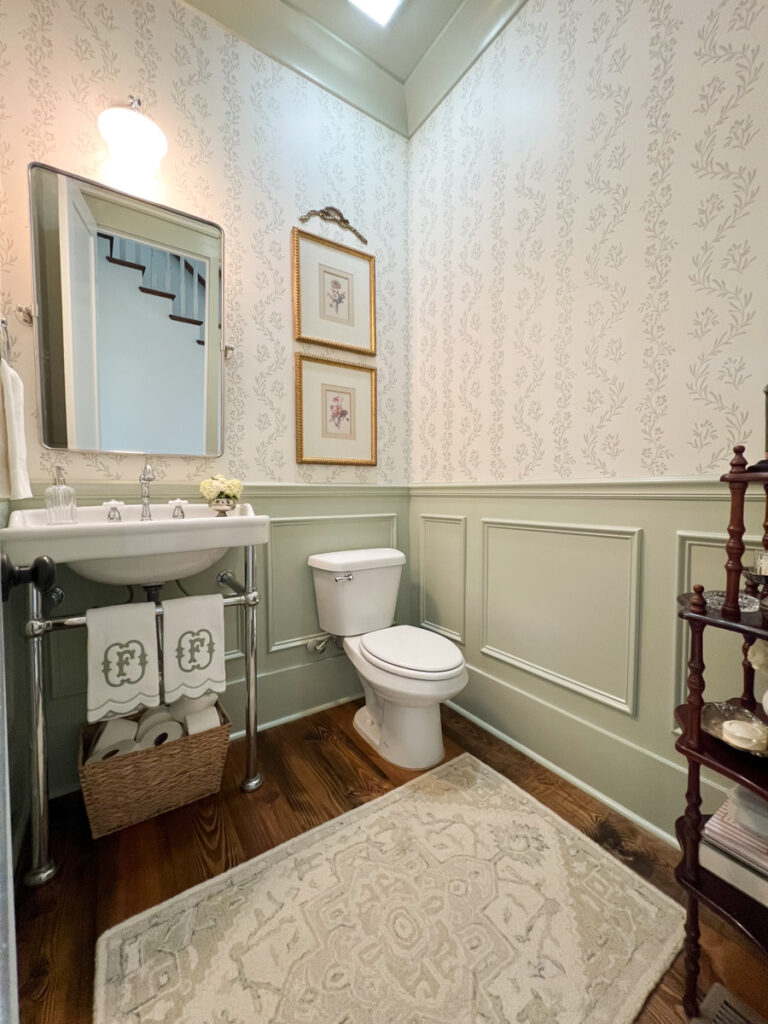
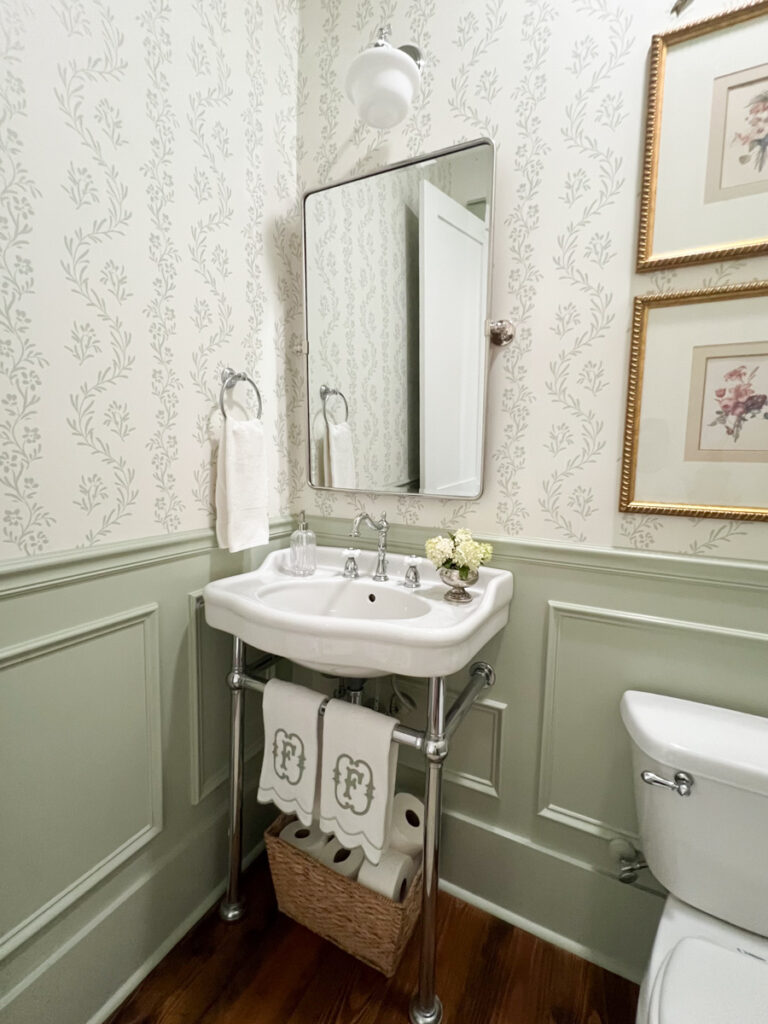
I recently gave our very boring and plain powder bathroom a complete makeover in conjunction with Love vs. Design wallpaper. Ever since we moved into our house a little over three years ago, I always envisioned that one day this bathroom would have traditional picture frame molding and a with a beautiful, classic wallpaper pattern above. To me that’s just the epitome of a southern powder room!
Installing picture frame molding is a relatively easy and beginner friendly DIY project that really gives you a big bang for your buck! Plain builder-grade sheetrock turns into high-end, custom woodwork with architectural character and detail with the simple addition of four pieces of base cap molding in the shape of a square or rectangle.
This comprehensive guide will show you how to install picture frame molding on your walls for a relatively easy and inexpensive way to make any space look custom and high-end.
What is picture frame molding?
Picture frame molding, also called “box trim” or “box molding,” is simply a piece of molding cut into 45 degree angles on the each end and applied to the wall in the shape or a box or rectangle. The boxes resemble picture frames, hence the name.
The timeless wall treatment dates back to ancient Greek architecture and is still ever so popular today. I would say it has withstood the test of time and isn’t going anywhere in the future.
It’s popularity and versatility make picture frame molding a good choice for practically every design style. Picture frame molding adds visual interest and architectural character to any room, space, or home.

Design Options to Consider When You Install Picture Frame Molding
Picture frame molding is normally configured in one of two ways. It can be added to the lower 1/3 of a wall with a chair railing above, or it can be added to the full height of a wall from floor to ceiling.
There are multiple design options when it comes to picture frame molding:
- Color drench a room with picture frame molding from floor to ceiling
- Install wallpaper on the wall above the chair rail
- Paint the picture frame molding the same color as your trim (traditionally white) and paint the walls above a different color
- Add wallpaper inside of picture frame molding boxes
Install picture frame molding for a beautiful, timeless look in virtually any room: bathrooms, foyers, bedrooms, living rooms, dining rooms, or even offices. The possibilities are endless and you can’t go wrong!
Supplies and Tools You Will Need to Install Picture Frame Molding on Walls
- Chair Rail
- Base Cap Molding
- Brad Nailer + 1.5 inch brad nails
- Miter Saw
- Tape Measure
- Level or Laser Level
- Pencil
- Caulk + Caulk Gun
- Painter’s Putty, Wood Filler or Spackle
- Painters Tape
- Paint Supplies: Paint Brush, Roller, Tray
- Paint
- Drop cloths
What kind of trim should you use to install picture frame molding?
Finger jointed base cap molding is traditionally used to install picture frame molding. However, you can use any small molding or trim you like.
Base cap molding is typically sold at any hardware store that carries lumber and trim, like Lowe’s or Home Depot.
Best Tips to Install Picture Frame Molding to Walls
Before we get started, be sure to follow these tips and tricks to install picture frame molding easily and seamlessly!
Adding picture frame molding to a wall is a beginner friendly DIY project. Just like with any DIY project, there are a few tips and tricks to implement to make the project go quickly and without hiccups.
- Draw and/or mark your picture frame boxes directly on your wall with a pencil or painter’s tape (I prefer to draw directly on the wall with a pencil). This makes it easy for visualization as well as measuring for your cuts.
- Use an online calculator like this one to help determine your box spacing on each wall.
- In order to save a ton of time, measure all of your boxes at once, then make all of your miter cuts at once. I noticed when we were building our house that this is how the trim carpenters do it. It saves so much time!
- Be sure to label your cut trim pieces in an organized manner so they don’t get mixed up.
- Don’t worry about nailing directly into studs. Nail two nails at a cross angle to ensure adequate grip to the wall.
How to Install Picture Frame Molding: Step by Step Tutorial
Follow these steps to learn how to install picture frame molding on your walls.
1. Measure The Dimensions of Each Wall
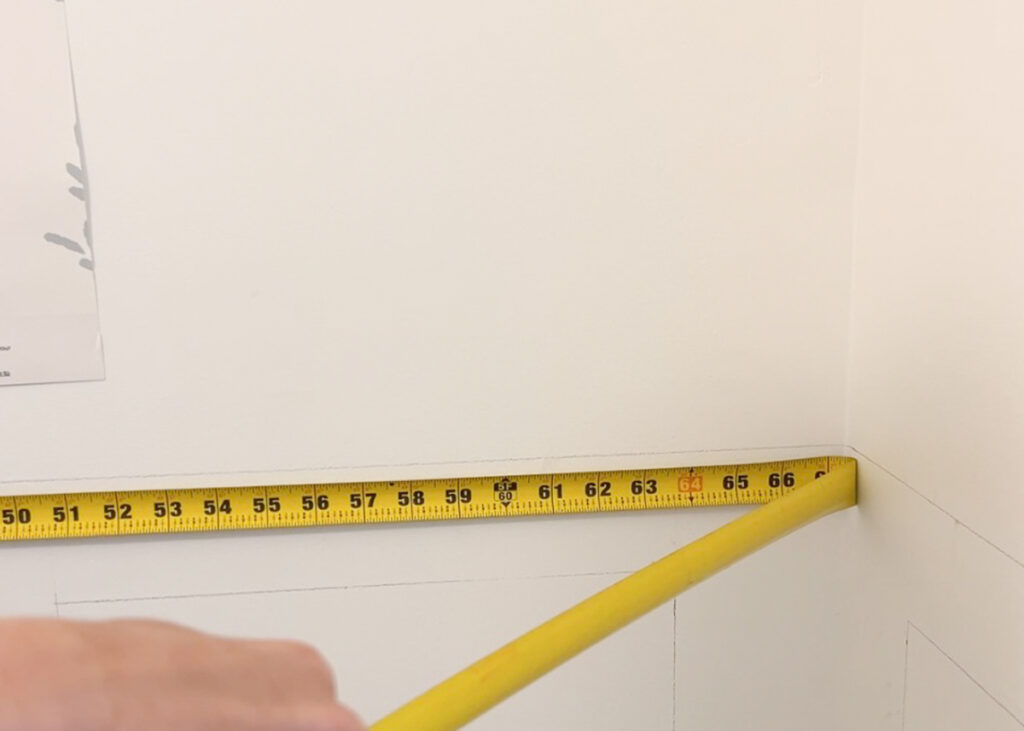
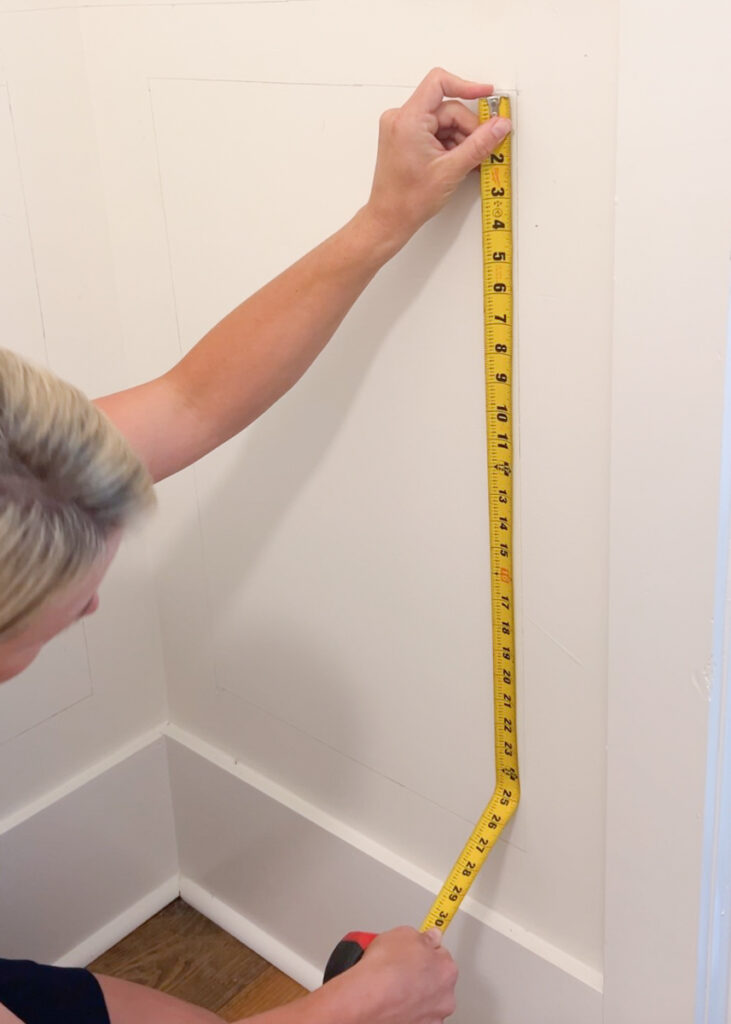
First you will need to accurately determine the measurement of each wall in inches. Start by measuring the width and height of each wall and write down your measurements on paper.
To determine the wall height, measure from the top of your baseboard to the bottom of the crown molding at the ceiling. If you do not have crown molding, simply measure from the top of your baseboard to the top of the wall where it meets the ceiling.
To determine wall width, measure from one wall edge to the other.
2. Determine Layout and Configuration of Picture Frame Molding Boxes
Determining the layout of your boxes is probably the hardest part of the entire project! The good thing is that there is no right or wrong.
Figure out where you want your picture frame boxes, how many you want on each wall, and how big you want them to be. Every space, and sometimes every wall, is going to be different depending on the size of the wall and any obstacles such as doorways, windows, fixtures, vanities, etc.
Determine How many boxes you want on each wall
Once you have the width of each wall, consider how many boxes you want on the wall. There is no real right or wrong here, but you do want it to look visually balanced in the end.
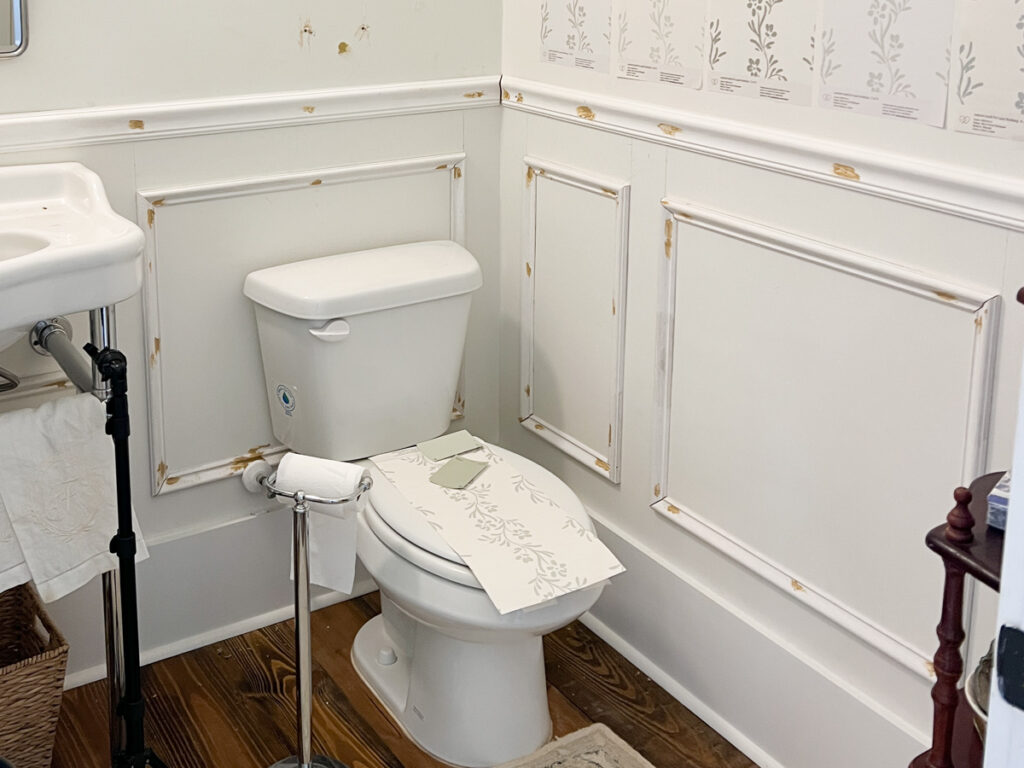
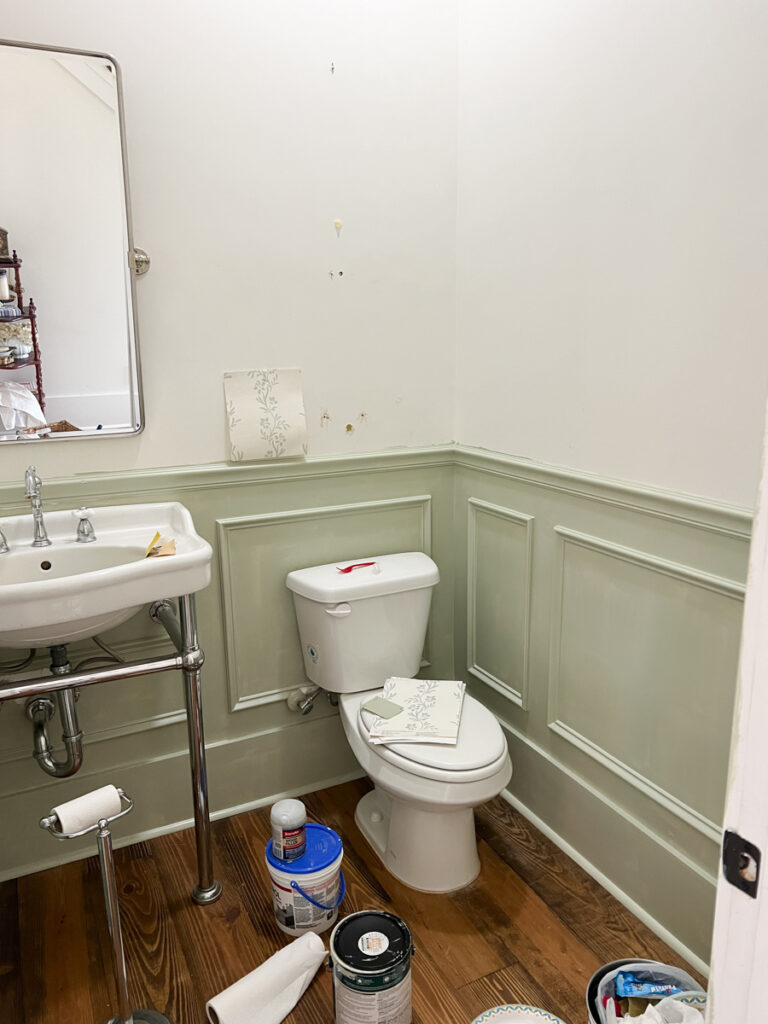
Determine any obstacles you may need to work around, such as outlets, light fixtures, vanities and doorways. In our powder bathroom I had to be sure to work around the console sink and the toilet.
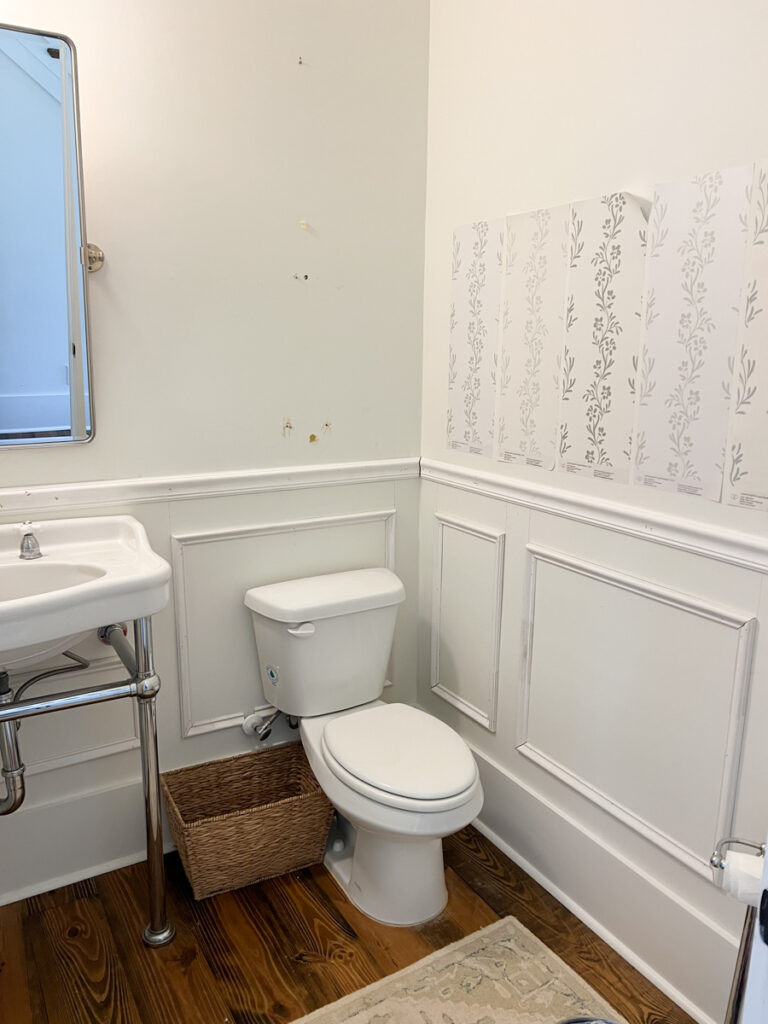
On right side wall you can see that I went with three boxes. The middle box is larger than the two side boxes. The toilet and sink on the back wall only allowed for me to do two boxes, both different sizes. Although my boxes are not symmetrical, they are balanced and pleasing to the eye.
Picture Frame molding spacing
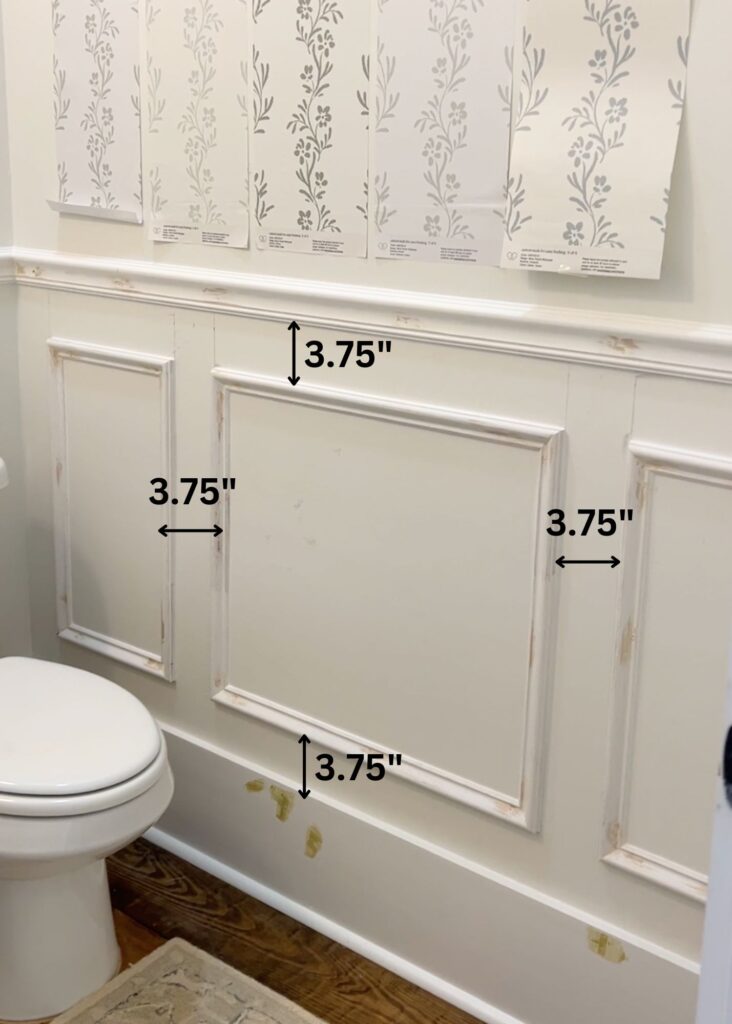
Although there is no right or wrong, picture frame molding is commonly spaced 3 to 4 inches from baseboards, walls, and crown molding. There is also commonly 3 to 4 inches in between each box.
As you can see in the photo above, I spaced each box 3.75 inches from each wall, and from the baseboards and chair rail. I spaced each box 3.75 inches apart.
Consider using an online layout caluclator to help determine and visualize
Consider using an online calculator to help determine and visualize your picture frame molding layout.
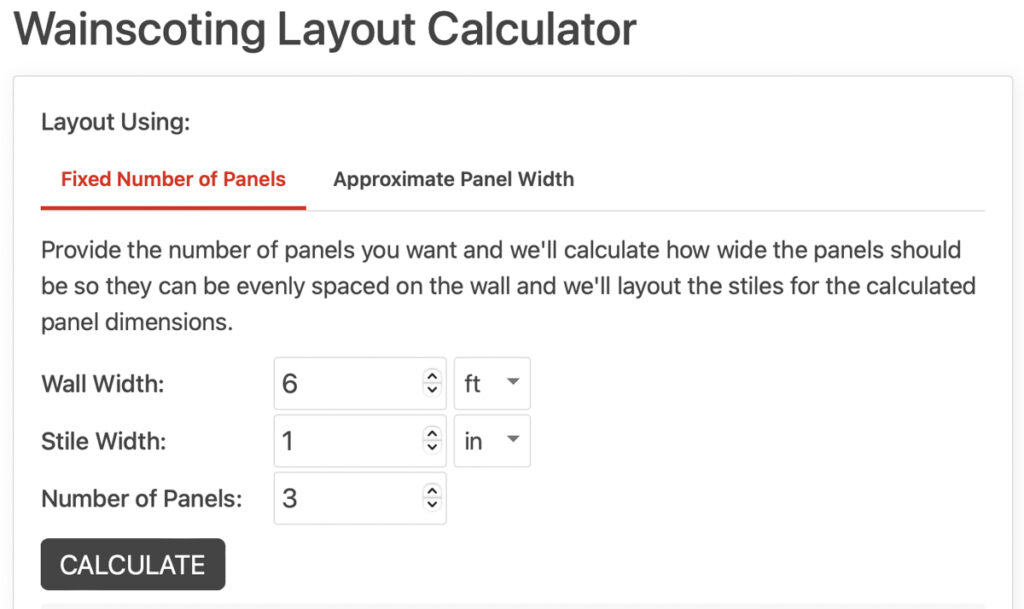
Simply input the width of your wall, the width of your trim (stile), and the number of panels you would like to have on the wall.
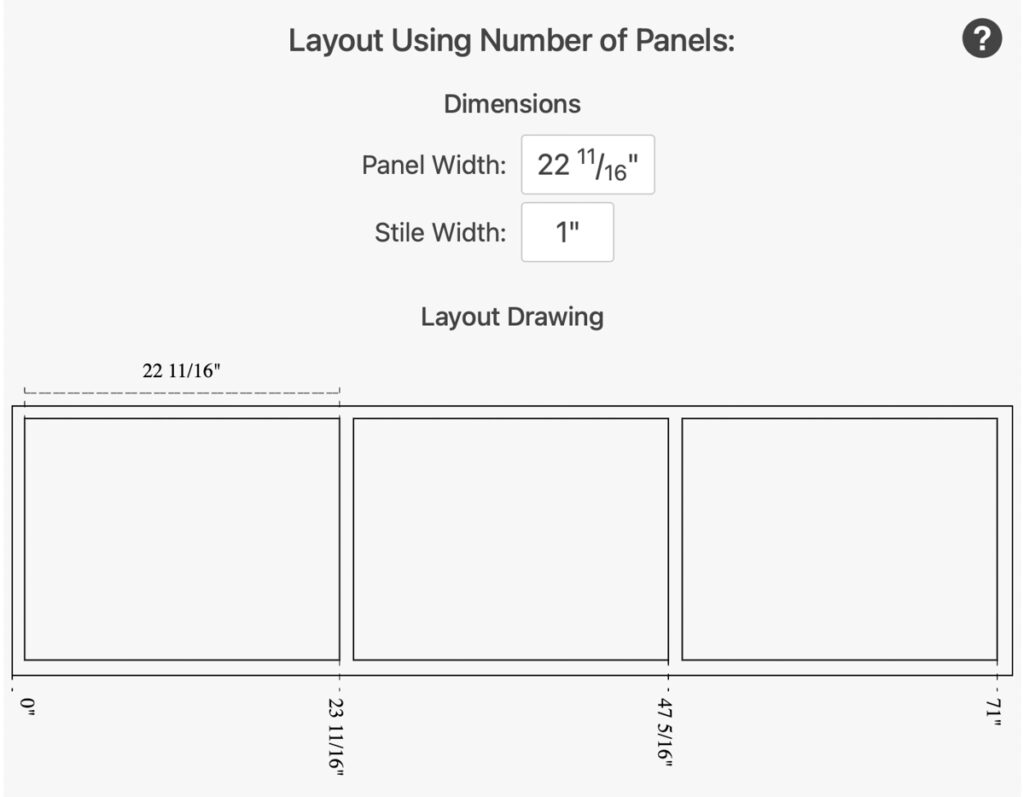
The calculator will calculate the size of your boxes and give you a visual illustration with measurements.
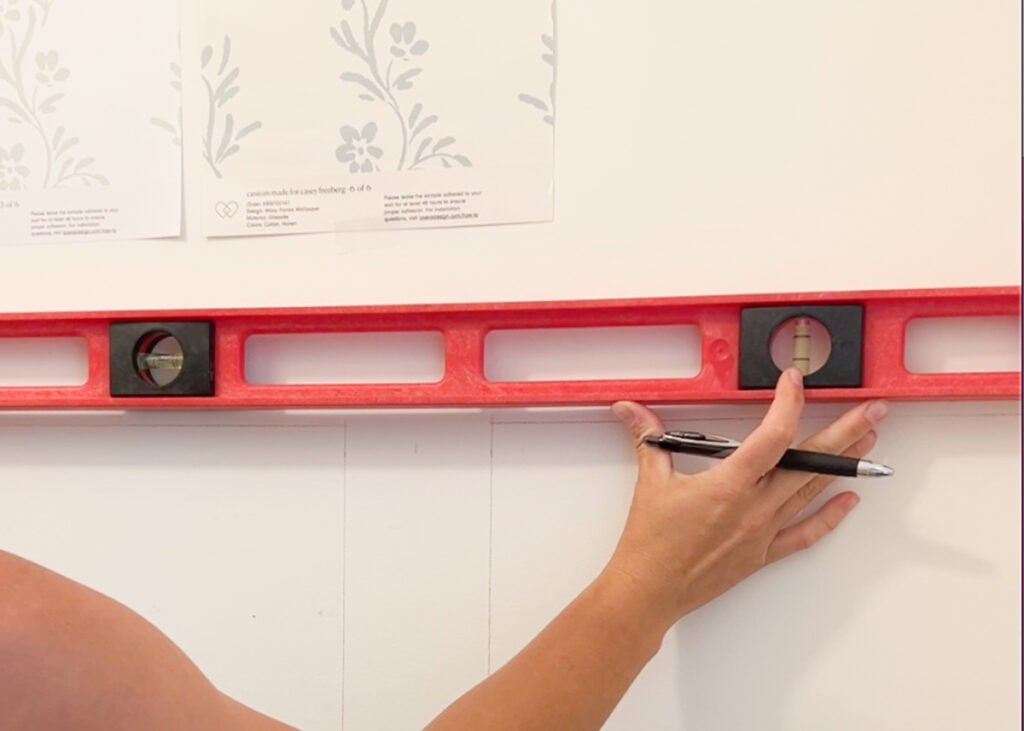
3. Draw Picture Frame Boxes Directly on Wall
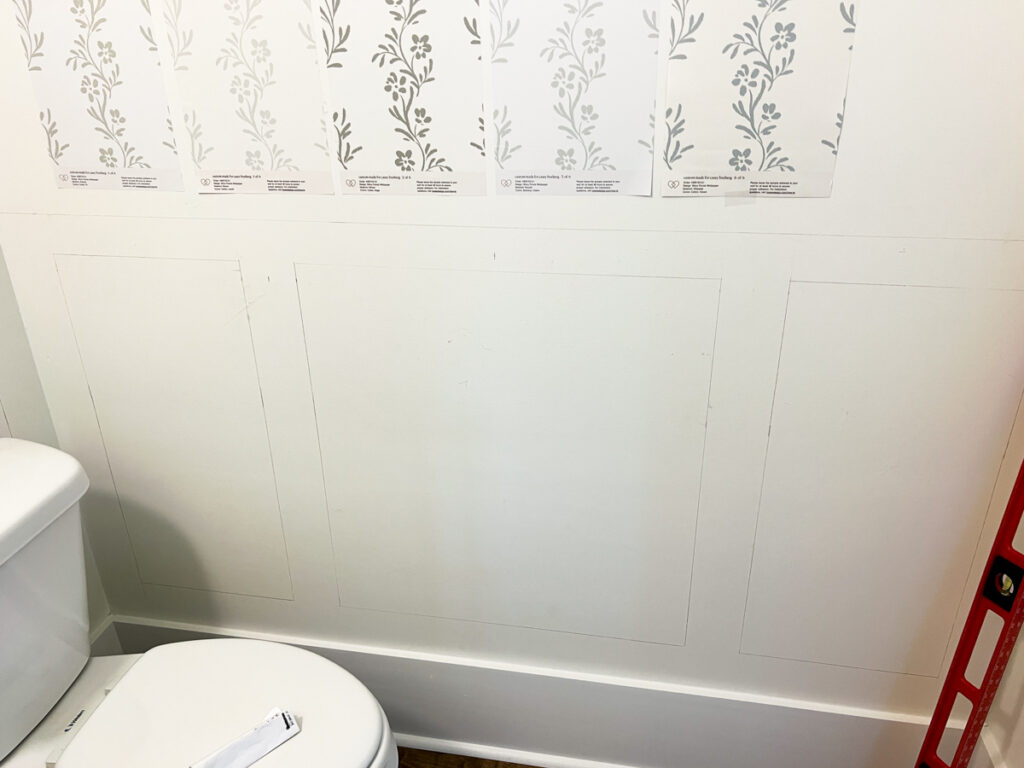
I find it easiest to use a pencil and draw your boxes directly on the wall. Drawing the boxes on the wall helps you visualize exactly where your boxes will be and what they will look like.
It’s easy to adjust your boxes and make tweaks to the design or layout by simply removing your pencil mark and starting over if needed.
The pencil lines will also be used to take measurements for cutting each piece of molding when you are ready to make your cuts.
3. Measure The Picture Frame Molding Boxes
Grab a pencil and a piece of paper, and then measure every box on your wall at one time. This will save you so much time in the long run!
I like to draw each box out on a piece of paper and then write down each measurement.
Be sure to have a labeling or numbering system for each wall and each box. This way you won’t end up with a bunch of pieces of cut base cap molding and have no clue where they go. Work clockwise direction in your room to make it easier to remember.
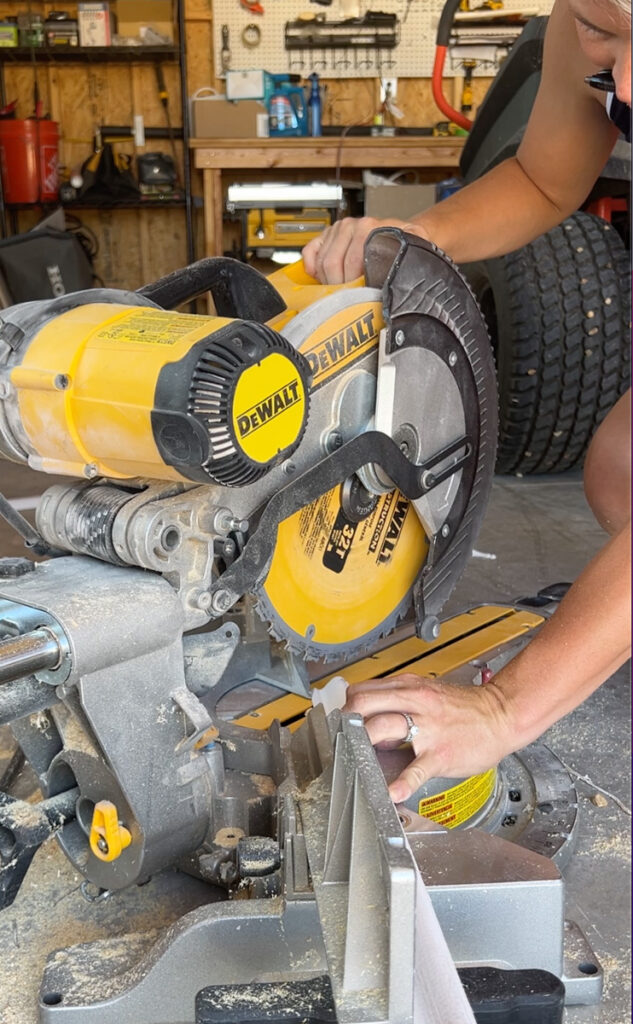
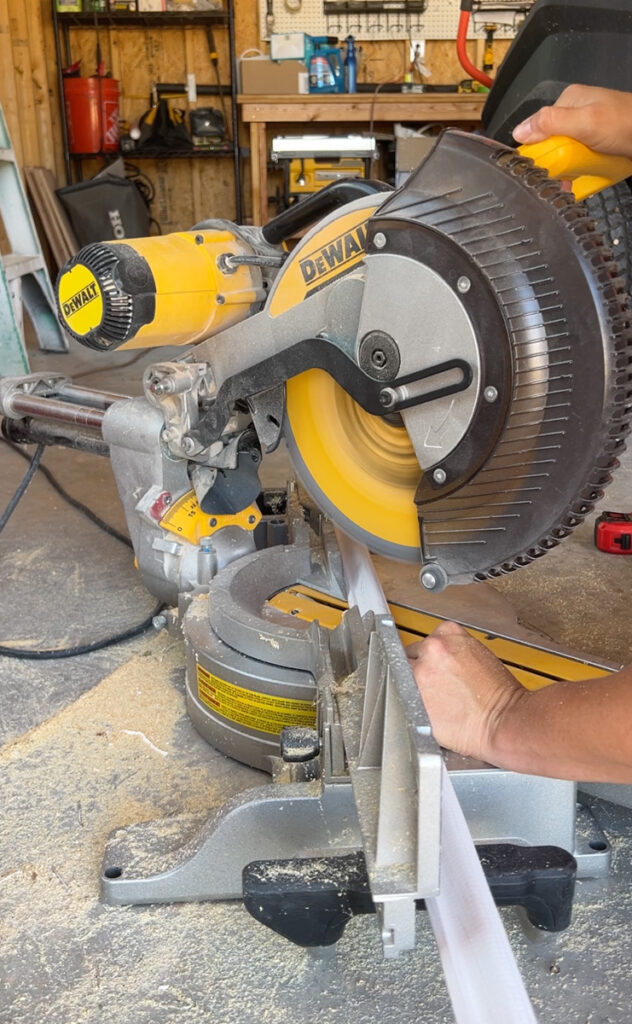
4. Cut The Picture Frame Molding with a Miter Saw
Now that you have all of your measurements, you can make all of your cuts at once using a miter saw.
As I stated above, be sure to label each piece so that you easily know where it goes when it’s time to attach it to the wall.
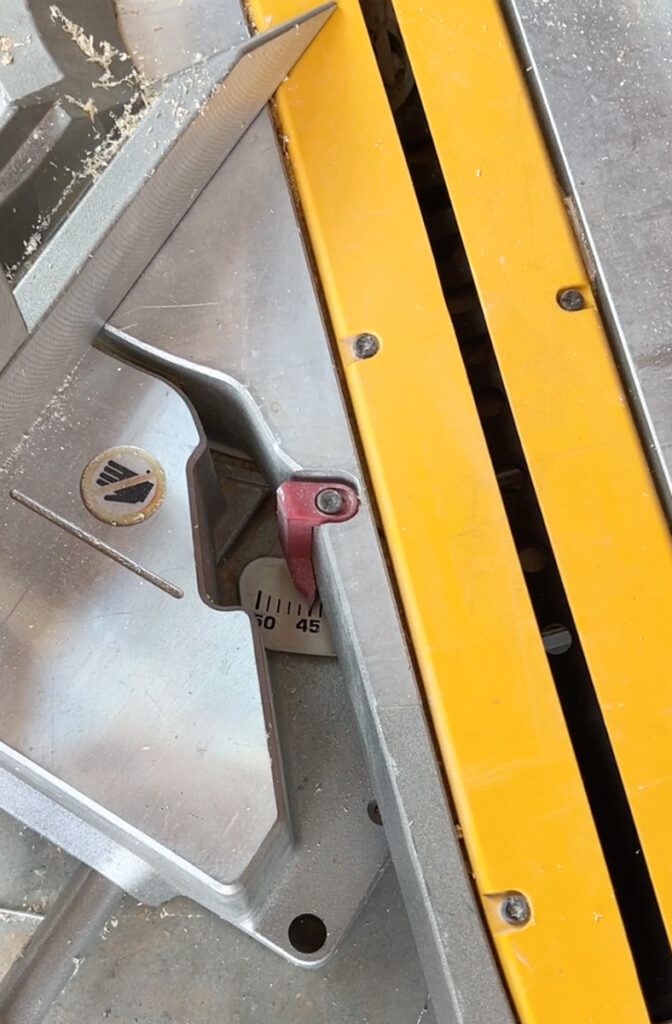
Each box has four corners (corner = 90 degrees), so each cut will be 45 degrees. Your miter saw will always be set to 45 degrees, but the direction of the cut will depend on which piece of the box you are cutting.
My simple way of making sure I am cutting in the correct direction is to draw an arrow on the actual piece of wood itself. It sounds silly but when you are making so many cuts at once it is very easy to get confused and cut in the wrong direction!
*Your measurement will be the long side, or the outermost point of your piece of trim.
Tip for making corner/miter cuts to install picture frame molding
- I find it so much easier to physically mark the molding with an arrow in the direction of the cut. This seems like it would be obvious, but it’s really easy to get confused and cut the wrong direction on your wood when you’re making so many cuts at once!
- Develop a system to label each cut piece of molding so that you can easily figure out where it goes when you are ready to attach it to the wall. I numbered each box in my room numerically going clockwise. I then labeled the top, bottom, left and right.
- Example: For box 1, I labeled my four pieces of cut wood “1 top”, “1 bottom”, “1 left”, and “1 right”
- Box 2 was labeled “2 top,” “2 bottom,” “2L,” and 2R”, and so on for each additional box
- Once you bring all of your cut pieces of wood back inside you will know exactly where they go
- Example: For box 1, I labeled my four pieces of cut wood “1 top”, “1 bottom”, “1 left”, and “1 right”
- This system really pays off in the long run. After making all of my cuts at once and having my molding pieces labeled in an organized fashion, I was able to take them all inside and install them on the wall in no time!
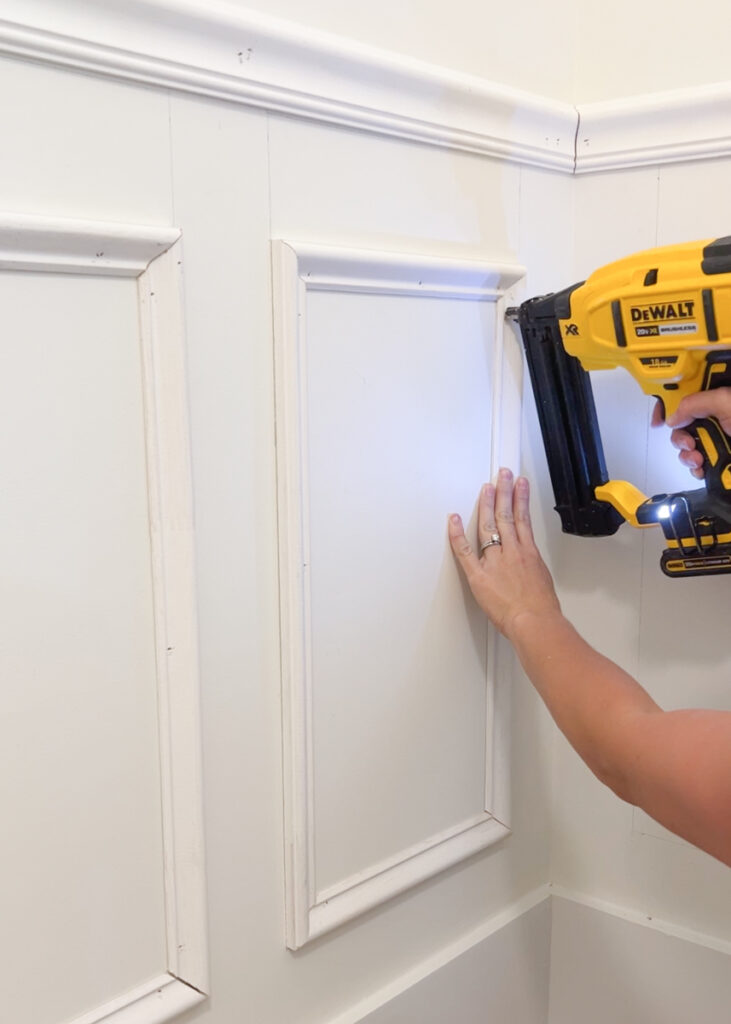
5. Attach Picture Frame Molding to Walls with Nailer
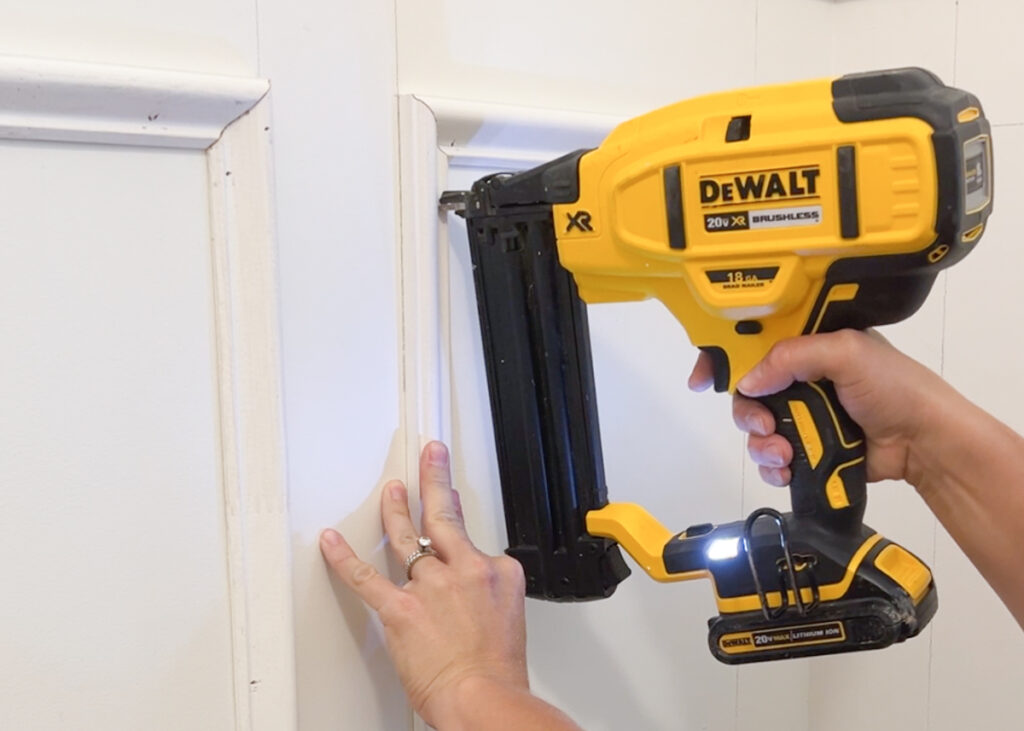
After all of the cuts were made, I brought the molding pieces inside and started attaching them to the wall.
Because I had drawn my boxes directly onto the wall, I was able to line my molding piece up directly on my pencil line. I find this to be the easiest method, but you could also use a laser level if you wish.
order matters!
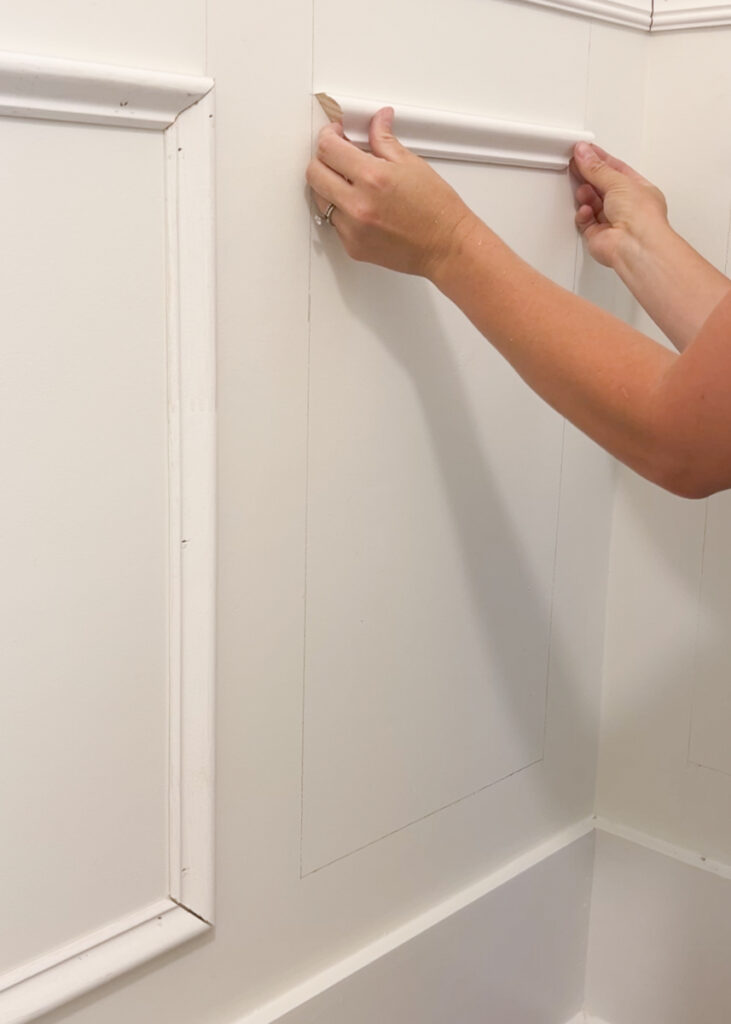
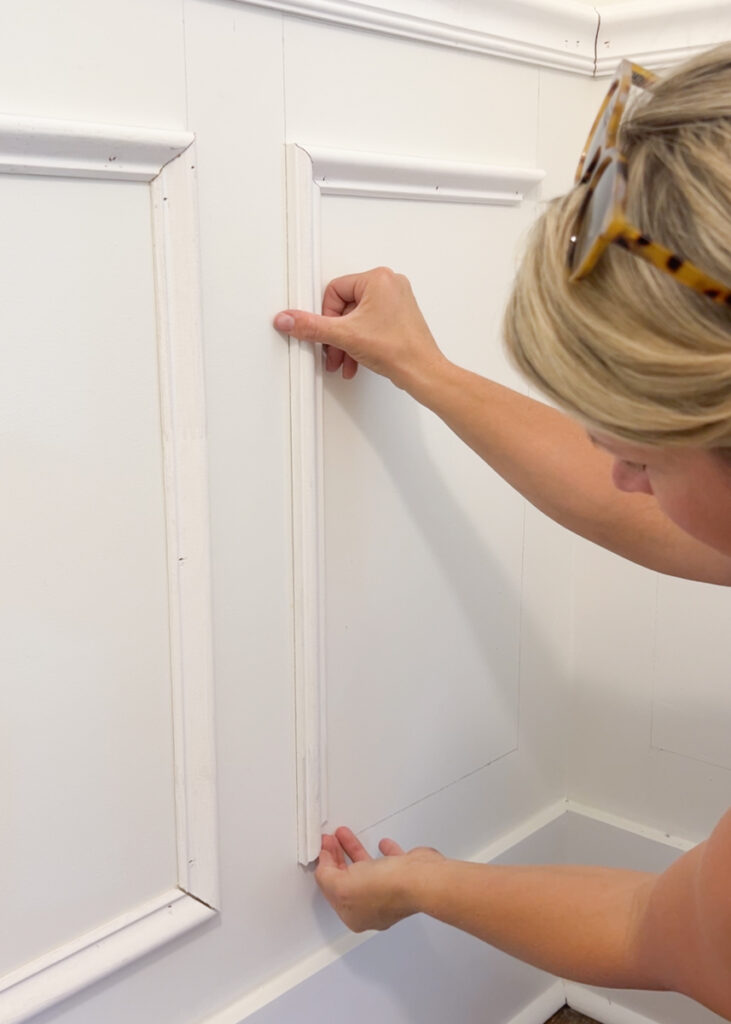
- Always start by installing the top horizontal piece of picture molding first
- Next attach the side/vertical pieces, but attach them loosely. Put one nail toward the top corner of each vertical piece, so that you still have some wiggle room toward the bottom of the piece
- This allows you to easily line up the bottom corners seamlessly
Do not worry about nailing into studs. Instead position two nails overlapping in the shape of an “X.” Angle the first nail up, and then the second nail down. This allows the nails to lock into the drywall and it will give your piece of trim a nice secure hold.
6. Finishing Work: Caulk + Fill Nail Holes
Once all of your picture frame molding is attached to the wall, it’s time to prep for finishing touches. This is what will really give your picture frame molding project a seamless and professional look.
Fill each nail hole with painter’s putty, spackle or wood filler. Next use a 220 grit sandpaper to sand each filled nail hole completely smooth.
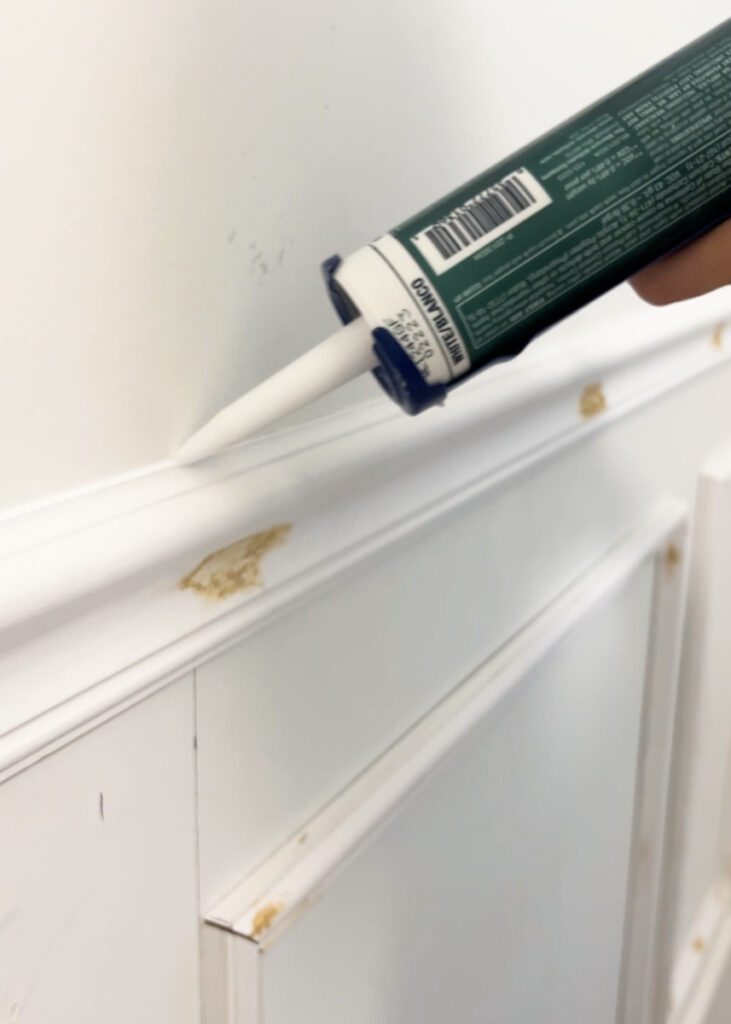
Now it is time for caulk.
Caulking tips
- Cut the caulk tip at an angle. The smaller the better!
- Have damp rags and/or paper towels available. Caulking is very messy!
- Run a small bead line of caulk on the seam where the molding meets the wall. Then dip your finger in water and run it along the caulk line to smooth it out and remove any excess caulk.
- Mom hack: baby wipes (yes baby wipes!) make for the best and easiest cleanup when caulking!
7. Time to Paint Your Newly Installed Picture Frame Molding!
Finally time for the fun part: paint!
I recommend using at least a semi-gloss sheen for picture frame molding (or most any trim work for that matter). Semi-gloss sheen is the best finish for trim such as molding, baseboards and woodwork. It is durable, strong, easy to clean, and stands up to dirt, stains, mold and mildew.
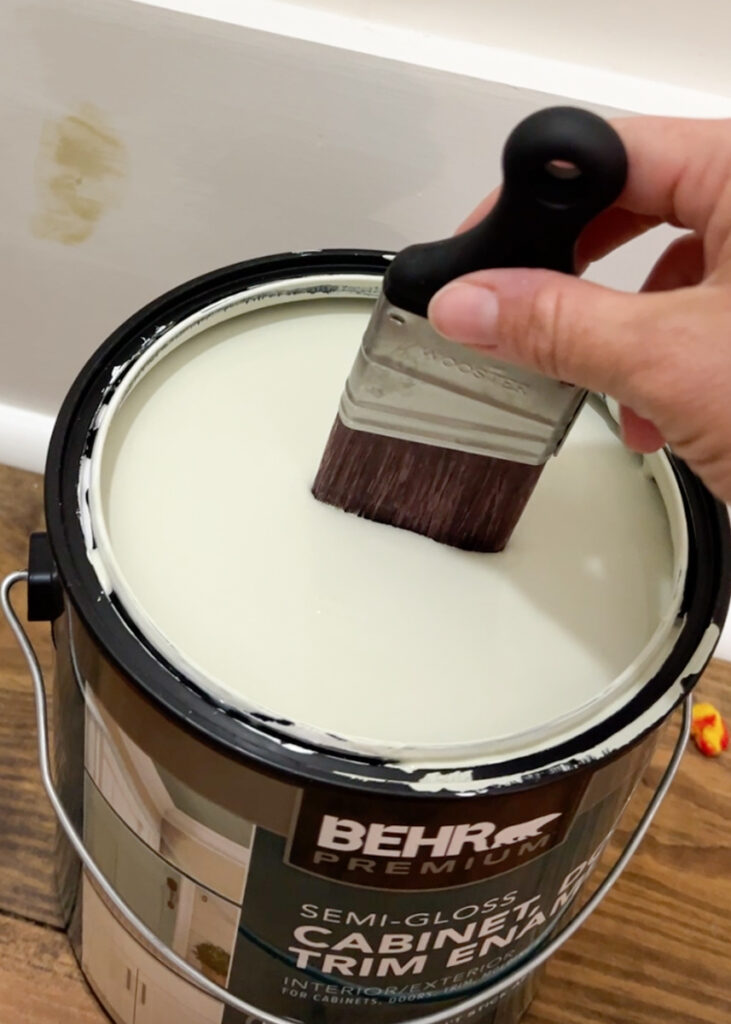
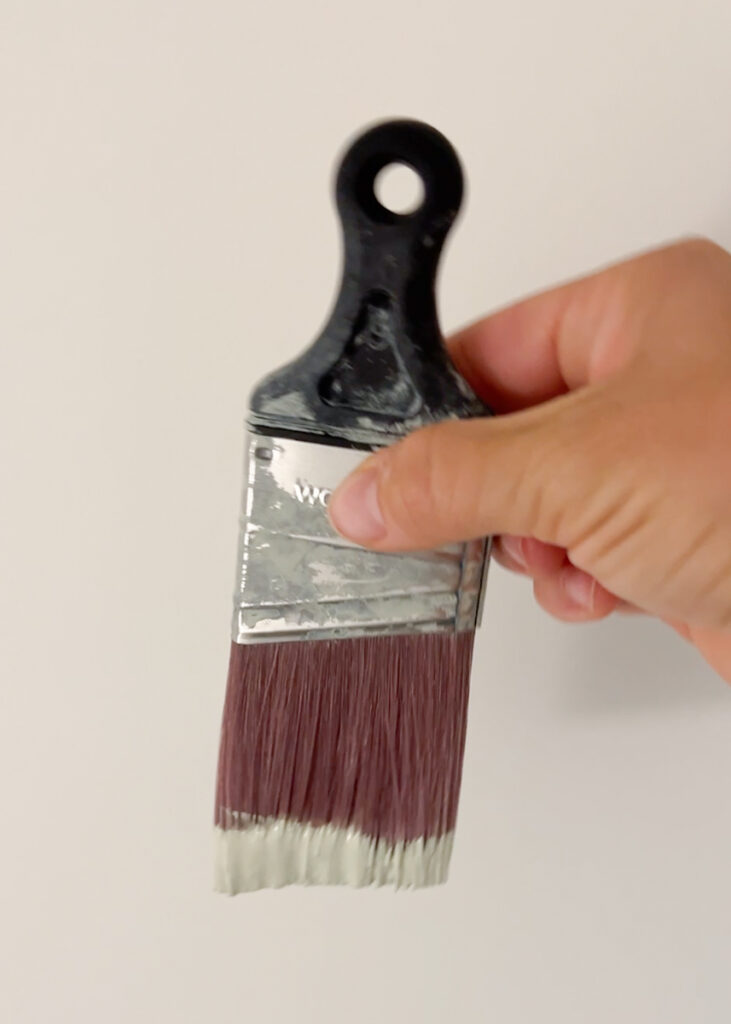
I chose the color “Urban Nature” by Behr Paint in a semi-gloss finish. I used a 2 inch angled brush specifically made for semi gloss paint.
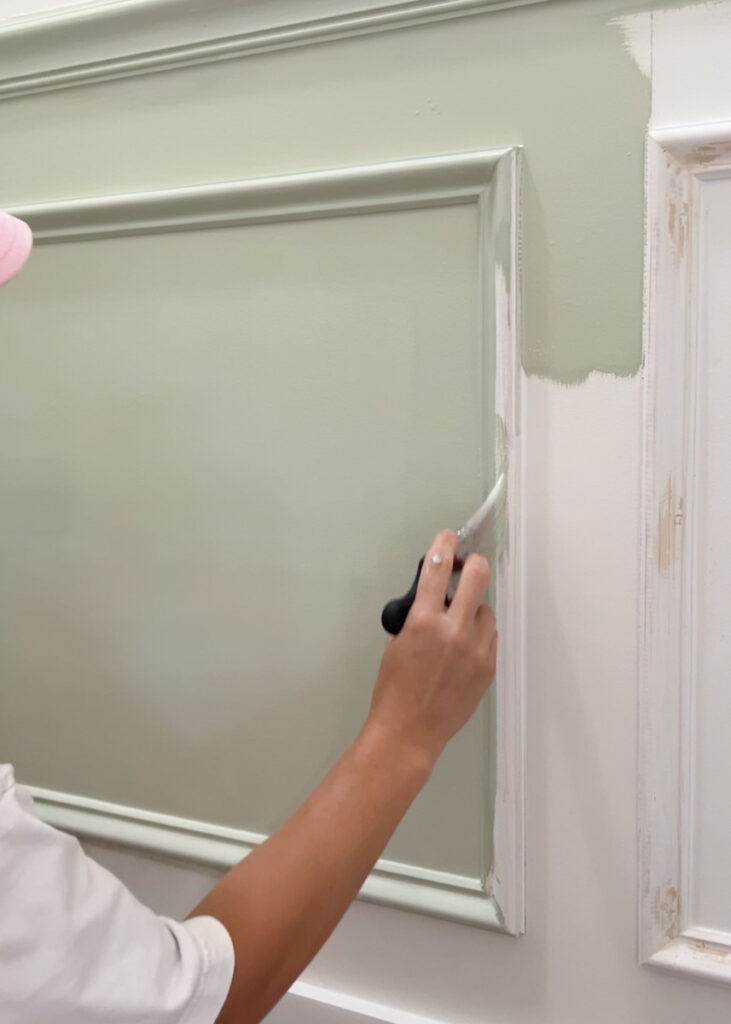
The Behr Cabinet, Door and Trim Enamel makes a great choice for a project like this. It is self-leveling and dries to a rock-hard, durable finish. The end result is a beautifully smooth and flawless finish!
8. Done! You Have Successfully Installed Picture Frame Molding on Your Walls
Done! Now you can install picture frame molding like a pro!
I still can’t get over what a huge difference the picture frame molding made in this small powder room. Before the room was so plain and boring. Now it has depth, character, and architectural detail that makes it so custom and cozy.
Im ready to install picture frame molding in more rooms in my home!
Shop this Post
You can find sources for my powder room below or by shopping my LTK page!