ORC Week 4: DIY Floating Shelf + Subway Tile
![]()
*This post contains affiliate links*
One Room Challenge Week Four
It’s week four of the One Room Challenge and we are beginning to see the laundry room really start to take shape. I have such a love-hate relationship with DIY home projects. I’m sick of living with a deconstructed laundry room (and all of the tools and laundry baskets lining our upstairs hallway), but looking at progress pictures to see just how far we have come gives me the motivation to keep going! When I say I’m sick of it, at some point I will likely say that I don’t want to do any more home projects for a long time. Let’s be real though, mark my word: before this project is even done I will be planning my next one. My name is Casey and I’m a DIY addict ; )
If you’re just now following along, the ORC is an online event where twenty designers and hundreds of guest participants completely transform a room in six weeks. Every Thursday guest participants link up to share their progress until the final room reveal on November 8th. Be sure to follow along on the blog every Thursday, and follow ORC, #oneroomchallenge and #BHGORC on Instagram so you don’t miss a thing!
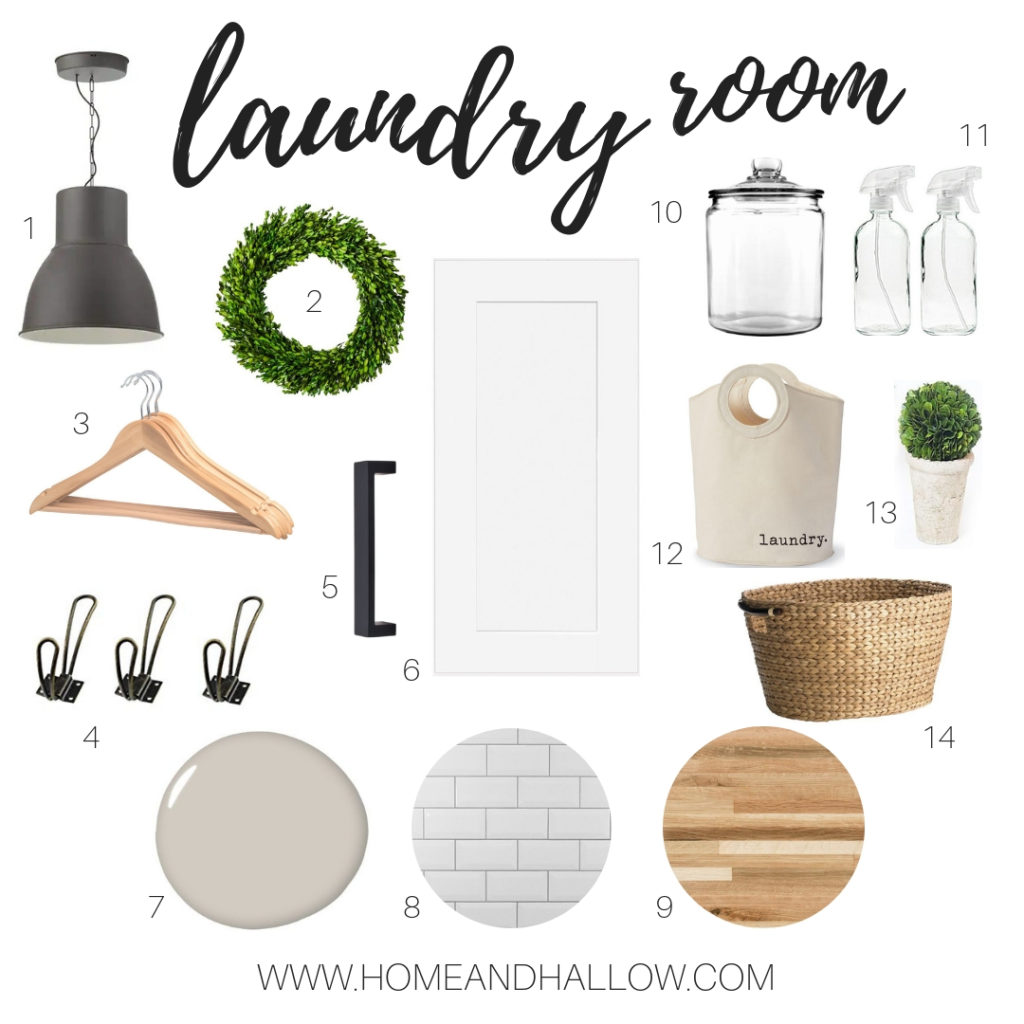
- Pendant Light | 2. Boxwood Wreath | 3. Wood Hangers | 4. Vintage Coat Hook | 5. Cabinet Pulls | 6. Shaker Style Cabinet | 7. Sherwin Williams Agreeable Gray | 8. Subway Tile | 9. Butcher Block Countertop | 10. Glass Jar | 11. Glass Spray Bottles | 12. Canvas Laundry Tote | 13. Boxwood Topiary | 14. Seagrass Laundry Basket
Catch Up
Last week we built and installed our very own DIY wood countertop. This week we had to squeeze an entire week’s worth of work into three days because we are going on vacation. That’s right, by the time you are reading this I will be sitting on the beach with my toes in the sand. (Ok, maybe not sitting because… #momlife. But I’ll be playing with my babies and breathing in the salt air and that is heaven on earth to me!) But cutting our week short meant that some nights we were up installing subway tile past midnight and that’s no fun for this old mama who can’t hang past about 9 PM.
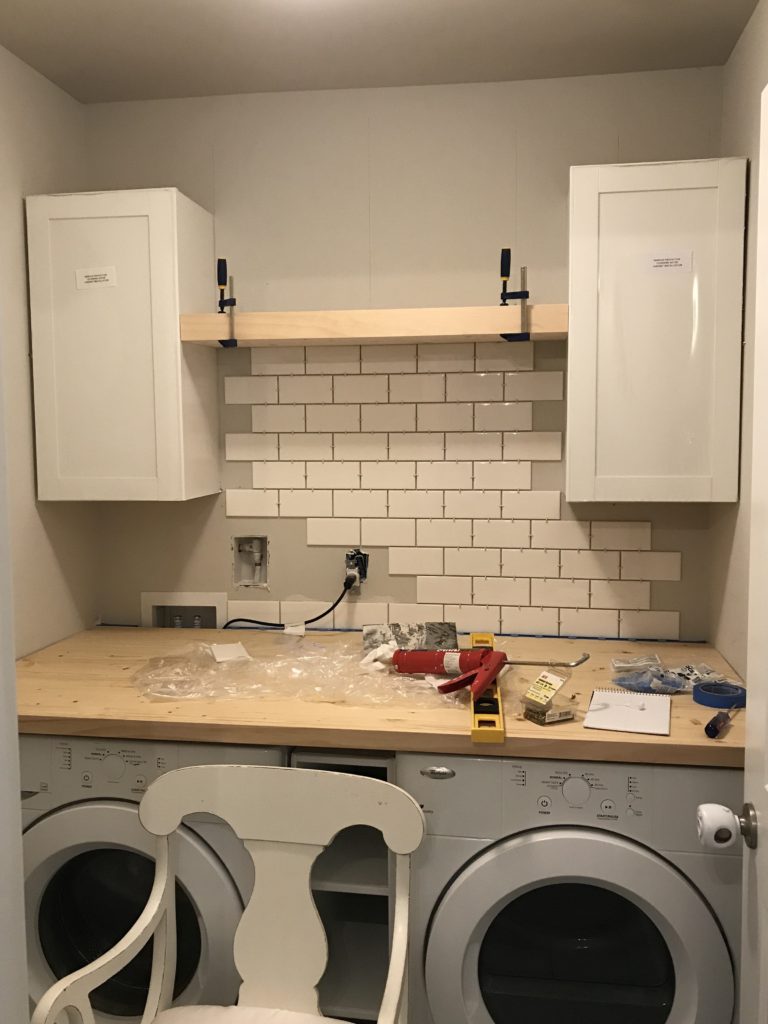
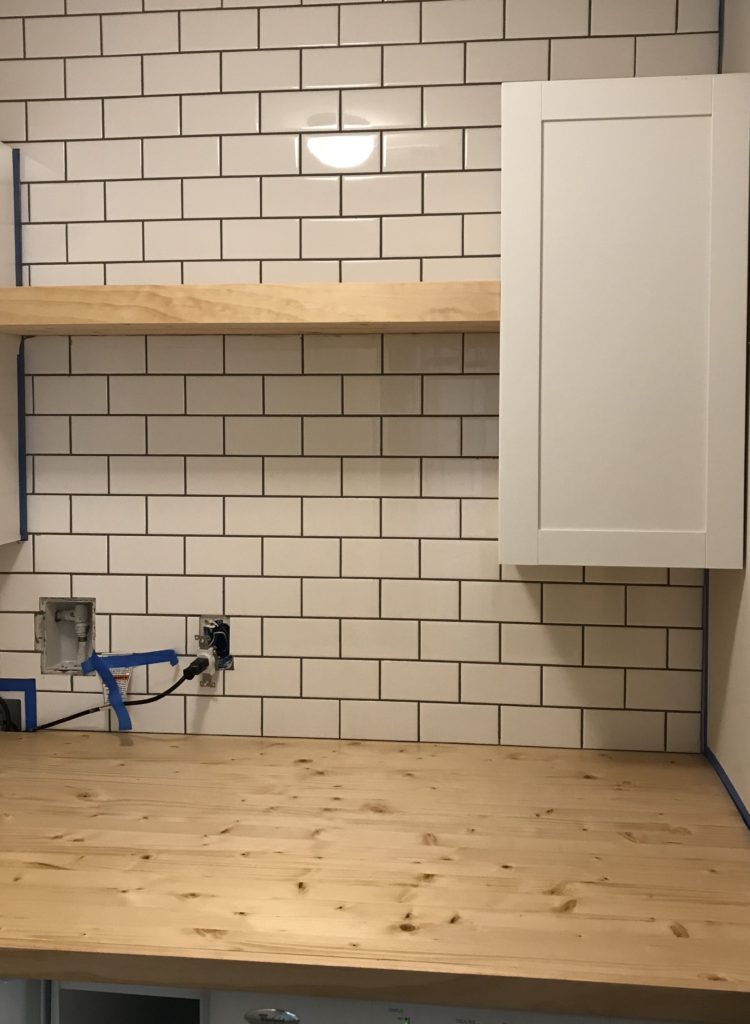
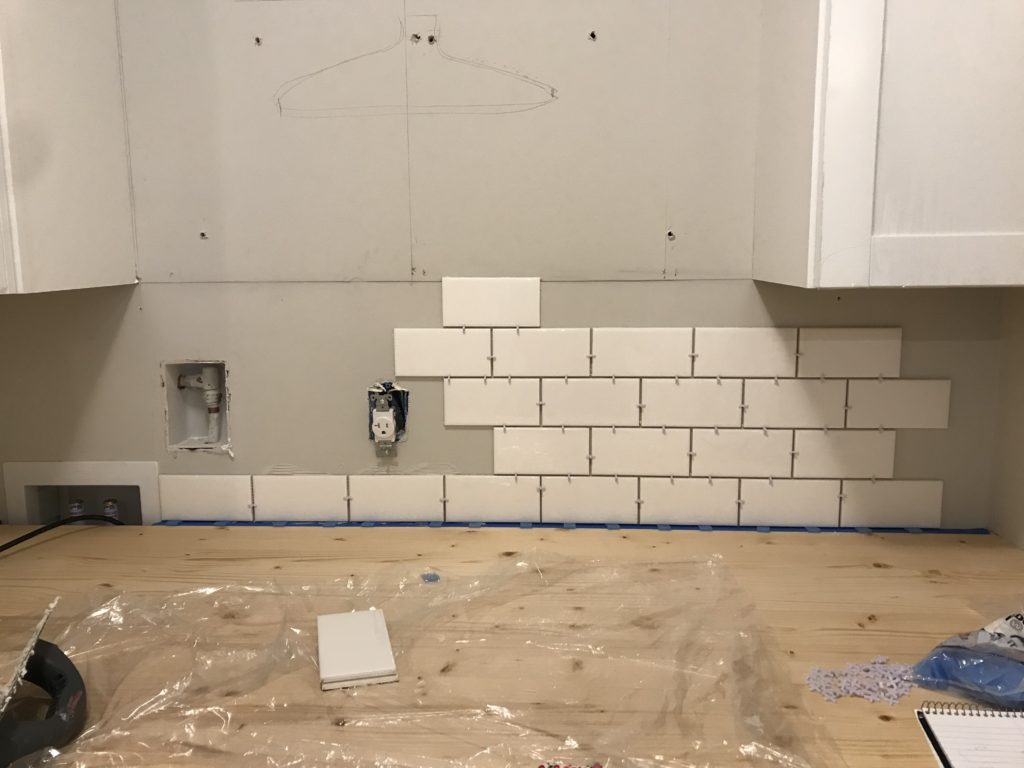
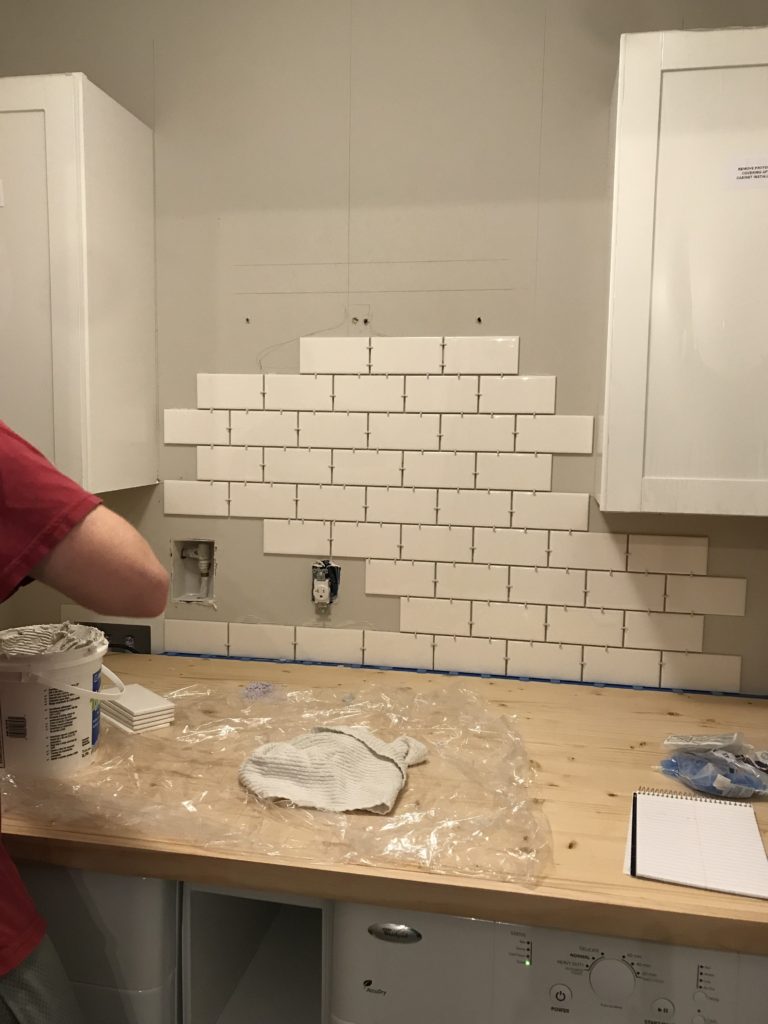
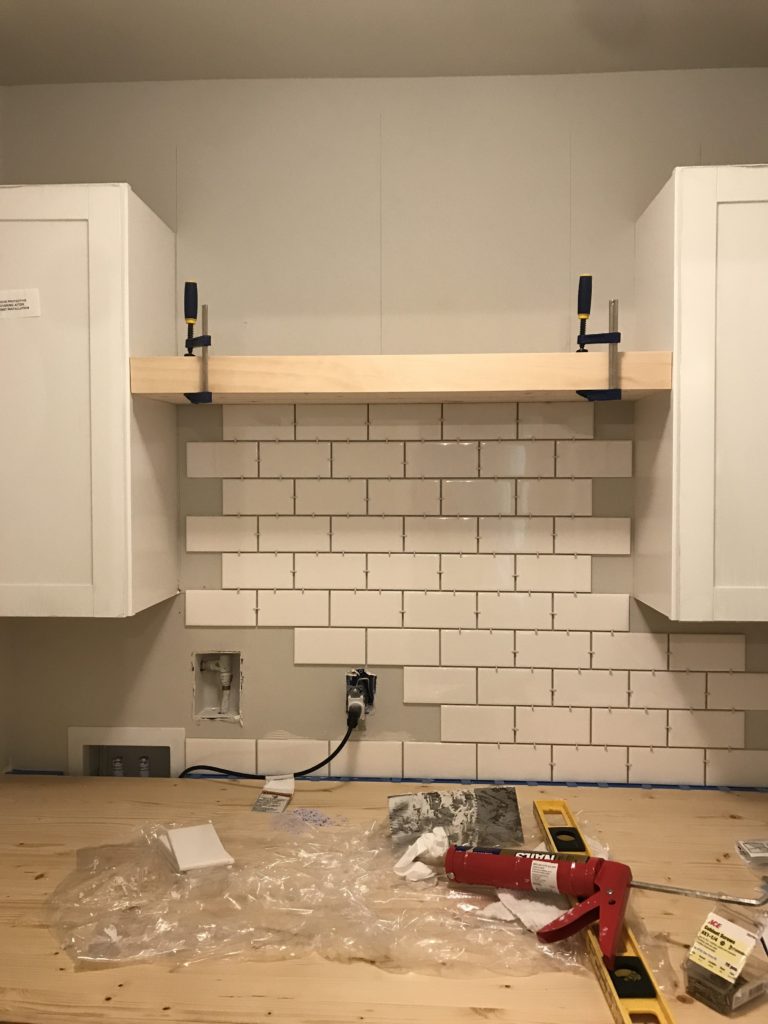
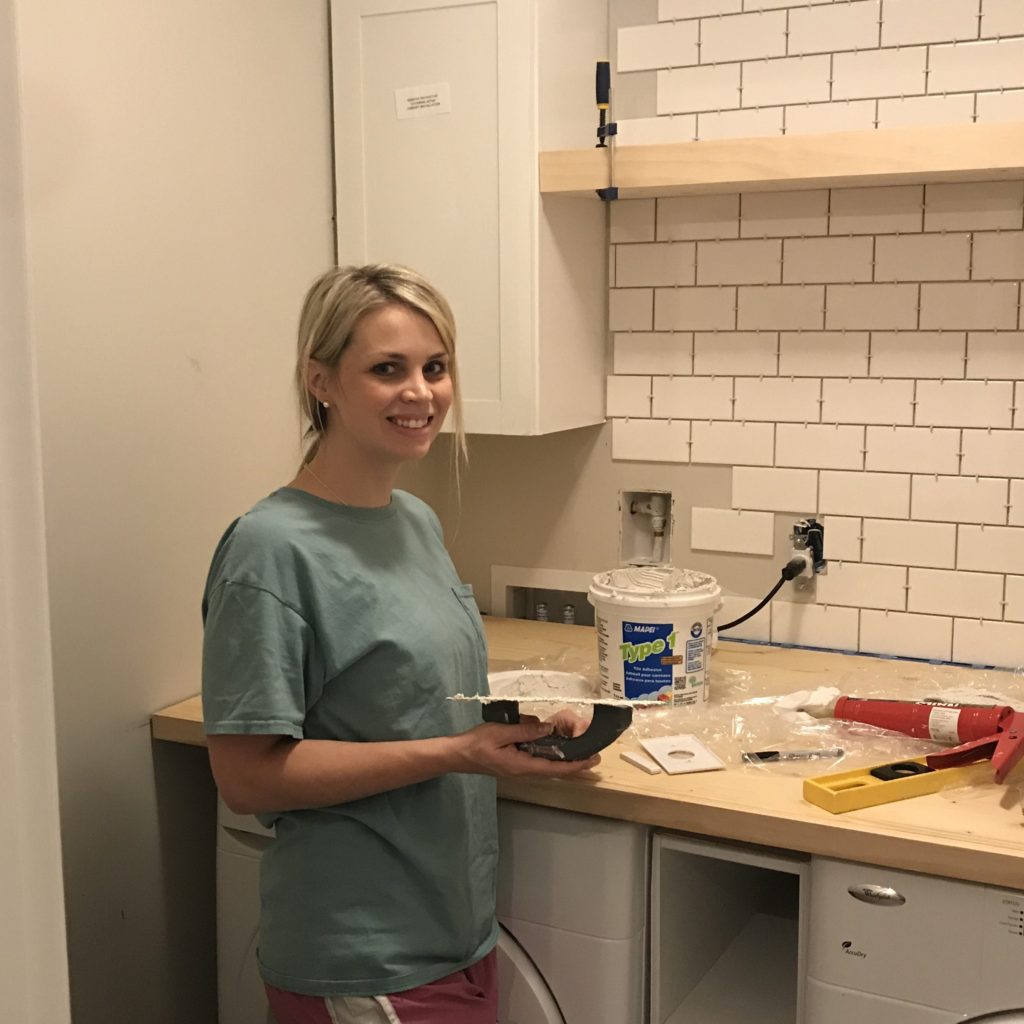
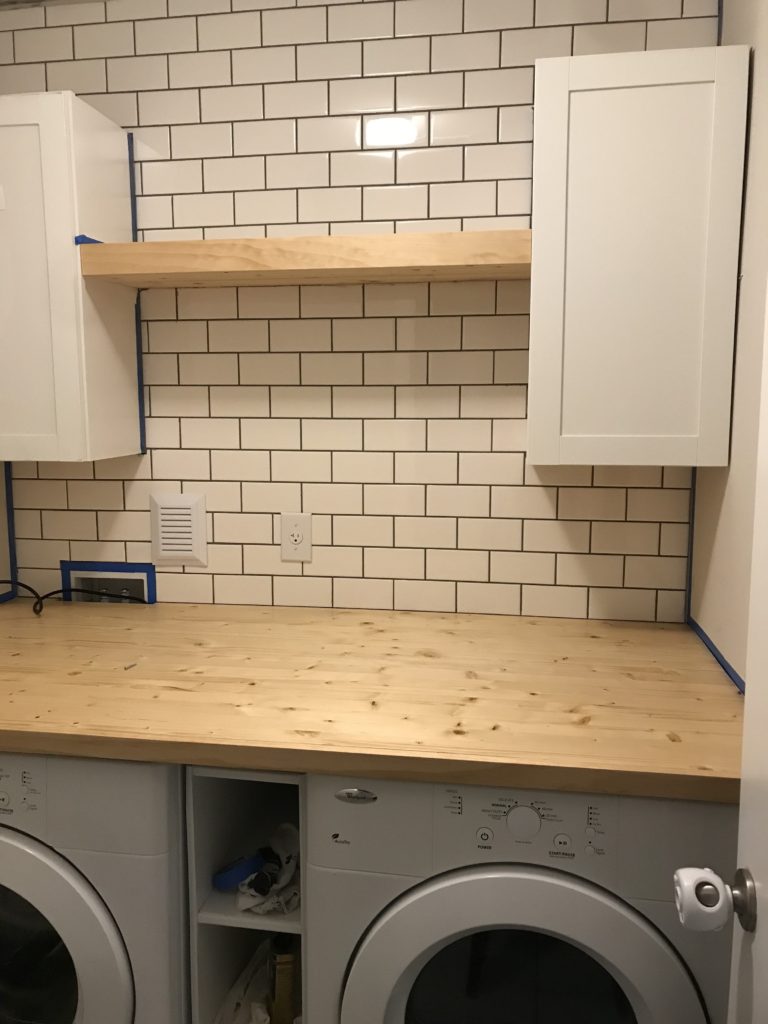
This week we added a DIY floating shelf between the two wall cabinets by following this tutorial by Shanty 2 Chic. Do you follow them on Instagram? They are a DIY sister duo and they are awesome! They can build anything and they share all of the free tutorials on their website. We also added subway tile with contrasting gray grout to the back wall.
DIY Floating Shelf
Our shelf isn’t technically “floating” since it sits between cabinets on each side. But as I was browsing tutorials on the best way to build a shelf, I kept coming back to this Easy DIY Floating Shelf Tutorial by Shanty 2 Chic. It is exactly what it says it is: easy. Their tutorial was straightforward and easy to follow, but we made a few modifications to fit our space.
What You Need
- 1- 1″ x 2″ x 8′ board for shelf frame
- 1/4-inch plywood cut to size
- 3/4″ inch board cut to size – we used this board which is the same wood we used for the top of our DIY Wood Countertop
- 1- 1″ x 3″ Pine Board cut to size (for front “trim” piece)
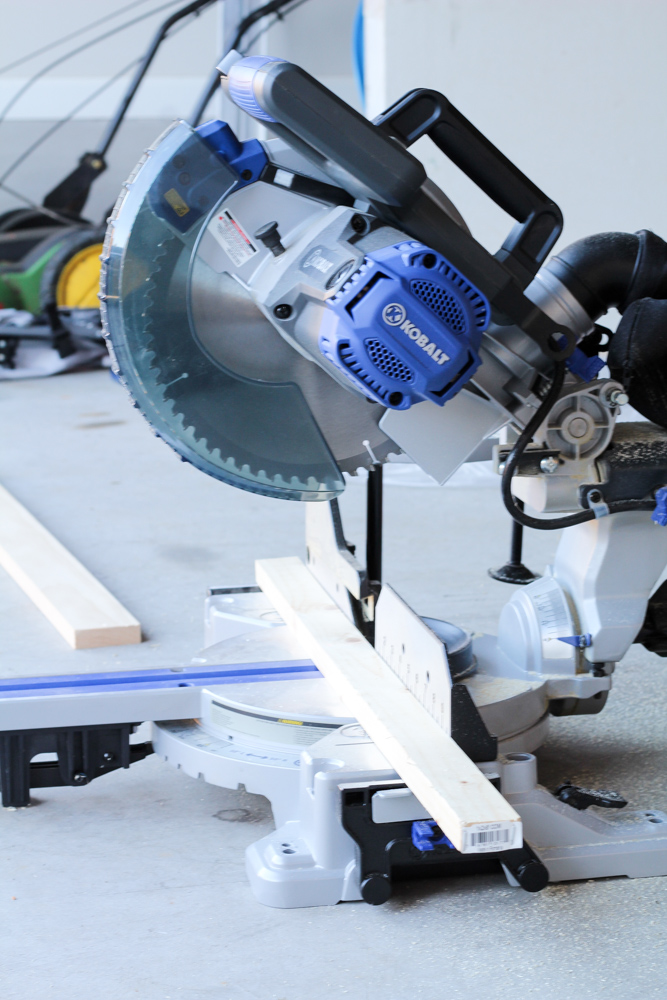
- Miter Saw
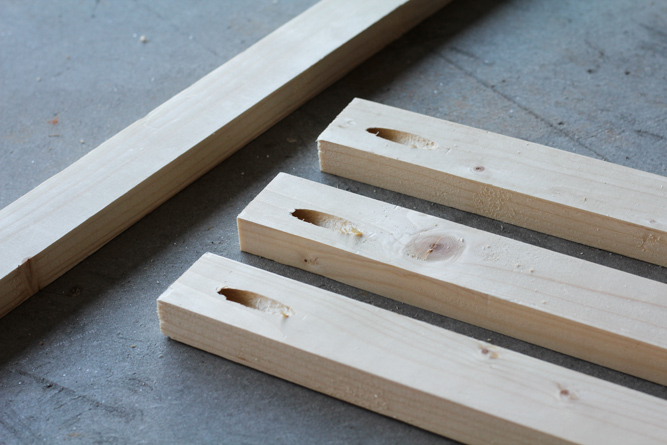
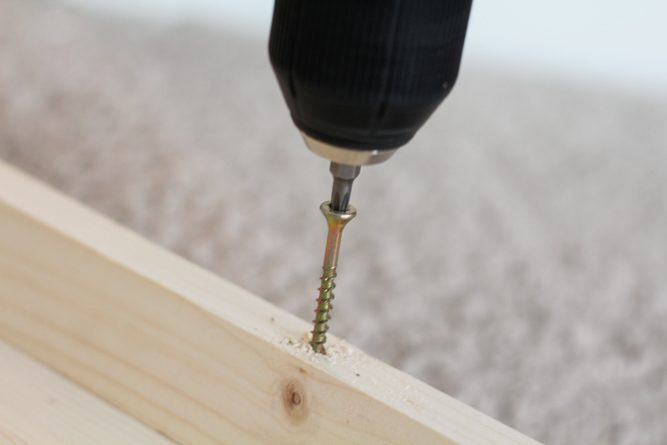
- Kreg Jig
- Kreg Pocket Hole Screws
- Wood Glue
- Wood Screws
- Liquid Nails
Build Shelf Frame
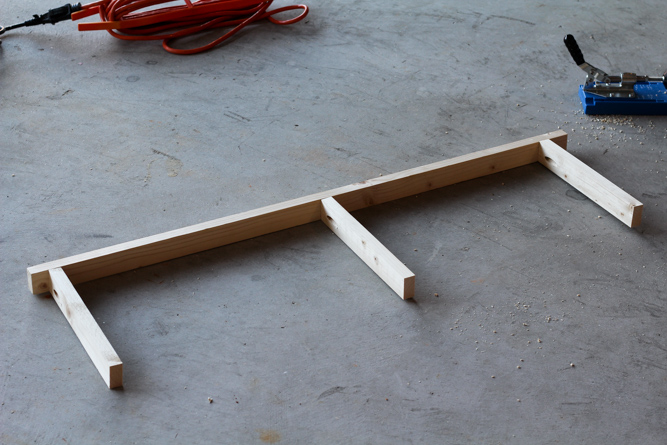
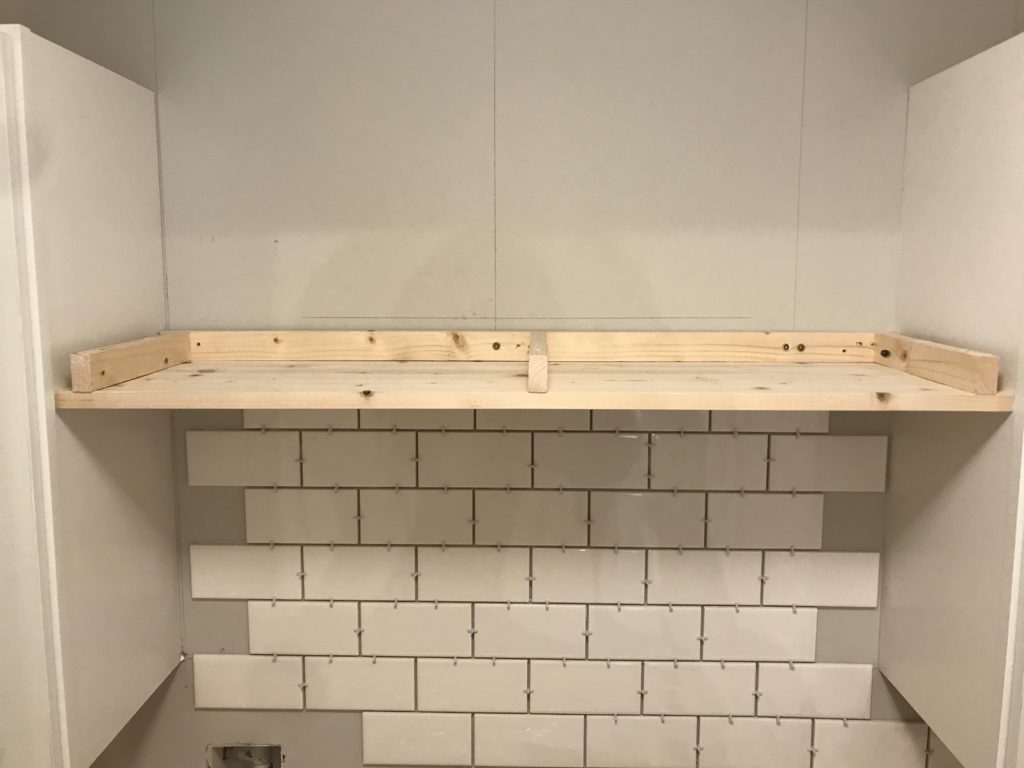
We followed Shanty 2 Chic’s tutorial for building the wood frame, but we customized the measurements to fit our space. The frame will be anchored into the wall and is what the shelf will be built around so to speak.
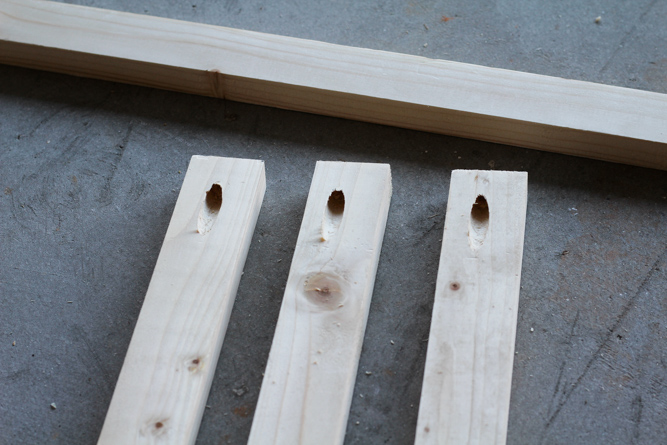
We used our miter saw to cut the 1″ x 2″ into four pieces: one long piece that will be anchored to the back wall and three shorter support brackets. (Shanty 2 Chic uses a 2×3″ for the frame but I didn’t want our shelf to be quite as thick).
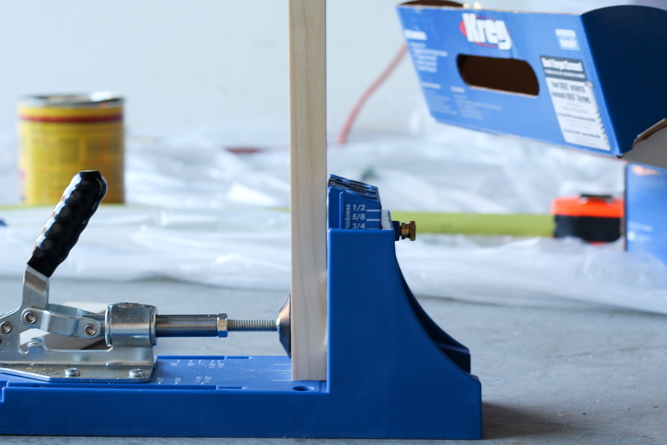
We used our Kreg Jig to drill pocket holes into the three support brackets. As I mentioned in my last post the Kreg is so easy and fun to use. I was glad to put it to good use again.
We used Kreg pocket hole screws to construct the frame by attaching the three support brackets to the back support.
Attach Shelf Base
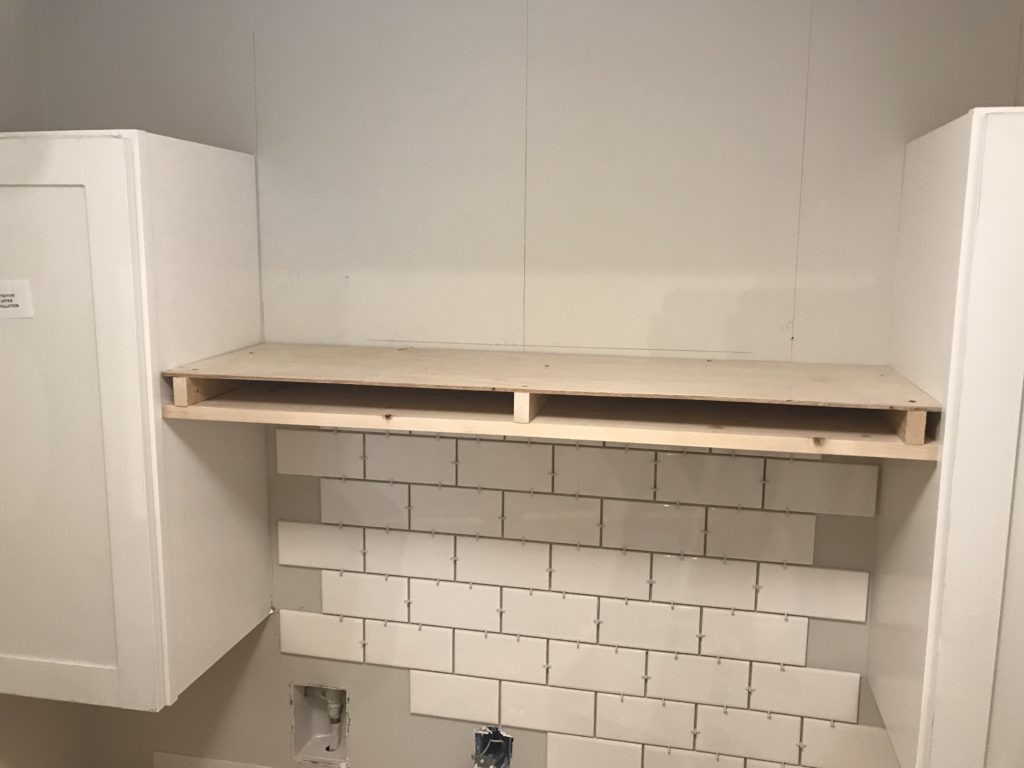
This is where we customized the Shanty 2 Chic tutorial to better fit our space. Shanty 2 Chic uses 1/4″ plywood for the base of the shelf and attaches it to the frame using brad nails.

Since our shelf is sitting up high above the countertop, you are only going to see the bottom of the shelf from eye level. So we switched things around and used the same 3/4″ board we used for the countertop for the bottom of the shelf. I like that the countertop and shelf will look like a matching pair.
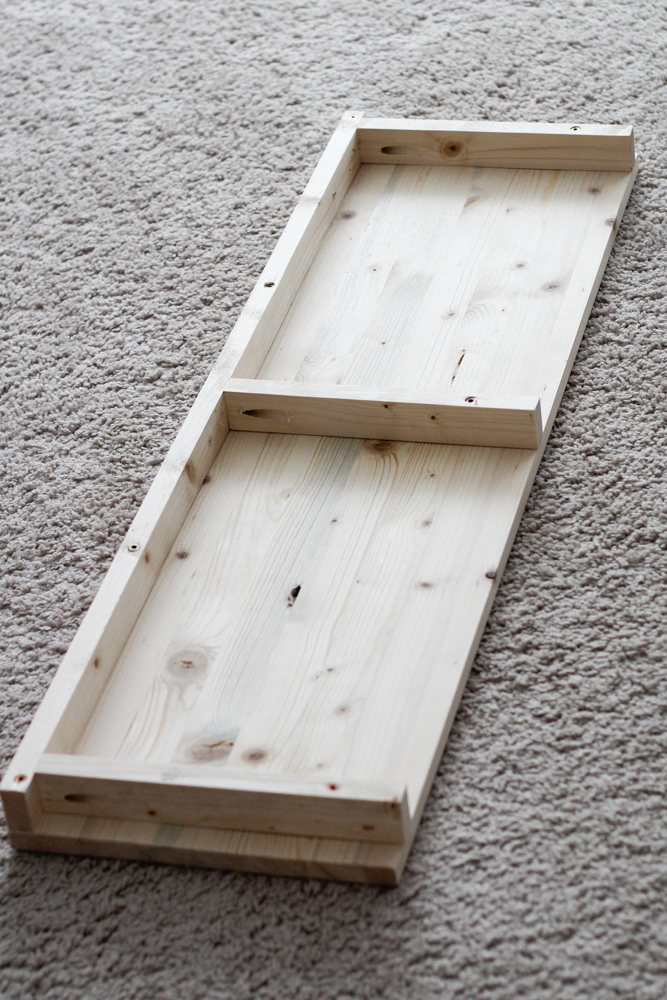
And instead of nailing it in directly from the bottom (where nail holes would be visible), I used wood screws to drill through from the top of the frame into the 3/4″ board.
Mount Frame to Wall
Once the 3/4″ board was attached to the bottom of the frame, we drilled pilot holes and then screwed the frame directly into the studs behind the drywall.
Attach Shelf Top
Next we attached our 1/4″ plywood onto the top of the frame. (Basically we did the opposite of the Shanty 2 Chic tutorial and switched around the top and the bottom). Since you cannot see the top of the shelf from eye level, we used wood screws and drilled through the top of the 1/4″ plywood directly into the shelf frame.
Finish Shelf Front with Trim Piece
The final step is to trim out the front of the shelf. I used a 1×3″ pine board (the same material we used to frame out the front of the countertop).
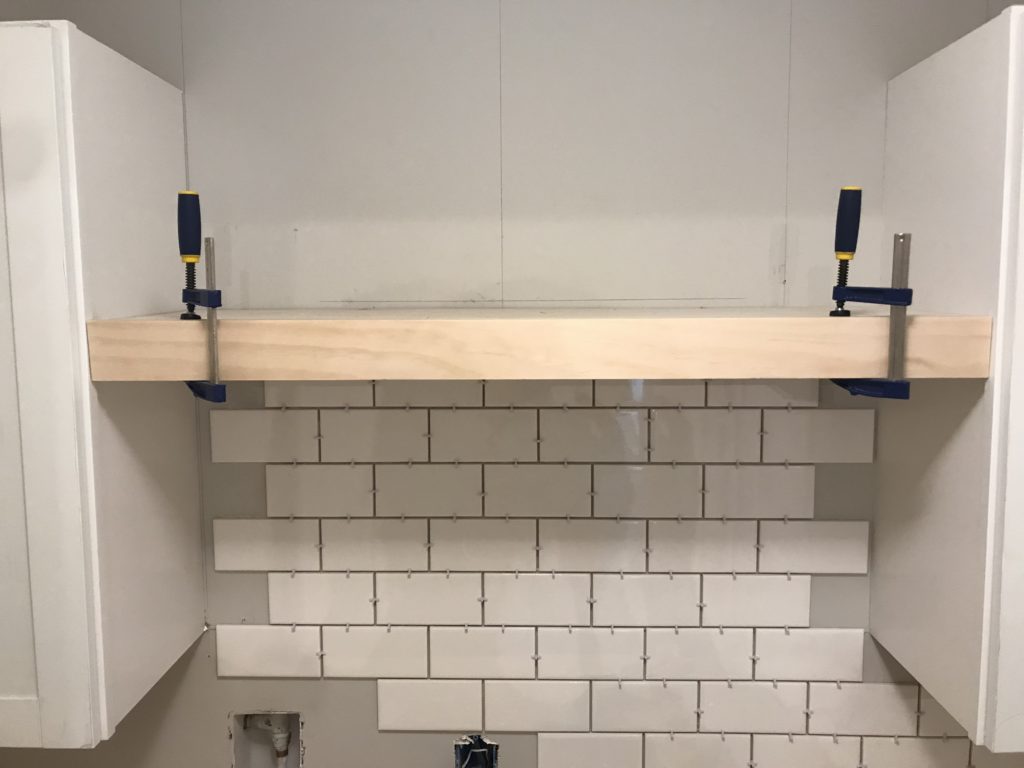
Since I was using a light colored stain I did not want any nail holes showing on the front of the shelf.
So instead of using brad nails, we used heavy duty liquid nails to attach the front. I applied a generous amount of liquid nails and then clamped it together and let it sit for about 24 hours.
Stain and Seal Shelf
I used the same natural color stain and the same rub-on polyurethane that I used on the countertop to stain and seal the shelf.
Since our shelf isn’t technically floating and sits against the edge of the cabinets, I drove a screw through the inside of the cabinet through to the 3/4″ plywood to add some additional strength and stability.
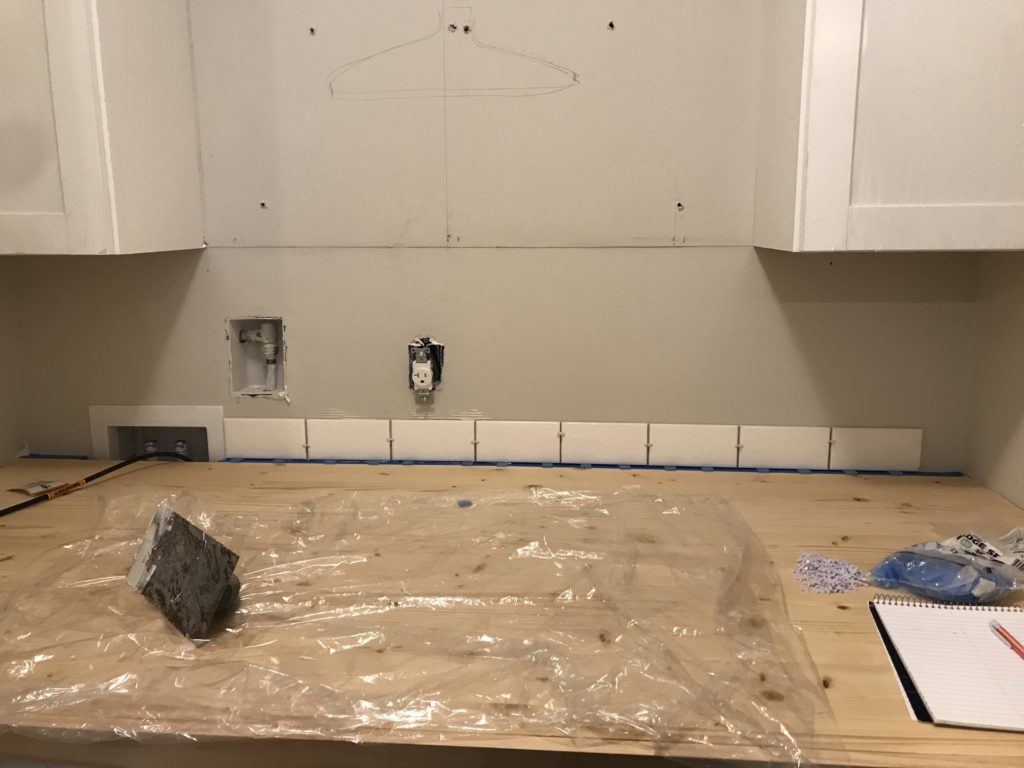
Install Subway Tile
As you can see from the photos of the shelf, we were knocking out two birds with one stone. We worked on the shelf and installed subway tile at the same time since we were in a time crunch to finish before we left to go to the beach.
I’ll spare you a full tutorial on installing subway tile (perhaps I will share one at a later date) since it is very straightforward and there are about a million tutorials out there.
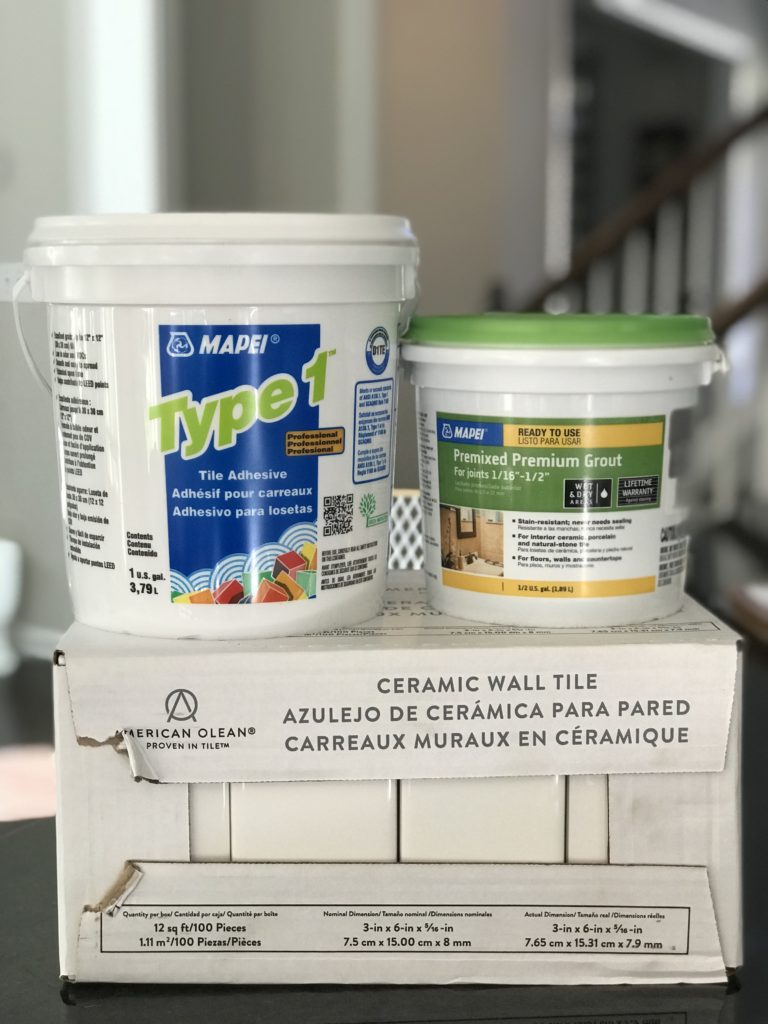
We used this 3×6 subway tile (only $0.15 cents each), this pre-mixed tile adhesive, and this pre-mixed grout in the color “Pearl Gray.”
We originally tried to use one of those score-and-snap tile cutters but we quickly learned that a tile saw is the better way to go.
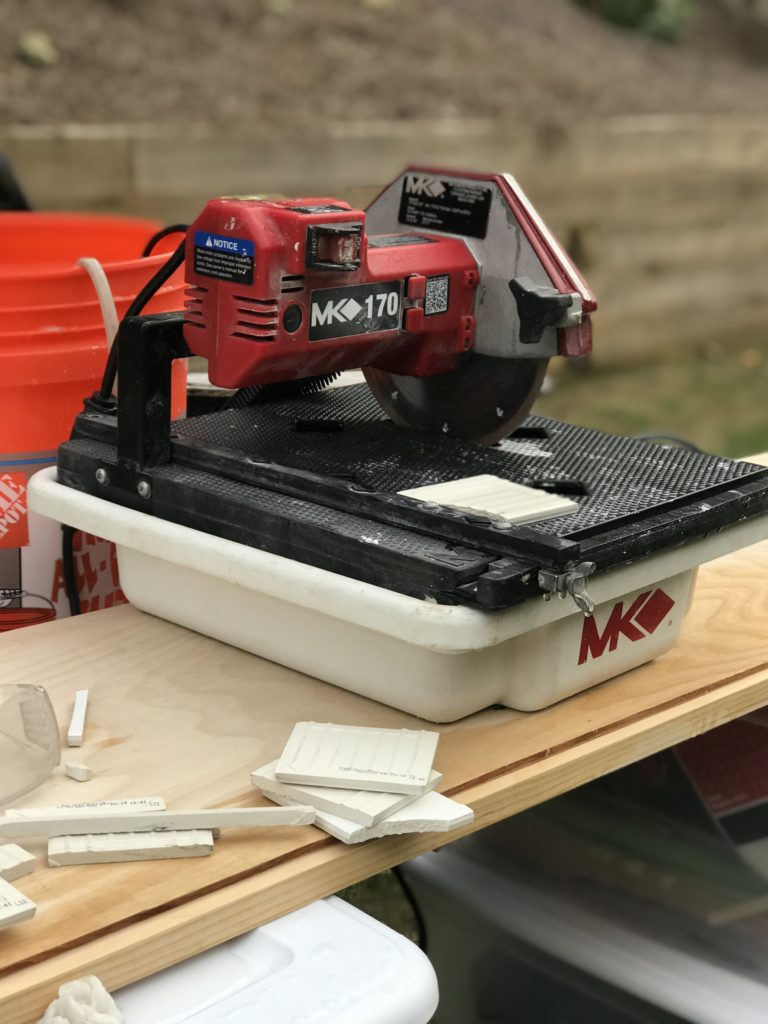
We rented a tile saw from Home Depot for the day and it made the job so much easier.
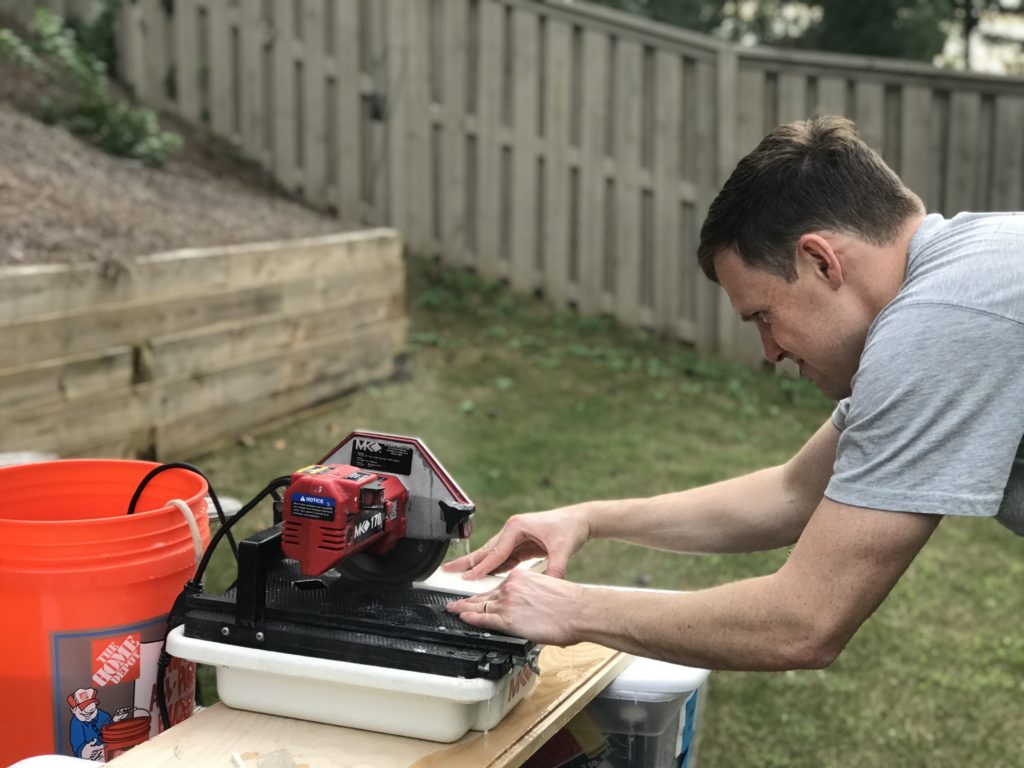
See Hubby working there? I told him to wear safety goggles but he didn’t listen to me.
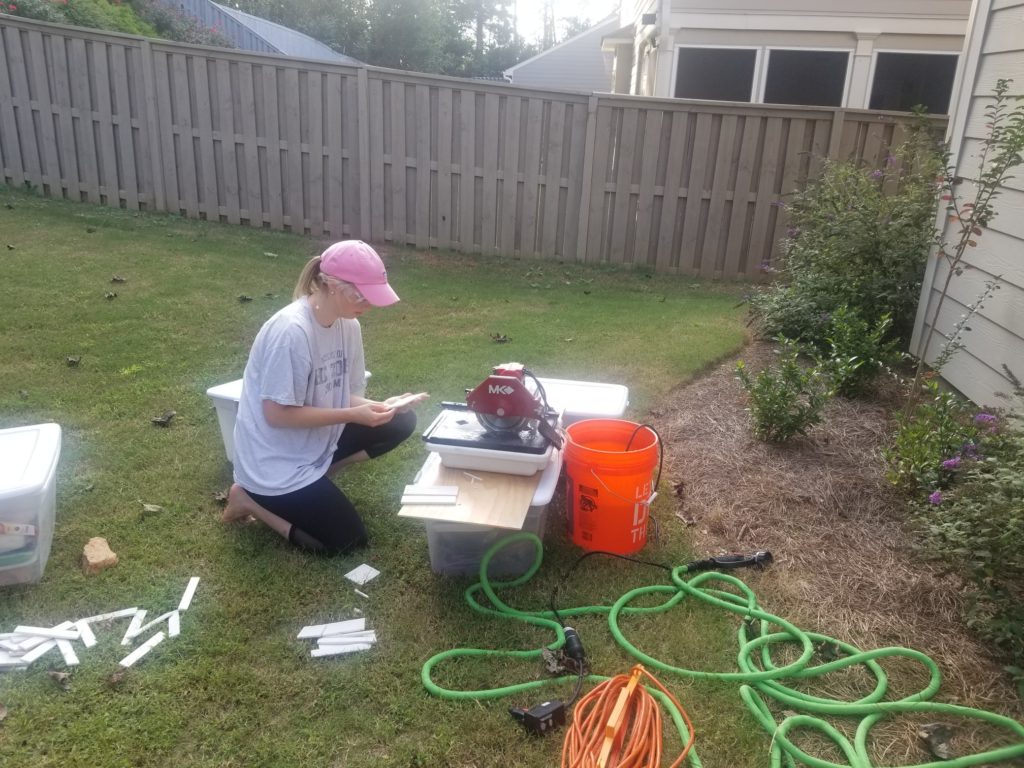
But in all fairness I didn’t listen to him either. He gave me strict instructions not to use the saw while he was at work but we all know that was not going to happen. I got it out during nap time and finished up before he got home : )
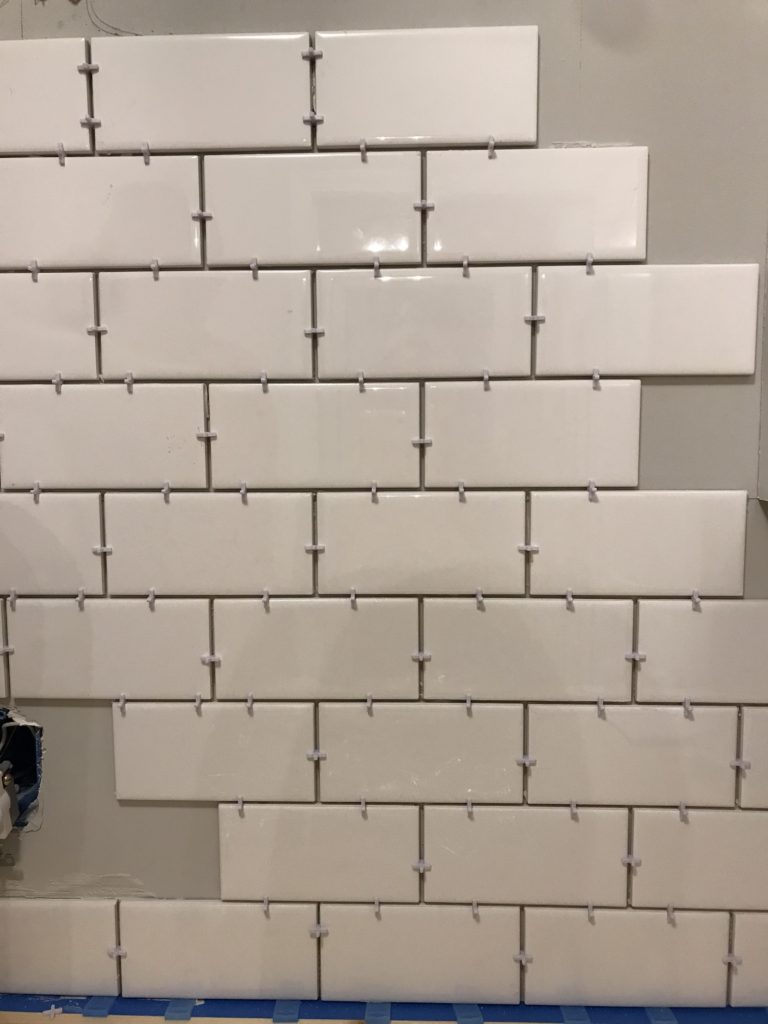
We decided on 1/8 inch tile spacers. They create a large enough grout line to highlight the contrast between the white tile and the dark gray grout.
Once we rented the tile saw the subway tile went up pretty quickly. We had a good system going where Hubby made the cuts and I put the tile up on the wall.
Grouting was definitely the worst part of the whole process. Not hard, just annoying. I didn’t think I would ever completely get the film from the dark gray grout off of the white subway tile.
But of course I eventually did (also got a good arm workout in the process) and I absolutely love the way it turned out!
As you can see from the blue painter’s tape we still have a few more finishing touches (like finishing up the seams with this sanded caulk) before the tile is 100% complete.
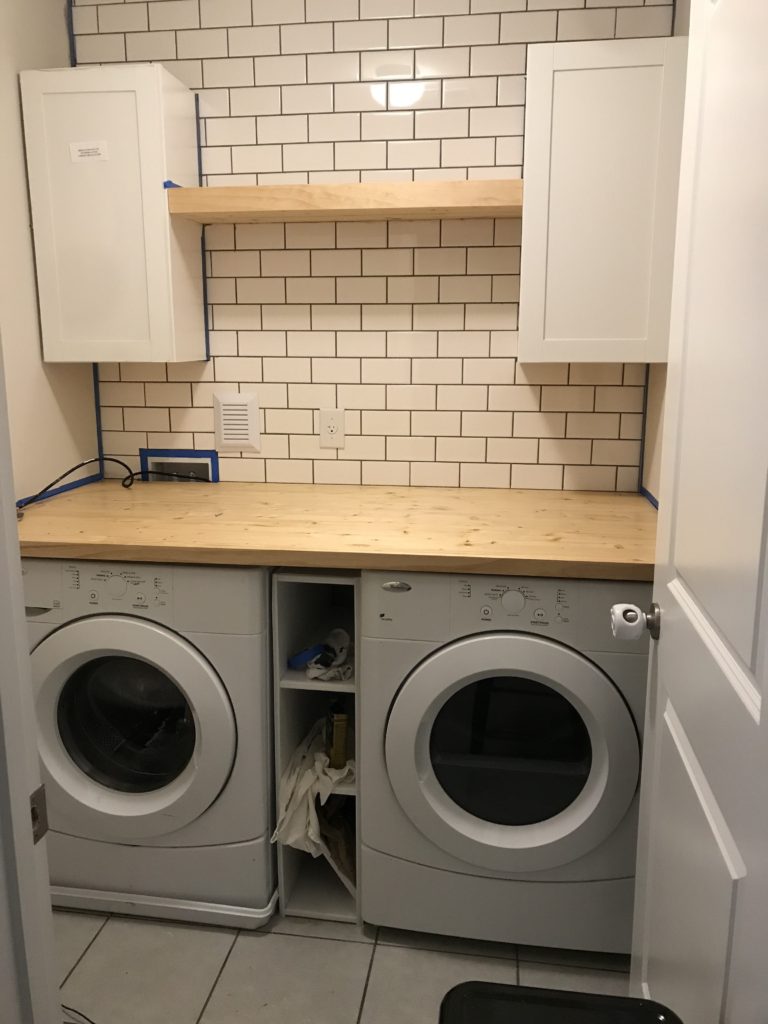
Progress Picture
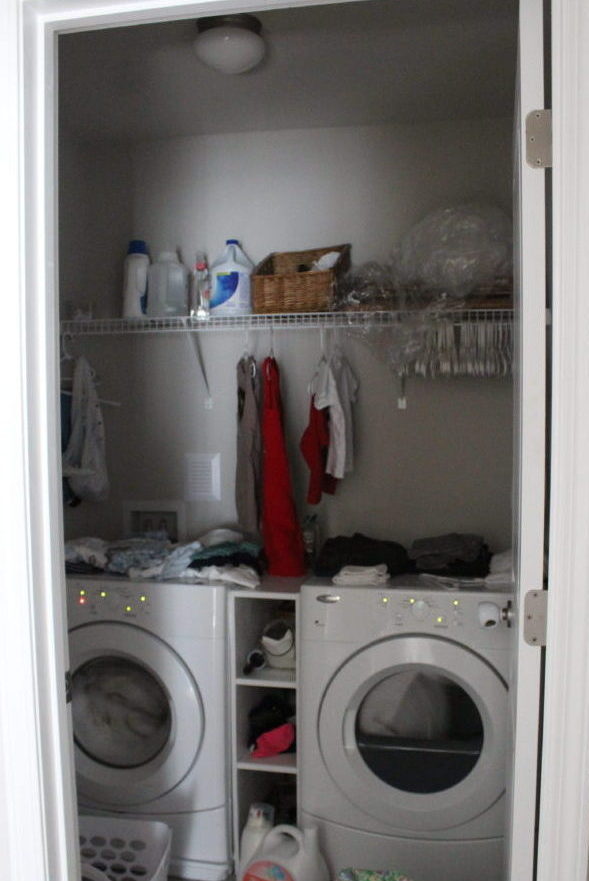

We’re at the point in this process where looking back at the before photo makes me excited to get this room finished up. I love the way this room is shaping up and it’s incredible to see how far it’s come in such a short time.
Punch List
Seething that we only have two weeks until the final reveal it’s a little daunting too see how much we still have on our to-do list. But the “big” items are now done and I’m looking forward to a few smaller, fun projects and adding in the finishing design choices.
Clear out room to start from scratchRemove wire shelvingPurchase wall cabinetsHang wall cabinets to provide useable storageFinalize countertop choiceInstall countertop to provide useable folding and sorting spaceInstall subway tile on the back wallDIY floating shelf between the two wall cabinets for extra storage- Install rod between wall cabinets for hanging clothes
- Purchase and install cabinet hardware
- Purchase and install new light fixture
- Incorporate hanging laundry totes to utilize wall space and clear the floor of clutter
- Purchase rug
- Accessorize!
Next Week
Next week we will hit the ground running when we get home from the beach. We will add the hanging rod between the wall cabinets and I have a fun little DIY planned for some space-saving hanging laundry bags. I’ve been finalizing some of the finishing design elements and I’m so excited to see them come together.
In the meantime be sure to follow along on the official ORC blog page and on Instagram. See you next week!
![]()